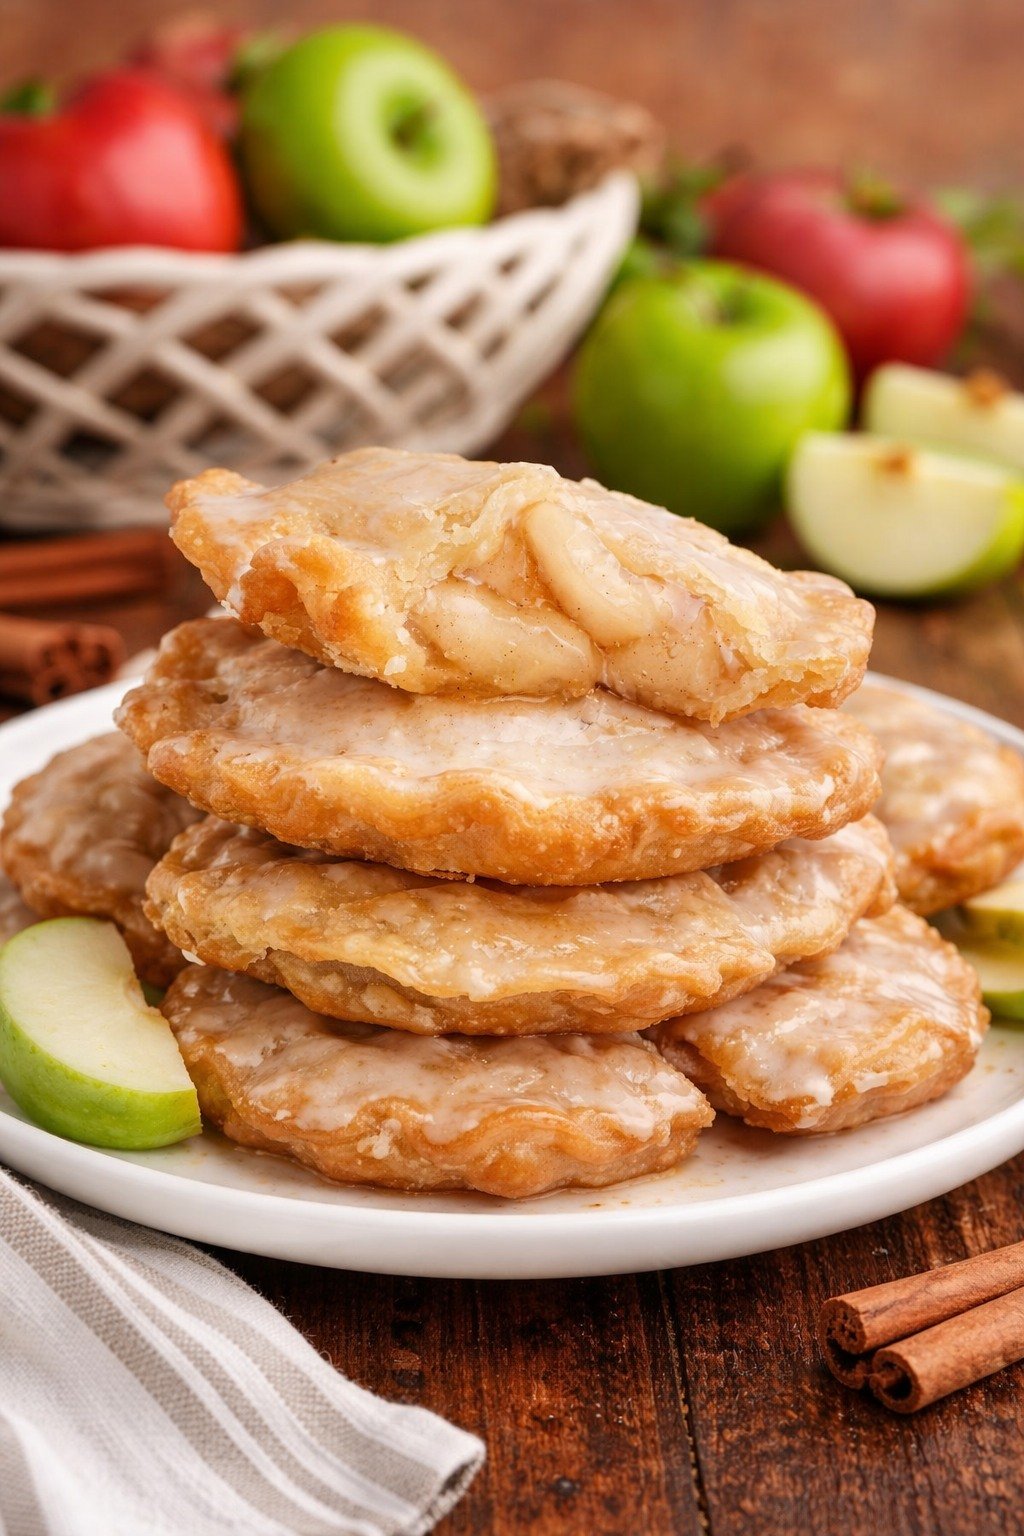
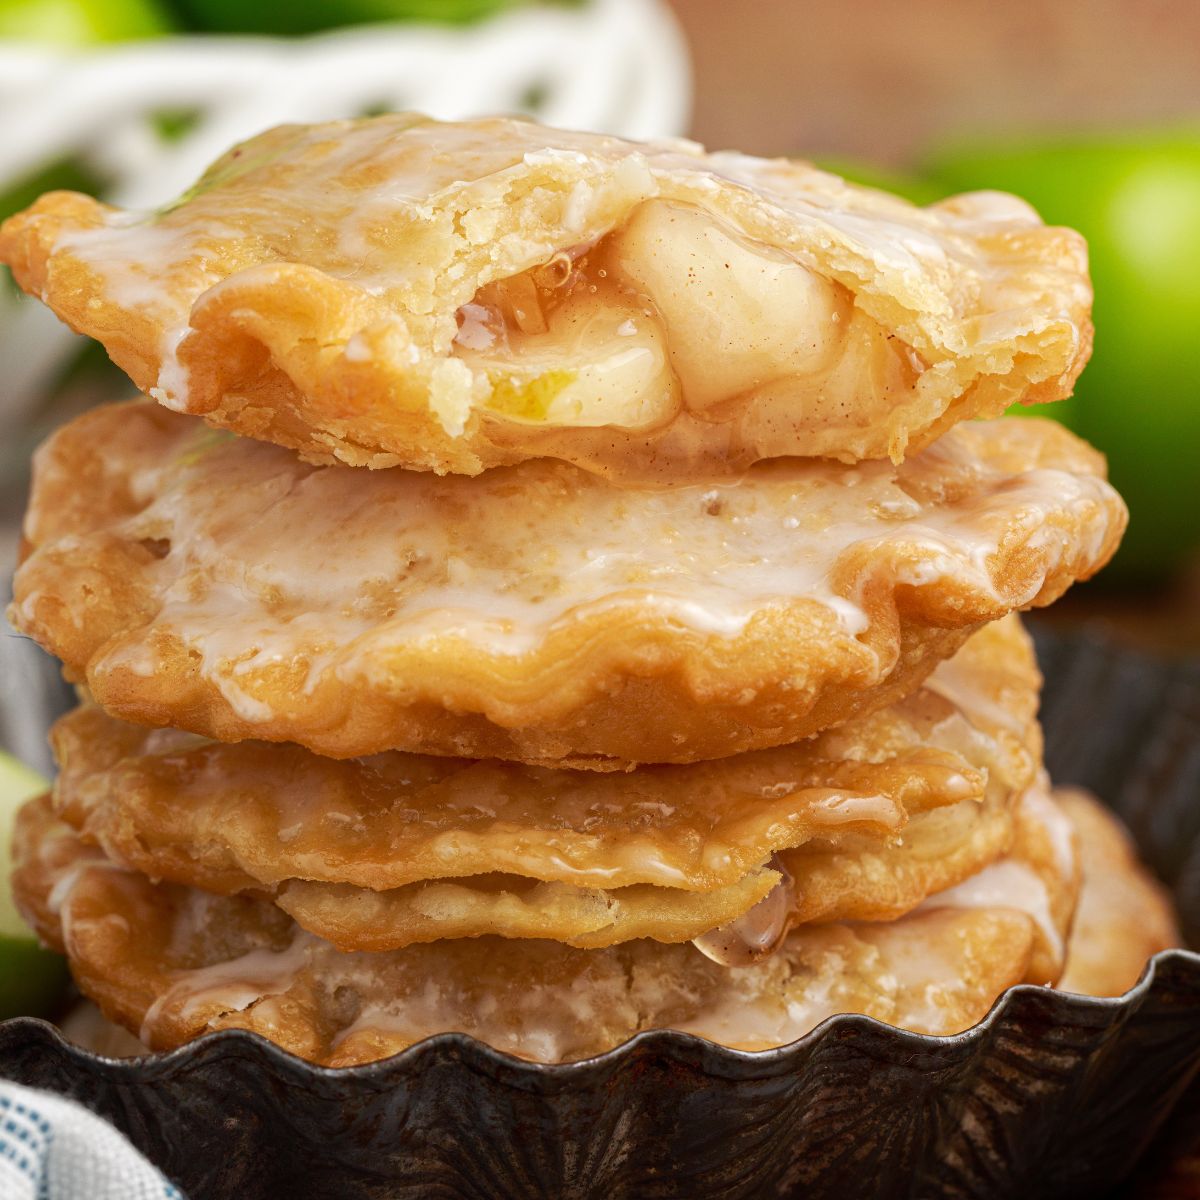
There’s just something magical about biting into a warm, golden hand pie filled with gooey spiced apples and covered in a sweet sugar glaze. These Deep Fried Apple Hand Pies are a nostalgic treat that tastes like they came straight from a county fair! crispy on the outside, tender and fruity inside, and easy enough to whip up anytime that apple pie craving hits.
My whole family goes wild for these. James can never eat just one, Ariya gets excited the moment she smells them frying, and even my one-year-old Cameron tries to grab a bite when he sees the glaze going on! Whether you’re making them for a special dessert, a fall celebration, or just because—these are the kind of old-fashioned treats that never go out of style.
What Are Deep Fried Apple Hand Pies?
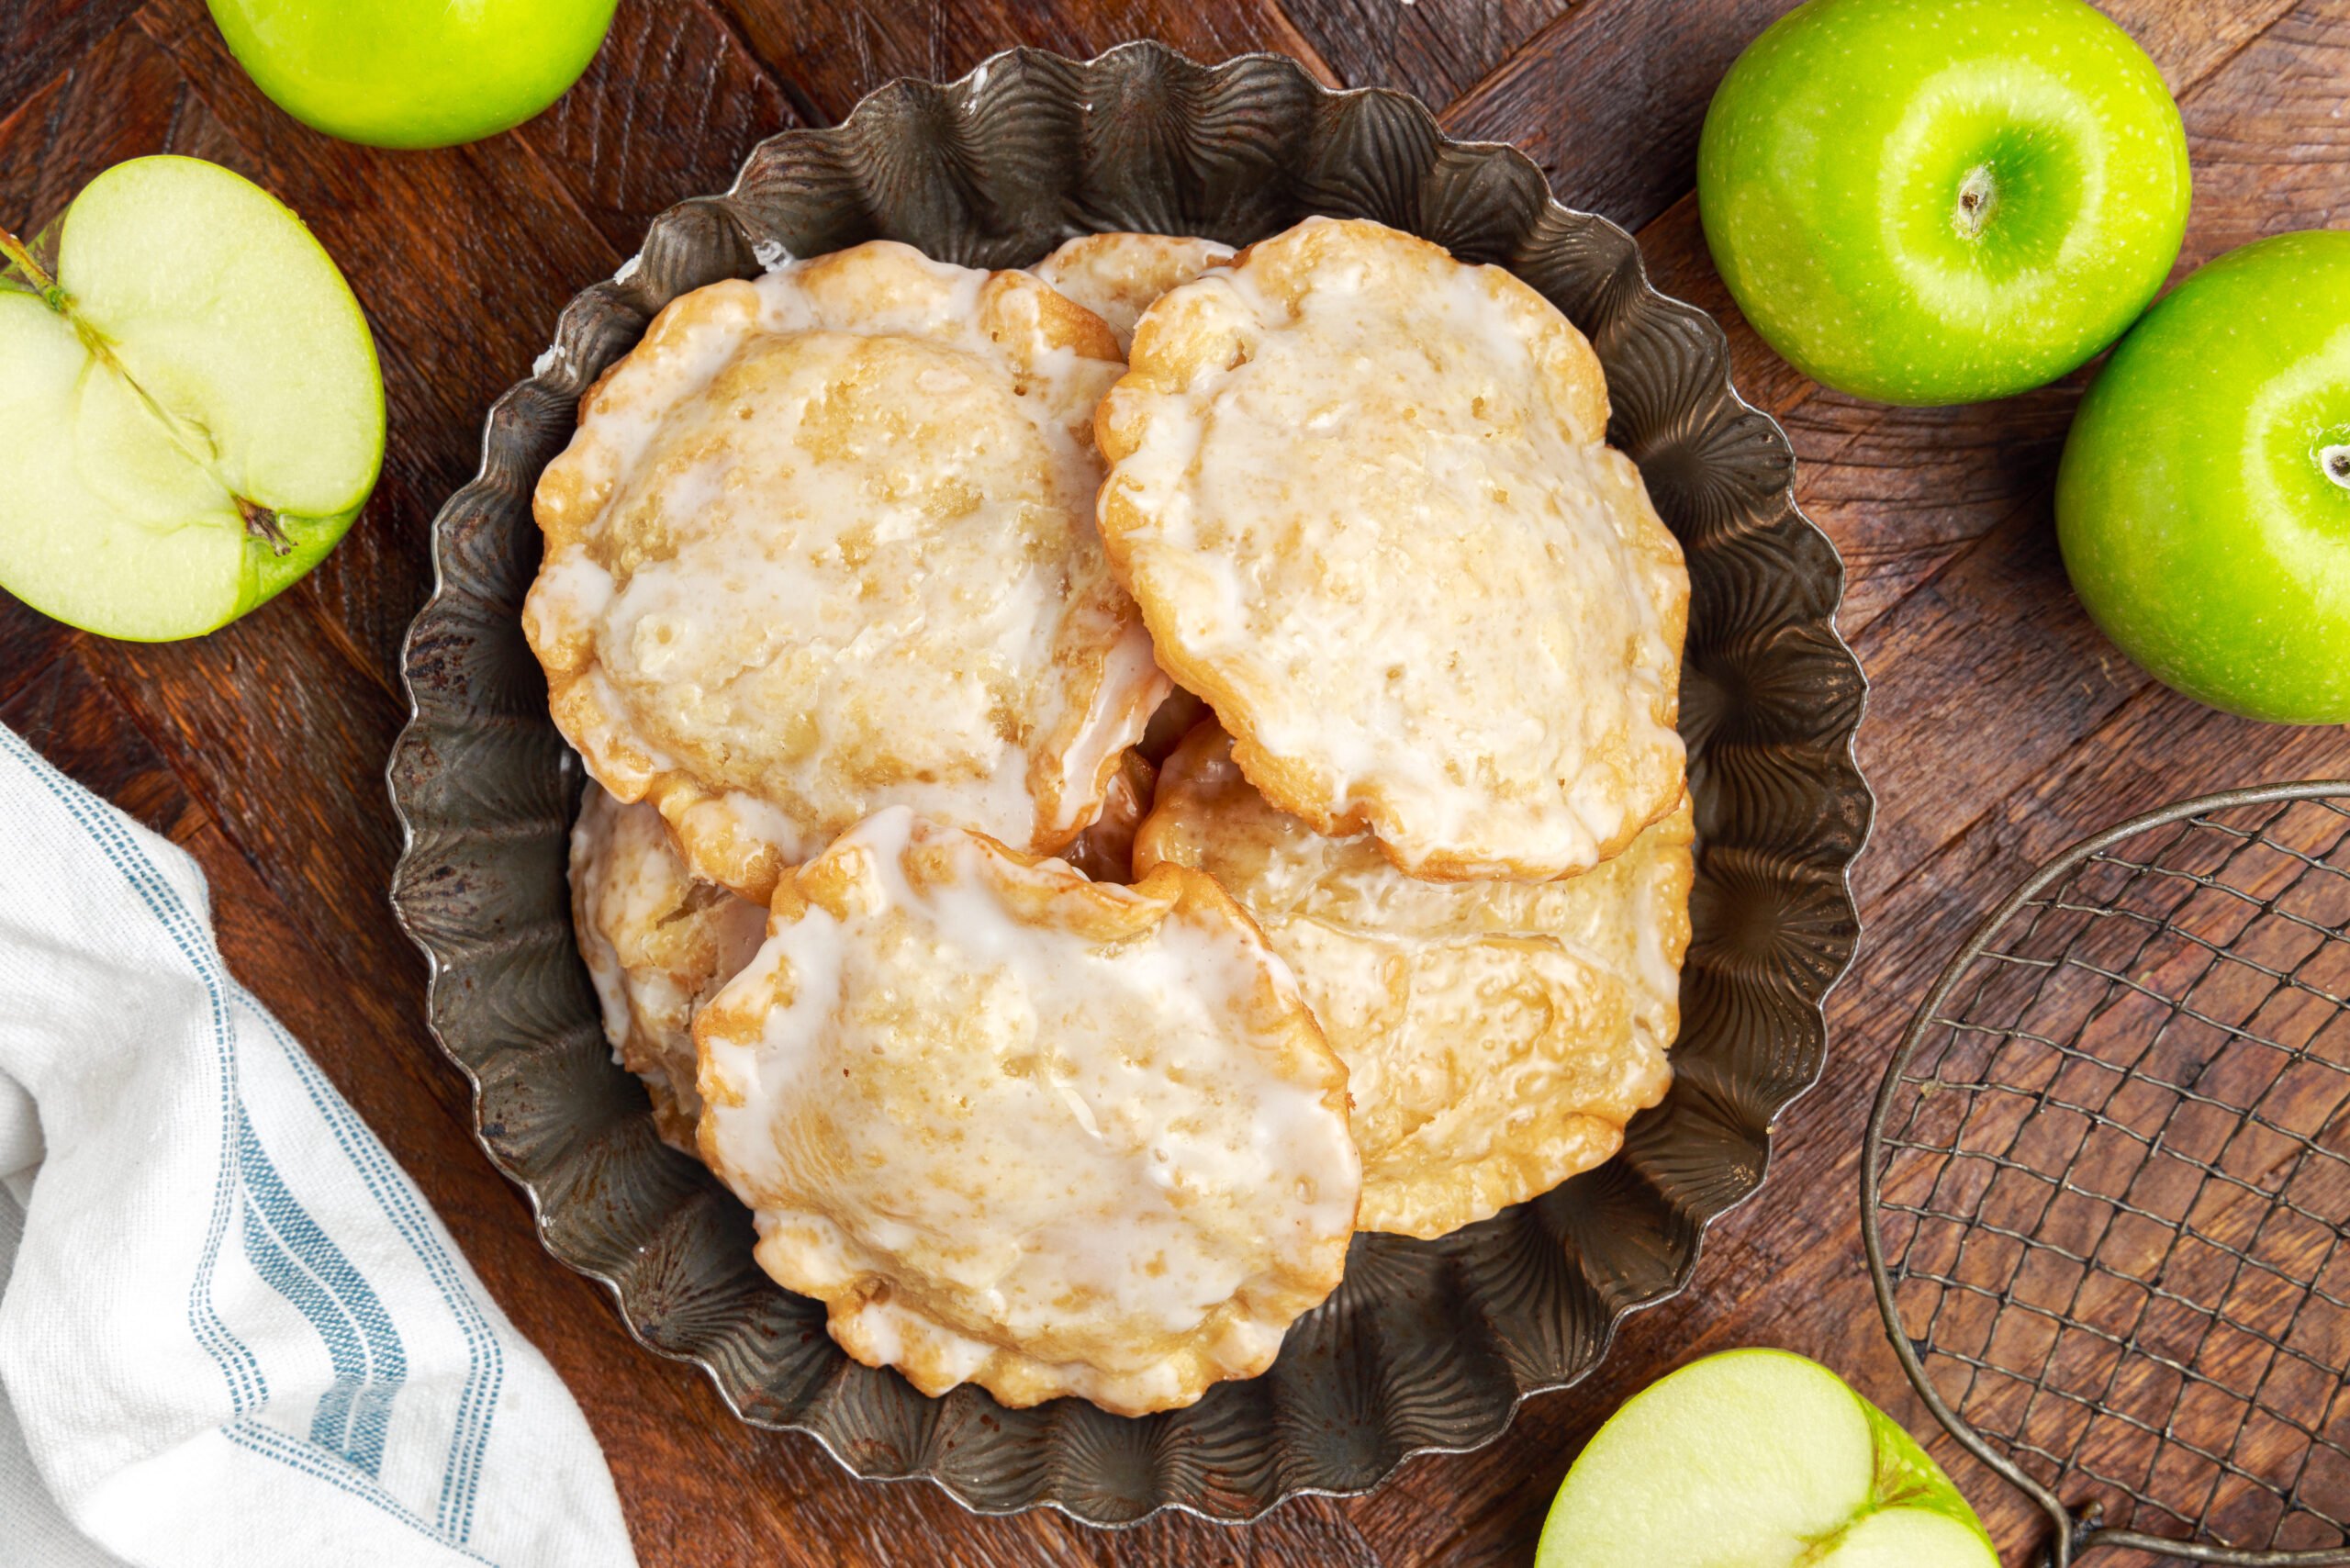
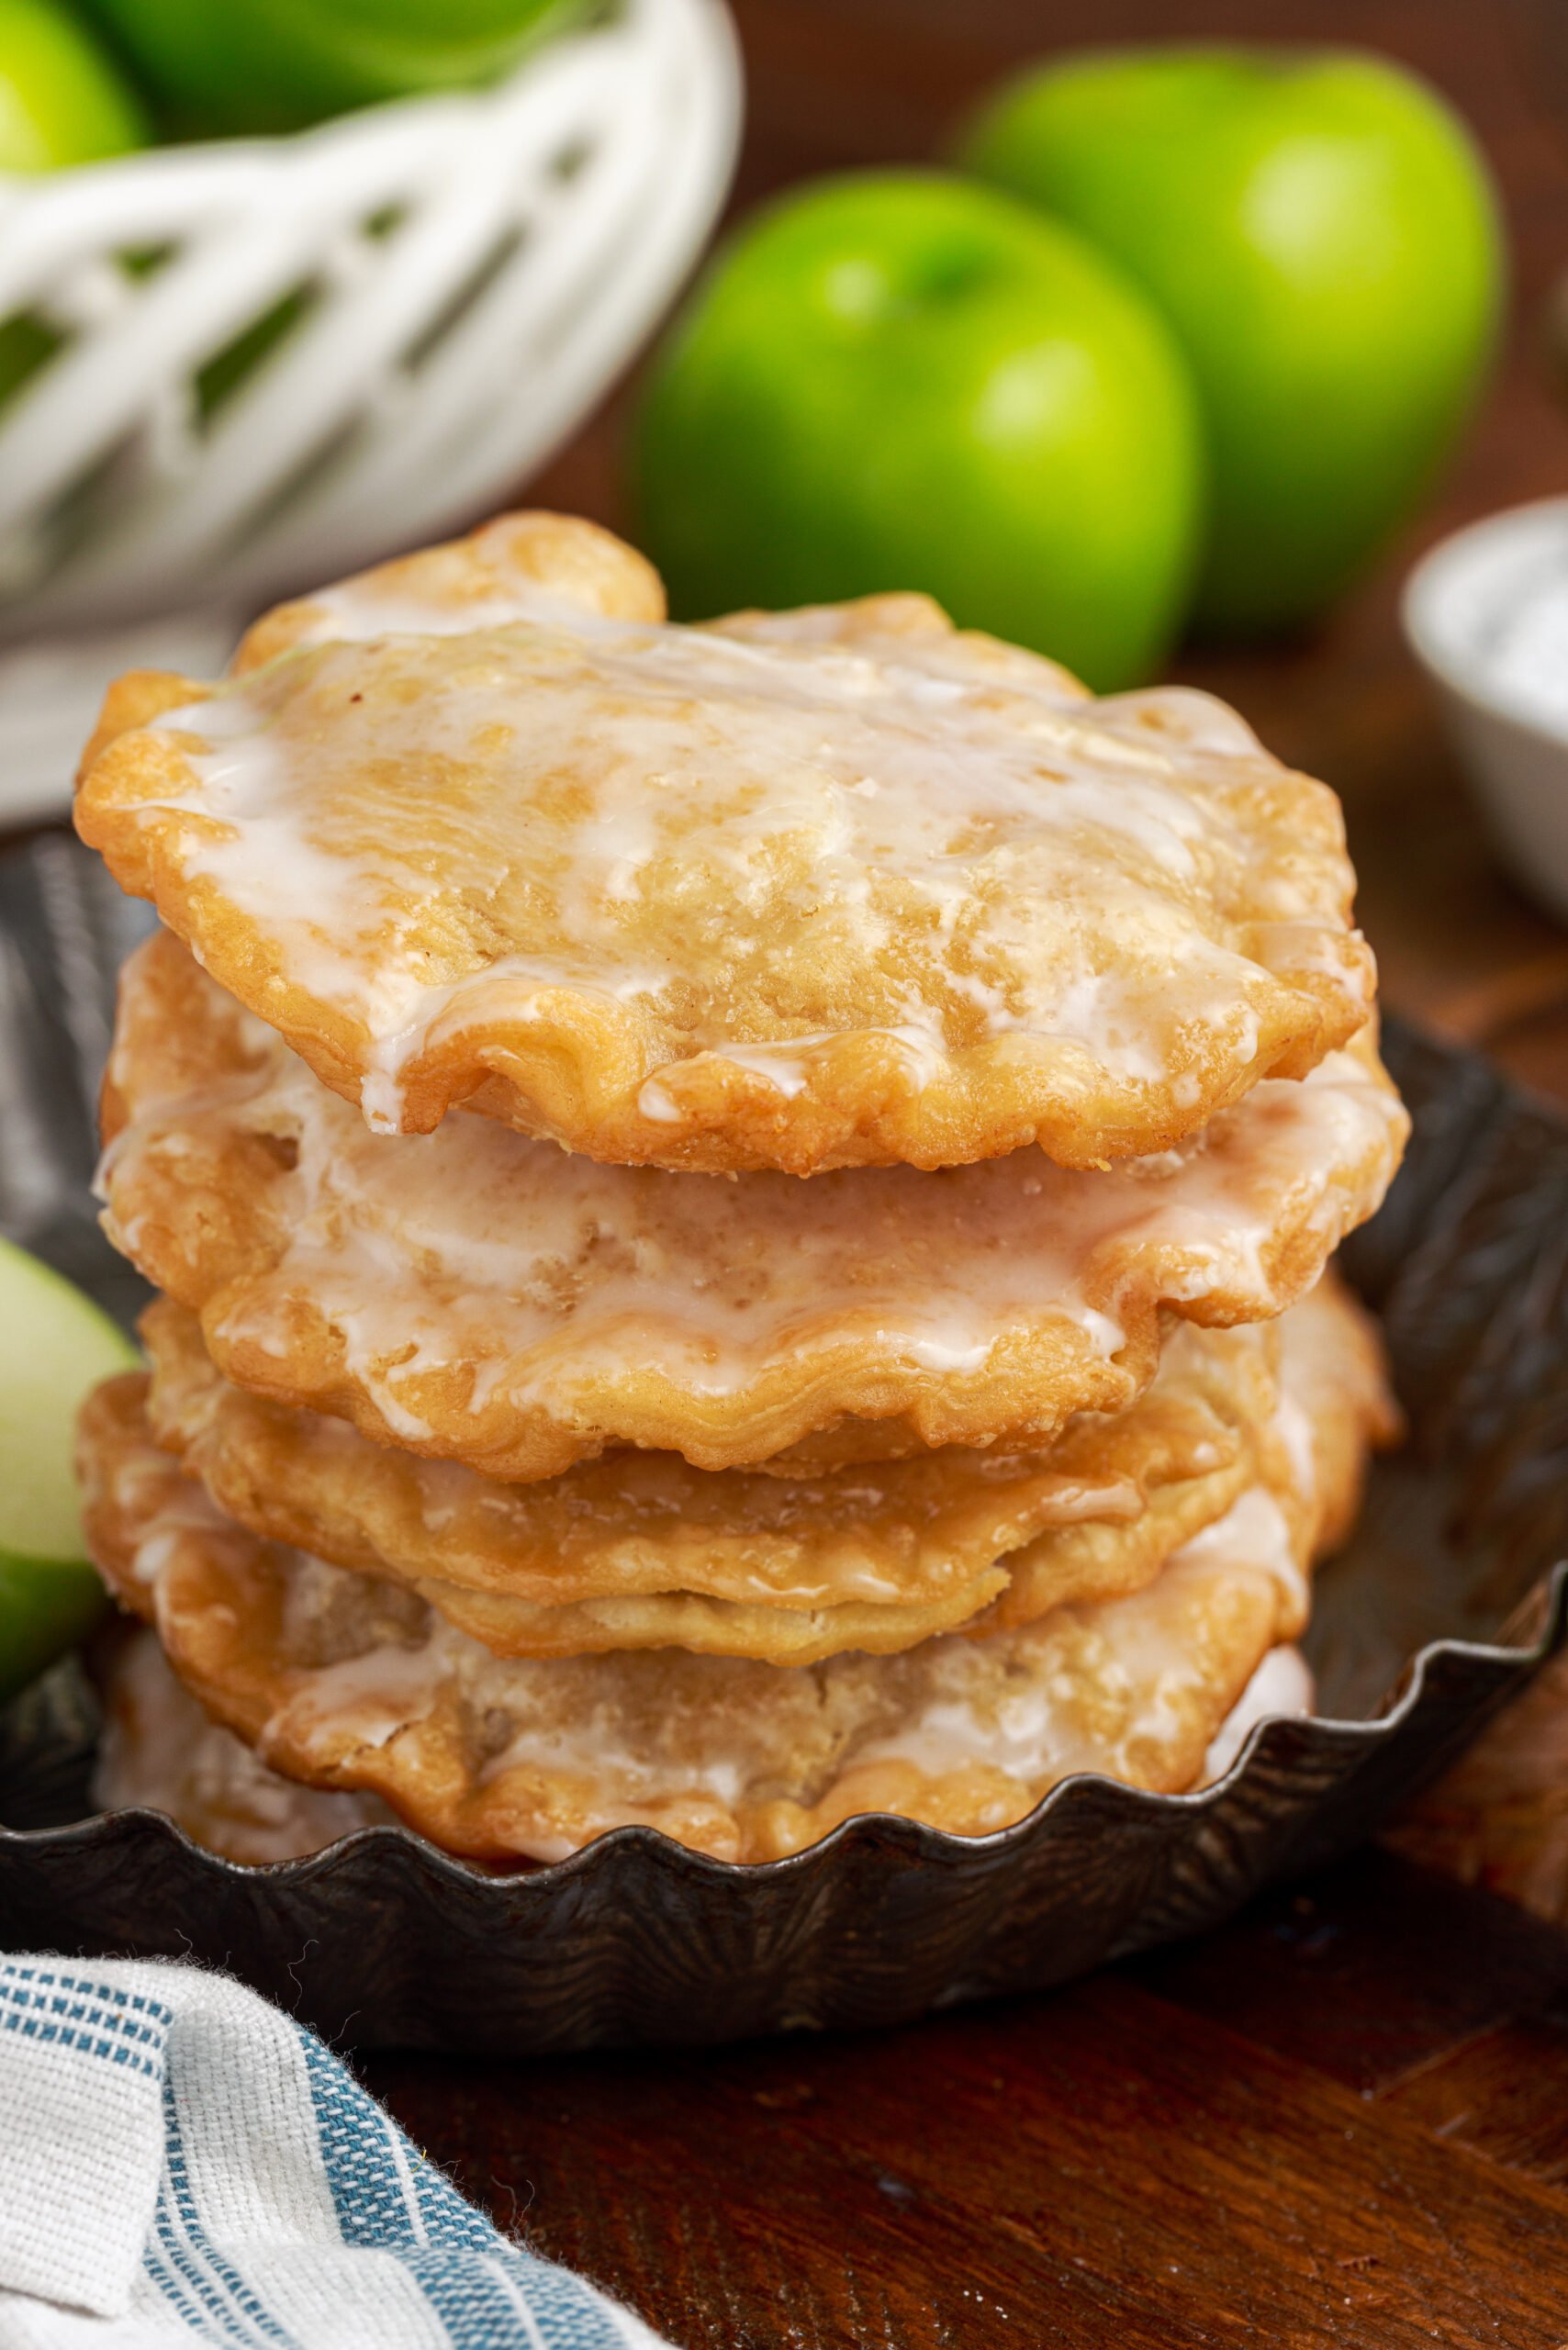
These are individually-sized apple pies made with a shortcut refrigerated pie crust and apple pie filling, sealed into a pocket, and deep fried until golden and crisp. They’re finished off with a sugar glaze brushed over while still warm, giving them that classic fair-style hand pie shine and flavor. These are not baked or air fried—this is the real deal: crisp, sweet, and satisfying.

When to Serve These
These fried apple hand pies are perfect for:
- Fall gatherings or apple-picking season
- Holiday dessert trays
- Birthday parties or potlucks
- After-school treats
- Anytime you need a quick, impressive dessert with just a few ingredients!

Why You’ll Love These
- Minimal ingredients: You only need a few grocery store staples.
- Quick and easy: No dough from scratch required!
- Old-fashioned flavor: Crispy, sweet, and warm—like something your grandma would make.
- Portable: Perfect for school events or on-the-go snacking.
- Customizable: Use any canned pie filling or homemade fruit compote you love.

Ingredient Breakdown
Pie Ingredients:
- Refrigerated Pie Crust – A shortcut that’s buttery, flaky, and reliable. Pillsbury works great.
- Apple Pie Filling – Use store-bought or homemade. Cut up larger apple chunks if needed.
Glaze Ingredients:
- Powdered Sugar – Gives that signature sweet topping.
- Corn Syrup – Adds shine and helps the glaze set.
- Water – Just a touch for the perfect consistency.
Oil for Frying:
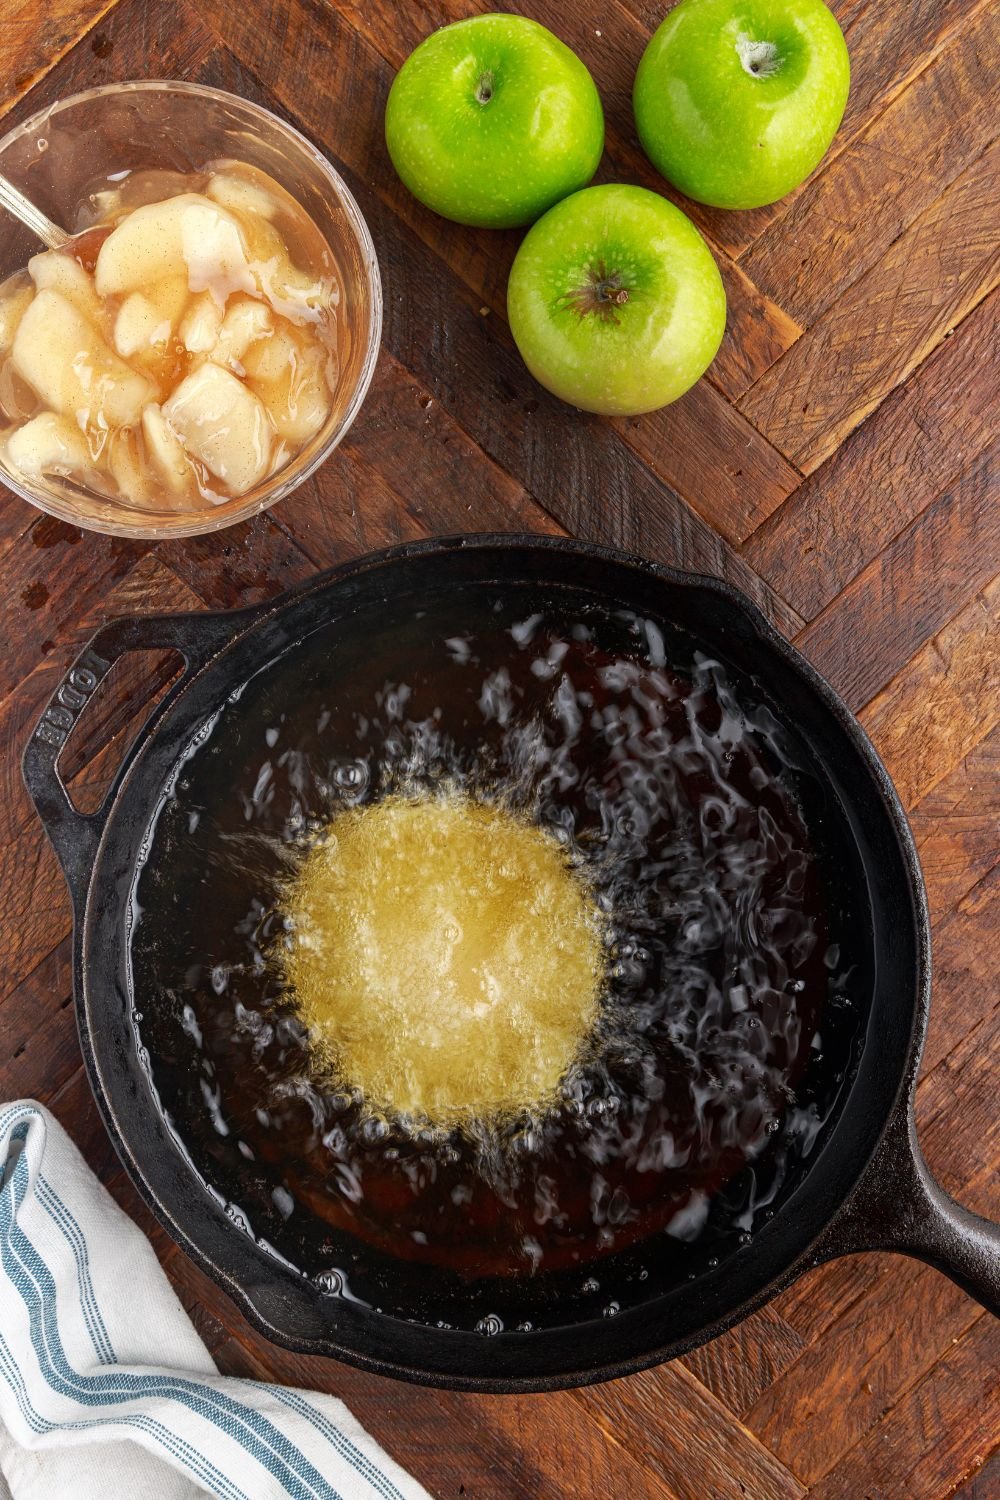
- Use vegetable oil or canola oil, and always monitor your temperature (375°F is the sweet spot).

Why These Deep Fried Apple Hand Pies Are So Good
These Deep Fried Apple Hand Pies are everything people love about classic apple pie, but in a handheld, crispy, bakery style treat. The flaky fried crust turns golden and crisp on the outside while the apple pie filling inside stays warm, soft, and perfectly spiced. Each bite gives you that sweet apple flavor paired with a light crunch that you just cannot get from baked versions.
Unlike traditional apple pie, these apple hand pies are easy to serve, easy to eat, and perfect for parties, holidays, or dessert nights at home. Deep frying creates a texture that is hard to beat, giving these pies that nostalgic fair style feel that people search for all year long. If you love fried desserts, county fair treats, or old fashioned apple pies, this recipe hits every mark.
These deep fried apple hand pies are made with simple ingredients and come together faster than a full pie, making them ideal when you want a homemade dessert without the extra work. Whether you drizzle them with glaze, dust them with powdered sugar, or enjoy them plain, they deliver big flavor in every bite.
Perfect for fall baking, holiday desserts, or anytime you want a warm apple treat, this deep fried apple hand pie recipe is one you will want to make again and again. It is a true comfort dessert that feels both classic and indulgent at the same time.


Variations & Swaps
- Filling options: Try cherry, blueberry, or peach filling instead of apple.
- Make them mini: Use a 2.5″ cutter for bite-sized pies.
- Add cinnamon to the glaze for extra warmth.
- Homemade crust: Swap in your own pie crust if desired—just make sure it’s sturdy enough for frying.
- Drizzle instead of glaze: For a lighter finish, skip brushing and drizzle the glaze on top.

Troubleshooting Tips
Why are my pies greasy?
- Your oil may be too cold. Keep it at 375°F so they fry quickly and don’t absorb too much oil.
My pies opened up during frying—what went wrong?
- They weren’t sealed tightly. Use a fork to crimp thoroughly, and don’t overfill.
They got too dark too fast!
- Your oil may be too hot. Reduce the heat slightly and give it a minute to stabilize before frying the next one.

Storage, Make-Ahead & Freezing Tips
Storing Leftovers:
- Let pies cool completely.
- Store in an airtight container at room temperature for 1–2 days, or refrigerate up to 4 days.
- Reheat in an oven at 350°F for 5–7 minutes.
Freezing:
- Freeze unglazed hand pies individually wrapped, then transfer to a zip-top bag.
- Reheat from frozen in the oven, then glaze once warmed.
Make-Ahead Tips:
- Assemble and seal the pies, then refrigerate for up to 12 hours before frying.
- Make the glaze ahead and store covered at room temp.

What to Serve With These
These pair beautifully with:
- A scoop of vanilla ice cream
- Whipped cream or caramel drizzle
- Warm apple cider or chai tea
- Coffee or hot chocolate during the holidays
Reader Tips & Customizations
One of our readers suggested using a sprinkle of cinnamon sugar after glazing for an added fall touch—and it’s amazing! Another reader made these with cherry pie filling for a Valentine’s Day treat. These are super customizable, so let your creativity shine.

Air Fryer Instructions (Lighter Option, Same Great Flavor!)
If you want a quicker, less messy, and lower-oil version of these hand pies, the air fryer is your best friend! While the crust won’t have quite the same deep-fried crisp, it still gets beautifully golden and flaky.
How to Air Fry Apple Hand Pies:
- Preheat your air fryer to 350°F.
- Assemble the hand pies as instructed, making sure they’re well sealed.
- Lightly spray the tops of the pies with oil or brush them with a little melted butter.
- Place 2–3 pies (depending on the size of your air fryer) in the basket, leaving room between them.
- Air fry for 7–9 minutes, or until golden brown.
- Remove, glaze immediately while warm, and let them set on a cooling rack.
- Repeat in batches.
Tips:
- Don’t overcrowd the basket. Air circulation is key for even crisping.
- If the filling leaks out a bit, don’t worry—it happens! Just clean the basket between batches if needed.

Holiday Baking & Christmas Tray Ready
These are absolutely perfect for Christmas dessert trays or fall party spreads. You can make a big batch and glaze them in festive ways—drizzle white chocolate, add holiday sprinkles, or use different fillings for a colorful variety tray.
They’re also ideal for gifting—see below!

Gift-Worthy Treats
Want to give these as a homemade gift? Let the pies cool completely, then wrap individually in cellophane bags or stack in a festive tin lined with wax paper. Add a ribbon and a handwritten tag for a cozy, nostalgic treat no one can resist. Perfect for neighbors, teachers, or holiday cookie exchanges.

Budget Breakdown
Here’s the cost estimate for a batch of 6 hand pies (based on average U.S. prices):
| Ingredient | Approximate Cost |
|---|---|
| Refrigerated Pie Crust | $3.00 |
| Apple Pie Filling | $2.50 |
| Powdered Sugar | $0.50 |
| Corn Syrup | $0.25 |
| Vegetable Oil (for frying) | $1.50 (used portion) |
| Total Cost | $7.75 |
| Cost per Pie | $1.29 |
Affordable, delicious, and impressive!
Oven Instructions (Easy Baked Version!)
Prefer to bake them instead? While you’ll miss a bit of the deep-fried crunch, these hand pies still turn out golden, flaky, and absolutely delicious from the oven.
How to Bake Apple Hand Pies:
- Preheat your oven to 375°F.
- Assemble the pies as directed, then place them on a parchment-lined baking sheet.
- Brush the tops with a little milk or beaten egg for a golden finish.
- Bake for 18–22 minutes, or until the tops are golden and the edges crisp.
- Remove from the oven and let cool slightly before glazing while still warm.
- Allow glaze to set before serving.
Tip:
You can even add a sprinkle of cinnamon sugar over the glaze for a fun twist!

Frequently Asked Questions
Can I use homemade apple filling?
Absolutely. Just make sure it’s not too runny and the pieces are finely chopped for even filling.
Can I bake instead of fry?
Yes, though they won’t be as crisp. Bake at 375°F for 18–22 minutes, then glaze while warm.
Can I use puff pastry instead?
Puff pastry doesn’t hold up well to frying, but it can be used if you’re baking them instead.
Can I make these gluten-free?
Yes, use a gluten-free pie crust and double-check the pie filling ingredients for any hidden gluten.
Can I double or triple this recipe?
Definitely! Just monitor your oil temperature and only fry a few at a time to avoid crowding the pot.
Shortcut Tips & Store-Bought Swaps (Busy Baker’s Secret Weapon)
We all have those days when we crave a warm, cozy dessert but don’t have the time—or patience—for anything complicated. That’s where this recipe really shines. Whether you’re short on time, new to baking, or just looking for a quick and delicious dessert that delivers big flavor with minimal effort, these shortcut tips and smart swaps will be your saving grace.

Time-Saving Hacks:
- Refrigerated Pie Crusts: Already a game changer! These come ready to roll, cut, and seal—no chilling, mixing, or fussing. Perfect for beginners or busy parents juggling a million things (trust me, I’ve been there!).
- Canned Apple Pie Filling: Using store-bought filling means no peeling or cooking down apples. But you can still make it feel homemade! Add a dash of cinnamon, nutmeg, or even a splash of vanilla extract to enhance the flavor.
- Cutting the Dough: Don’t have a fancy biscuit cutter? A drinking glass works just fine! Even a mason jar lid can double as the perfect cutter in a pinch.
Creative & Delicious Upgrades:
- Add a Caramel Surprise: Tuck a small cube of soft caramel into each pie before sealing it. It melts into the apple filling for a gooey, caramel apple twist that feels straight from the county fair.
- Sprinkle of Sparkle: After brushing the glaze on, give the pies a light sprinkle of coarse sugar for a bakery-style look. It adds a sweet crunch and makes the pies photo-worthy for holiday trays or gifting.
- Glaze Swap: In a pinch, you can use store-bought vanilla frosting thinned with a bit of milk instead of making a glaze from scratch. It’s super convenient and still tastes great.

Bonus Tip:
Want to get ahead for a party or holiday tray? Assemble and seal the pies in advance, then refrigerate or freeze them until you’re ready to fry (or air fry—check out those instructions above!). It’s a game changer for stress-free holiday baking.
Final Thoughts
These Deep Fried Apple Hand Pies are the kind of dessert that brings people together. The smell alone gets everyone rushing into the kitchen. They’re simple, delicious, and full of nostalgic flavor—whether you’re frying up a batch for your own family or gifting them to someone special. Seriously my foodie friends—this is a must-try!
More Hand Pies
- Blackberry Hand Pies
- Peach Hand Pies
- Deep Fried Strawberry Cheesecake Pies
- Cherry Cheesecake Hand Pies

Deep Fried Apple Hand Pies
Ingredients
- 21 oz. can apple pie filling
- Refrigerated pie crust
- 2 cup powdered sugar
- 1 teaspoon corn syrup
- 1 tablespoon water
- Vegetable Oil for frying
Instructions
- Fill a heavy dutch oven or heavy bottom pot 4-5 inches deep with vegetable oil. Use an oil or candy thermometer in the oil to monitor the temperature. Bring oil to 375°F. If your oil is too cold, the pies will absorb too much oil. If it’s too hot, they will burn.
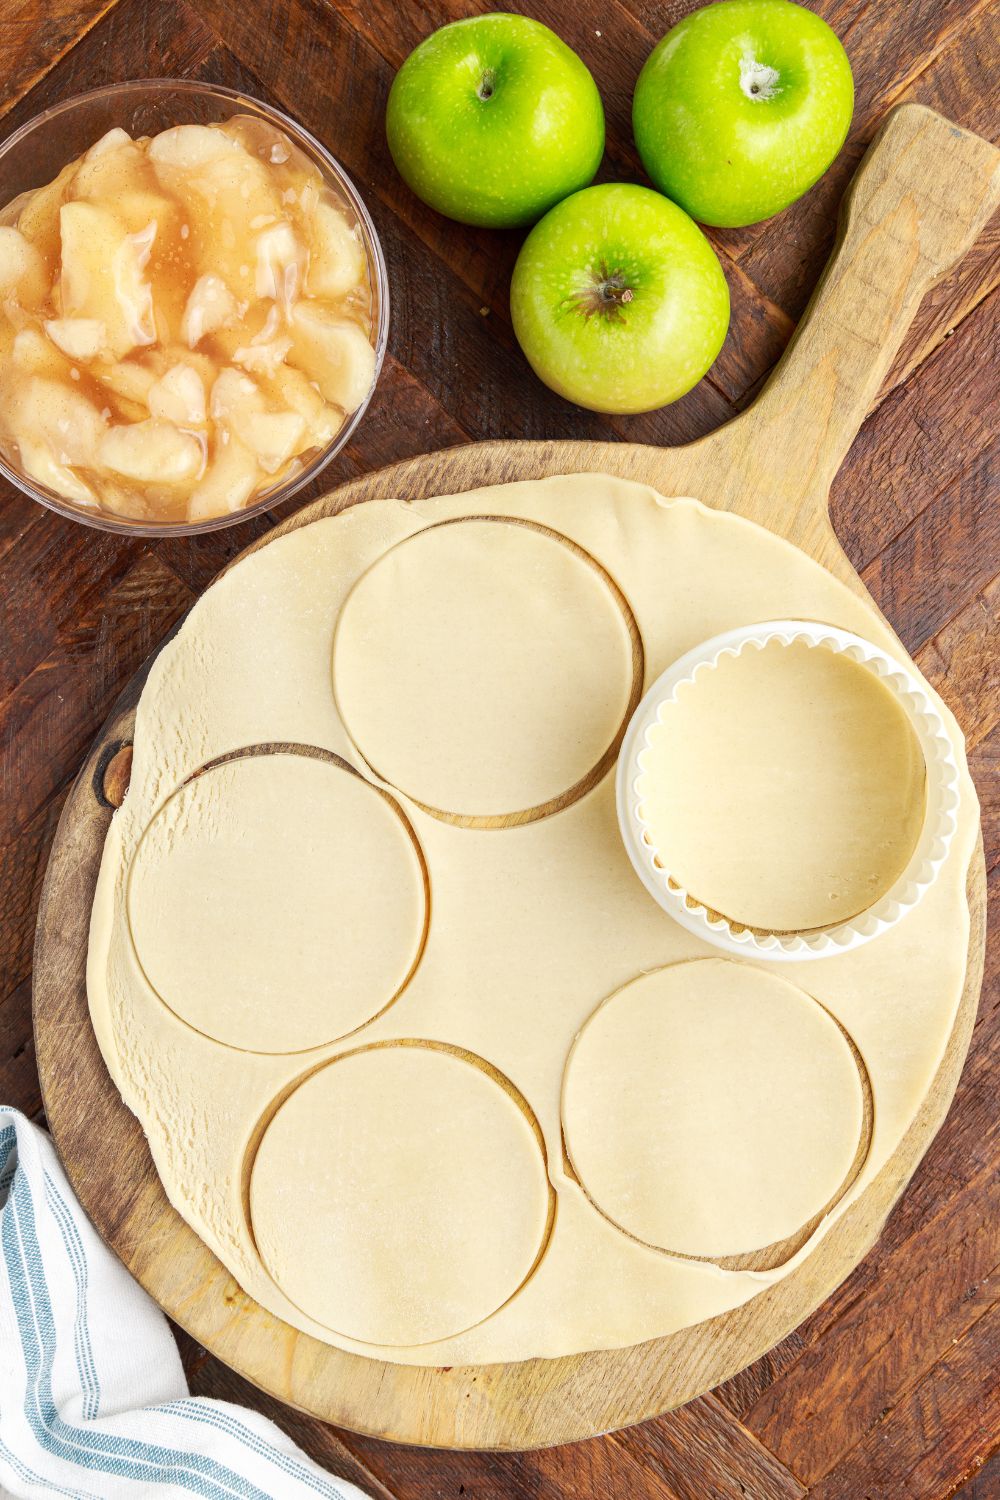
- Roll out your refrigerated pie crust. Use a 3-4” round or fluted cookie cutter to cut out 6 rounds from each pie crust. (You may need to gather the scraps and re-roll for the 6th round on each crust.
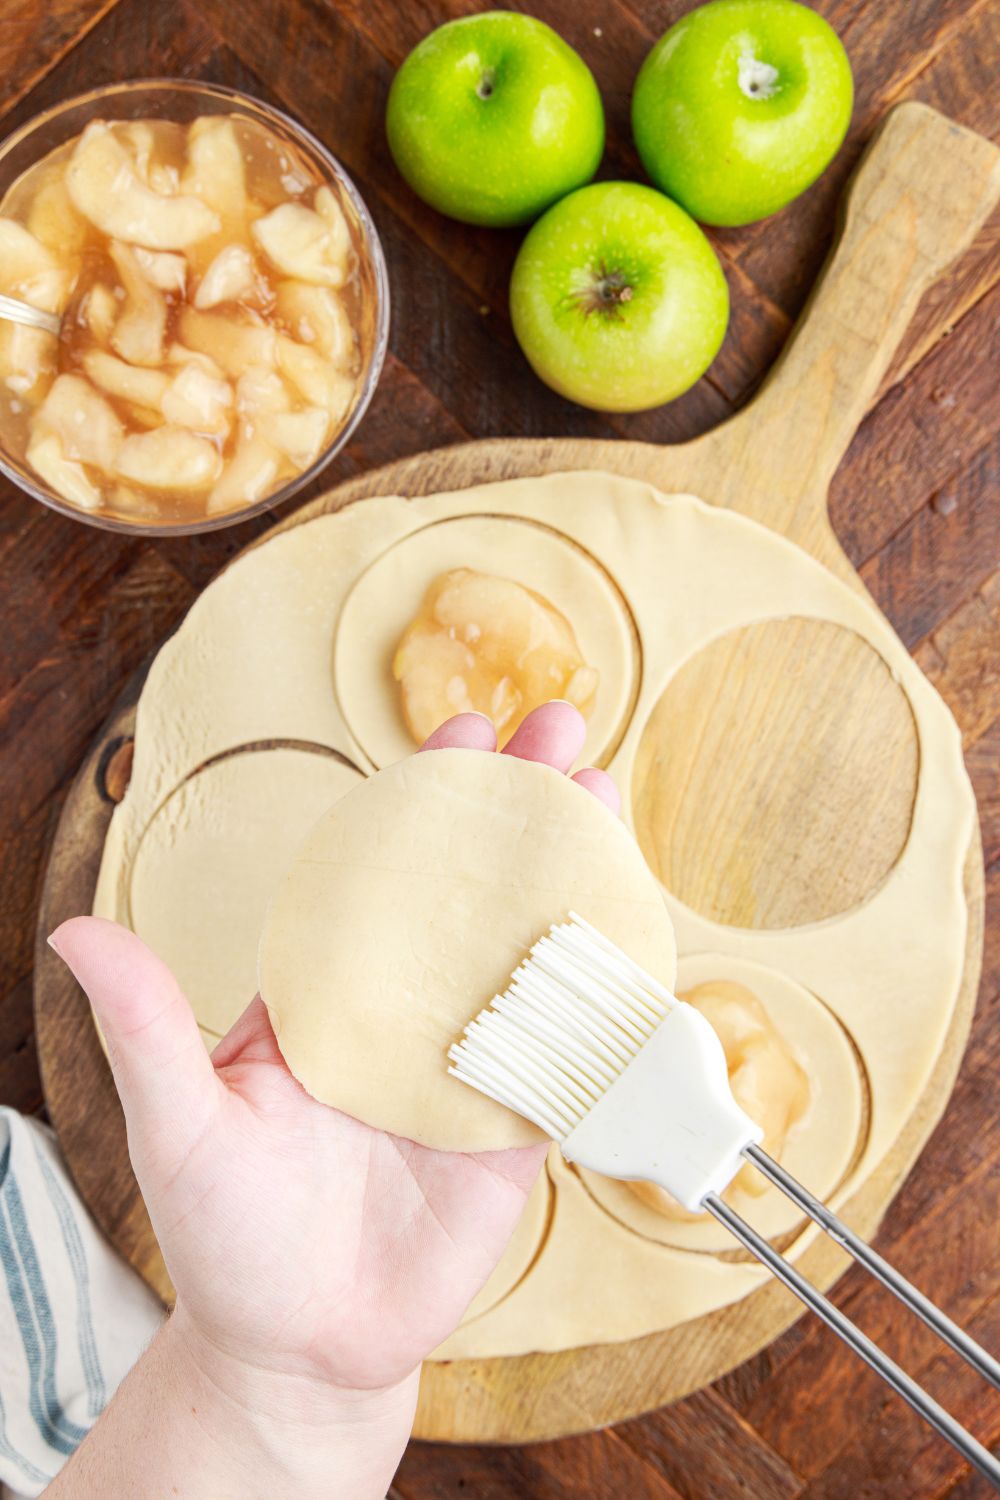
- Mound a heaping tablespoon of apple pie filling in the center of six rounds.
- Using your fingers or a pastry brush, brush water on the edges of the crust and press a second round over the filled round to make a pie.
- Crimp the edges all the way around to seal the pie.
- In a small bowl, mix powdered sugar, corn syrup and water together to make your glaze. Set aside; cover with a damp paper towel to prevent it from drying out while you fry the pies.
- Deep fry one hand pie at a time in the hot oil. Fry them for 2-3 minutes, or until the pie crust is a deed golden brown. Remove from oil and place on a paper towel.
- Using a pastry brush, brush glaze over both sides of hand pie. Place on a baking sheet or cooling rack.
- Repeat the frying and glazing process with the rest of the hand pies. Serve immediately.
Did you make this recipe?
Make sure to follow on Pinterest for more recipes!

Leave A Reply!