My Spooky Halloween Witch Finger Cookies are the kind of recipe that makes Halloween baking unforgettable. Every year, my family looks forward to spooky season, and these eerie little cookies are always the centerpiece of our Halloween dessert table. My kids love helping shape the “fingers,” my husband James claims the first batch before they’ve even cooled, and even Cameron, who can’t quite appreciate the “creepy” factor yet, just loves the sweet, buttery cookie taste. Ariya, who always notices the little details, points out every wrinkle and nail like it’s a work of art lol.
This recipe doesn’t just taste amazing — it’s fun, festive, and surprisingly easy to make. Whether you’re hosting a Halloween party, sending treats to school, or just looking for something seasonal to bake with your family, Witch Finger Cookies bring that perfect mix of spooky charm and sweet flavor.
What Are Witch Finger Cookies Exactly?
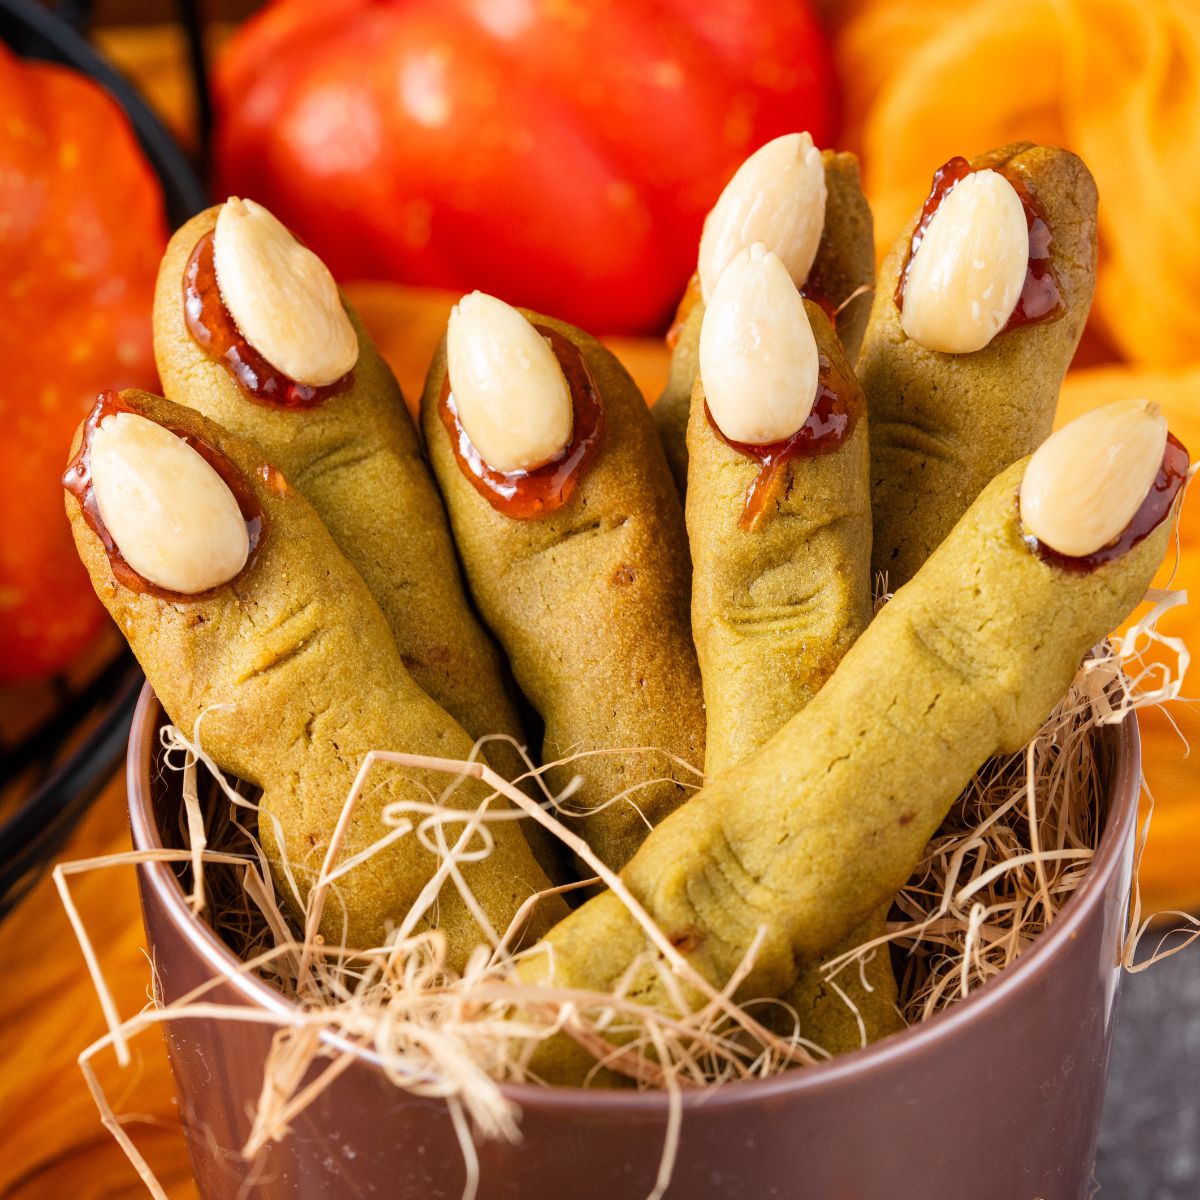
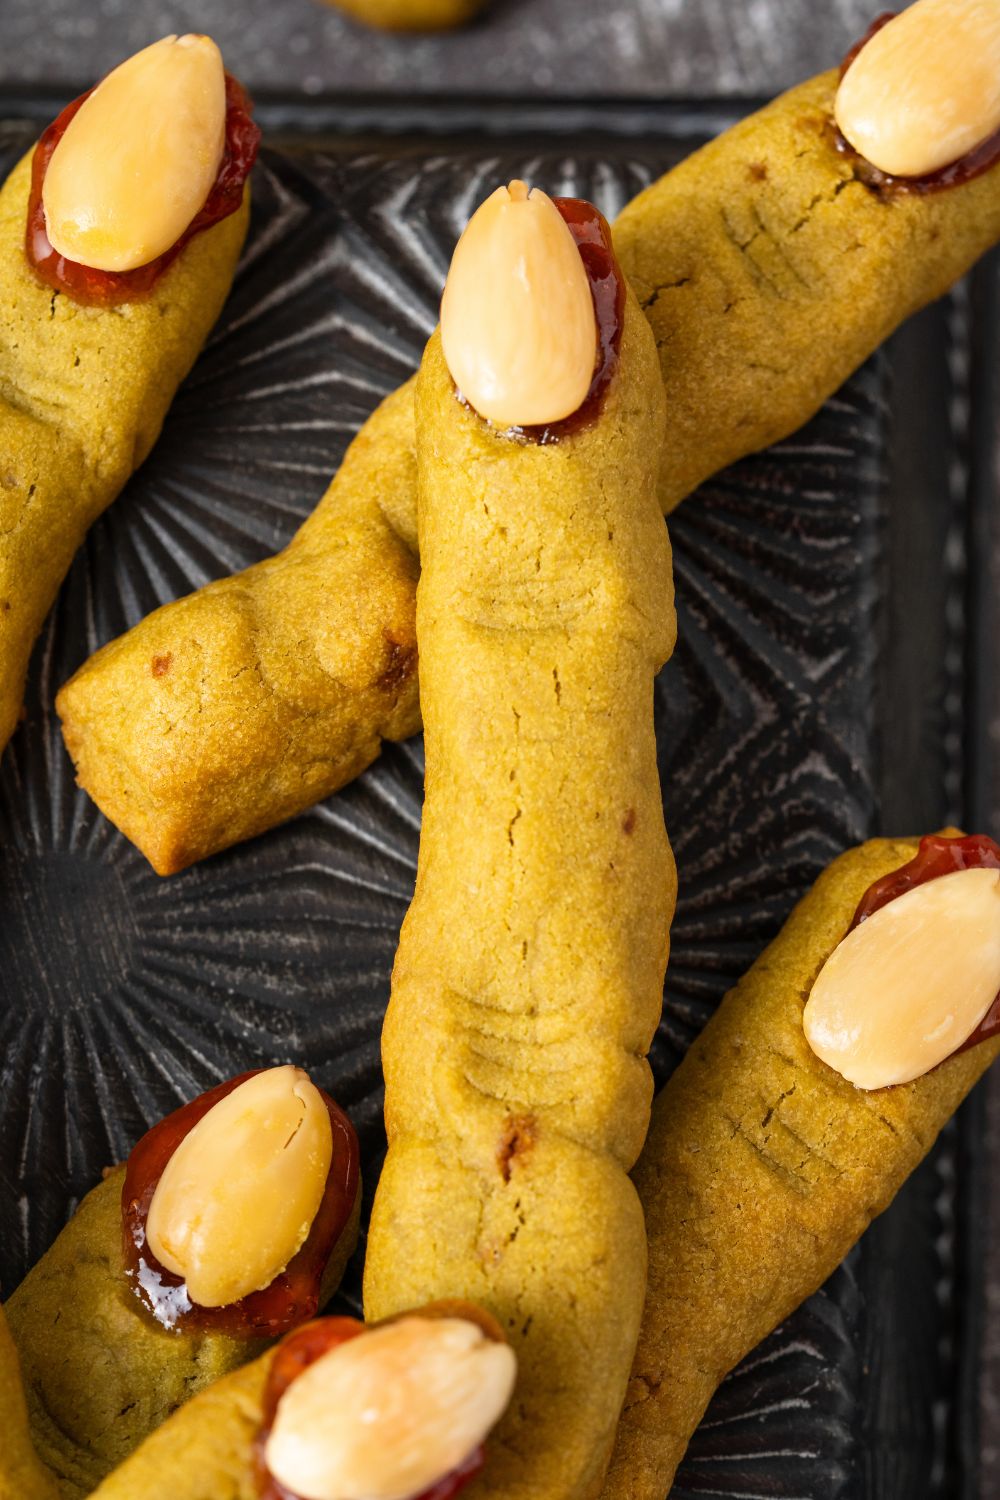
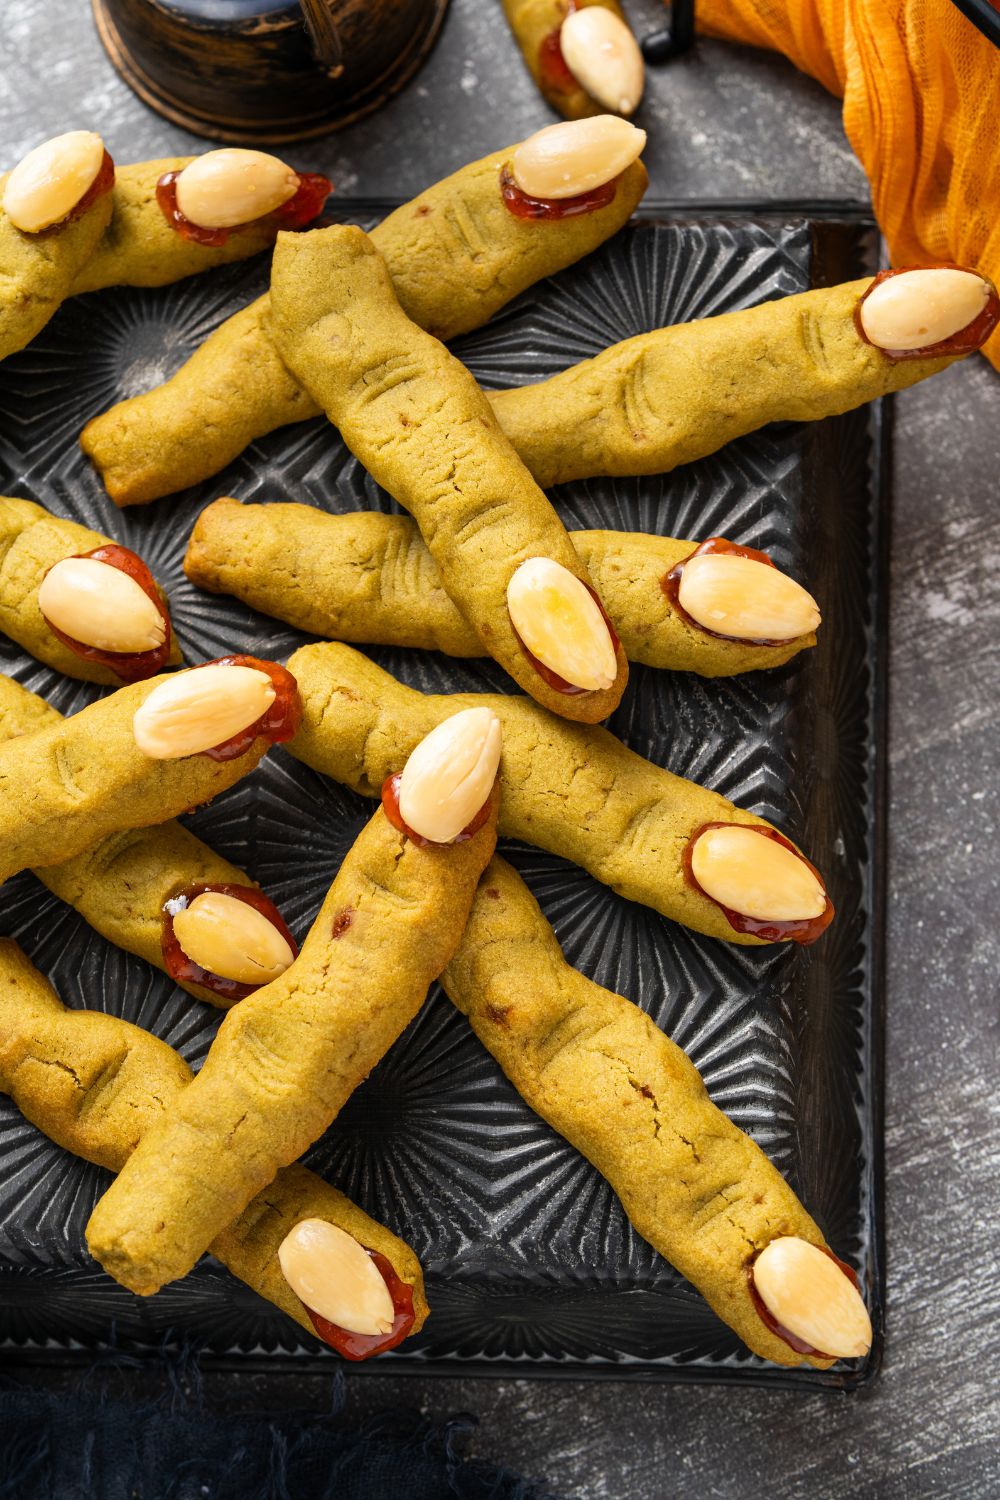
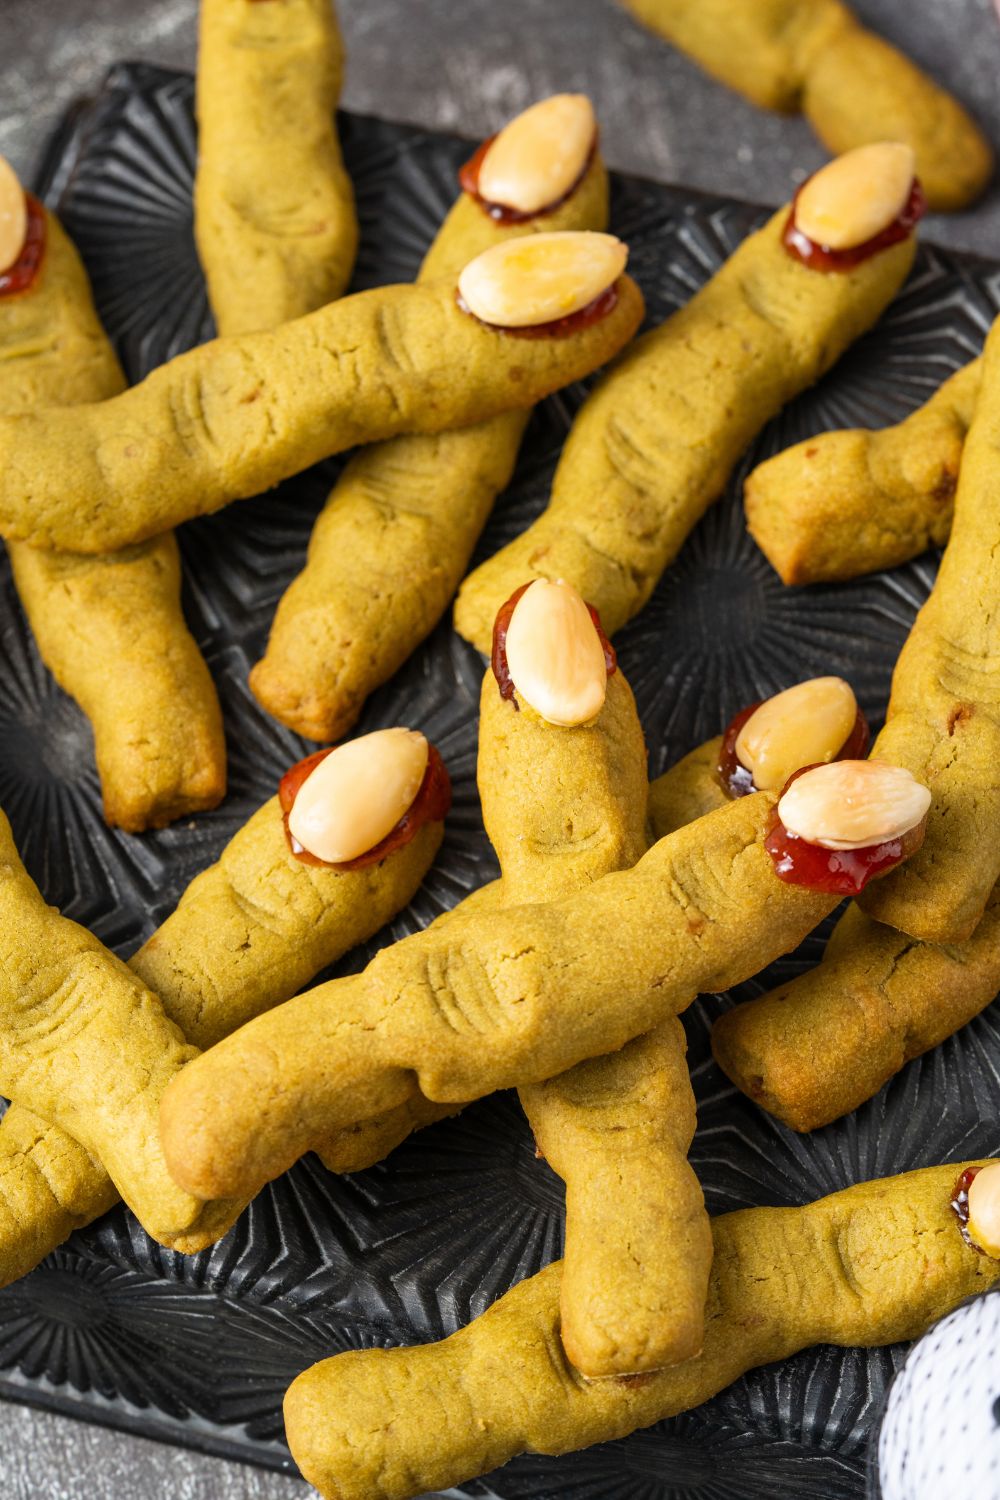
Witch Finger Cookies are buttery, shortbread-style cookies shaped like creepy, gnarled fingers with almond “nails” and strawberry jam “blood” for extra Halloween flair. They’re crisp on the outside, tender on the inside, and loaded with just enough sweetness to balance out the spooky look.
What makes these so much fun is the creative process. You’re not just scooping dough onto a baking sheet; you’re shaping knuckles, pressing almond nails into place, and giving each finger its own personality. No two ever look exactly the same — and that’s the point! These aren’t just “plain sugar cookies” dressed up for Halloween — they’ve got a nutty, slightly sweet, buttery flavor from the pistachio paste and almond “nails,” with a little fruity jam (like strawberry or raspberry) that adds a tangy, sweet pop. The base itself is closer to a shortbread or butter cookie — crisp on the edges, tender inside, and lightly flavored with vanilla and pistachio. When you bite in, you get a balance of buttery richness, nutty depth, and a touch of fruity sweetness from the “bloody” jam. So basically: they’re buttery pistachio-vanilla cookies with almond and jam accents.
Why This Recipe Works
Here’s why this Witch Finger Cookies recipe is a total winner:
- Foolproof dough – The pistachio-infused dough is soft yet sturdy, holding its shape while baking so your “fingers” look realistic, not flat.
- Perfectly balanced flavors – Sweet, nutty, and just a hint of fruitiness from the jam for the perfect finish.
- Easy for all skill levels – Whether you bake every weekend or once a year, these come together beautifully without complicated steps.
- Festive and customizable – Change up the “nail” toppings, use different jams, or add spooky food coloring for your perfect Halloween vibe.
- Make-ahead friendly – The dough chills beautifully, so you can prep ahead of time and bake when you’re ready.
This is one of those recipes that delivers on both taste and presentation. You’ll get plenty of “oohs” and “ahhs” before anyone even takes a bite.
Ingredient Breakdown: What They Do
Let’s talk about what each ingredient brings to the table:
- Unsalted Butter: Gives the cookies richness and that melt-in-your-mouth shortbread texture.
- Brown Sugar: Adds sweetness with a hint of caramel depth that pairs perfectly with the fruity jam.
- Egg: Helps bind the dough together while adding structure.
- Vanilla Extract: Balances flavors and rounds out the sweetness.
- Pistachio Paste or Jam: Adds subtle nutty flavor and gives the cookies a slight green tint for extra Halloween creepiness.
- Green Food Coloring (Optional): Deepens the spooky green shade for a dramatic effect.
- All-Purpose Flour: The backbone of the dough, providing structure so the fingers hold their shape.
- Blanched Almonds: The perfect “fingernail” — crunchy, toasty, and just the right shape.
- Strawberry or Raspberry Jam: Creates the “bloody” detail for that classic Halloween look.


When to Serve / Serving Ideas
These Witch Finger Cookies are perfect for:
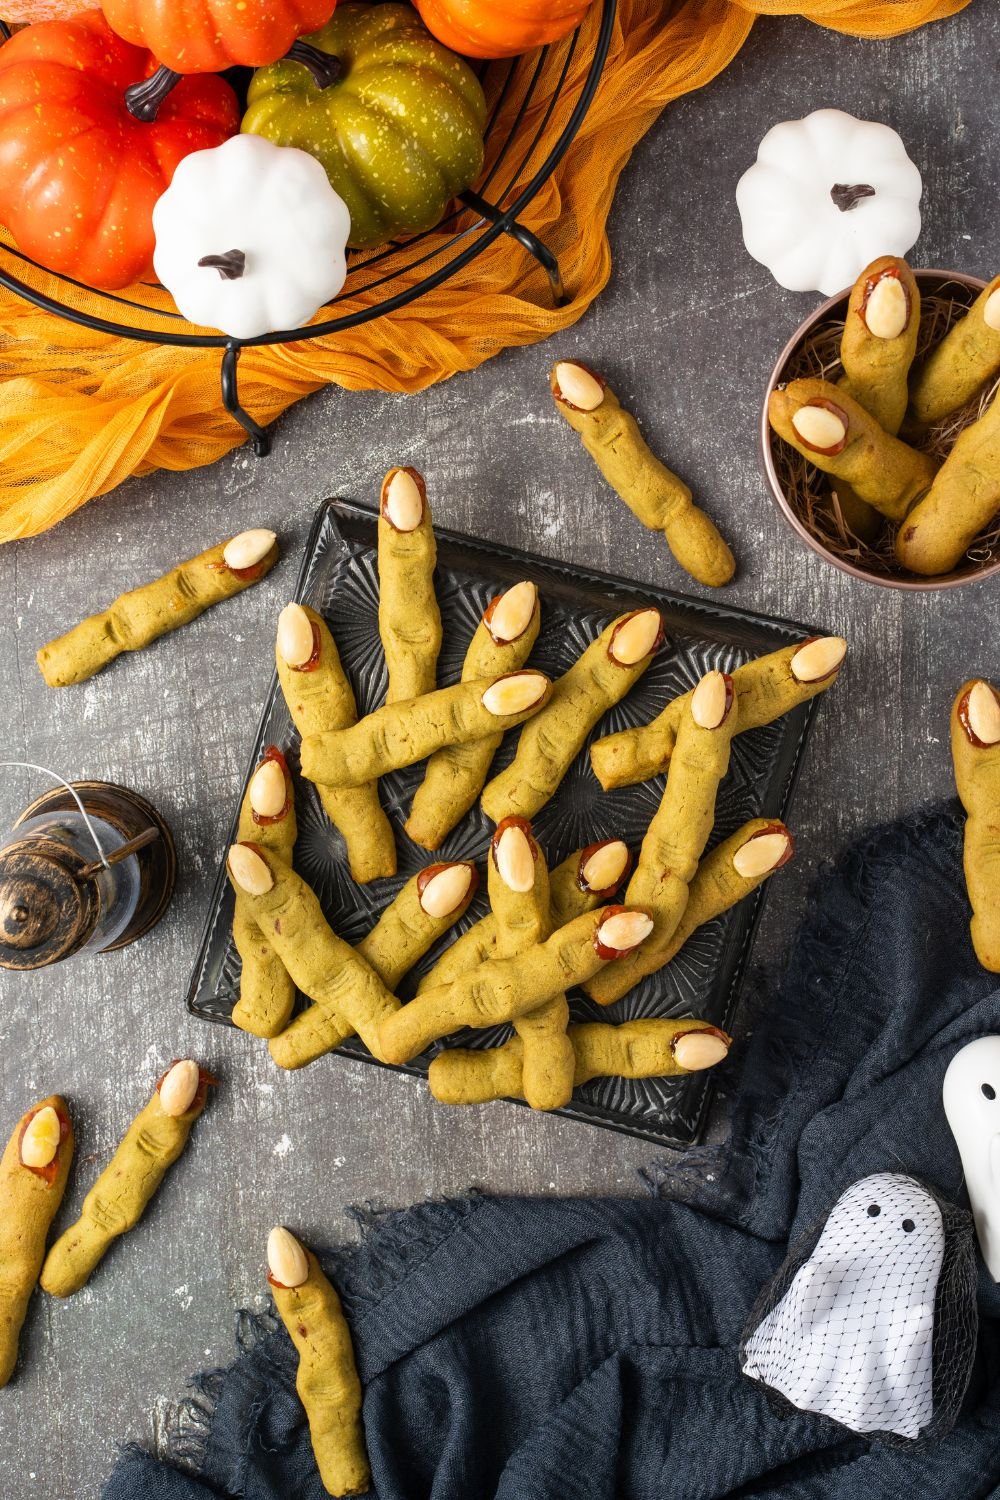
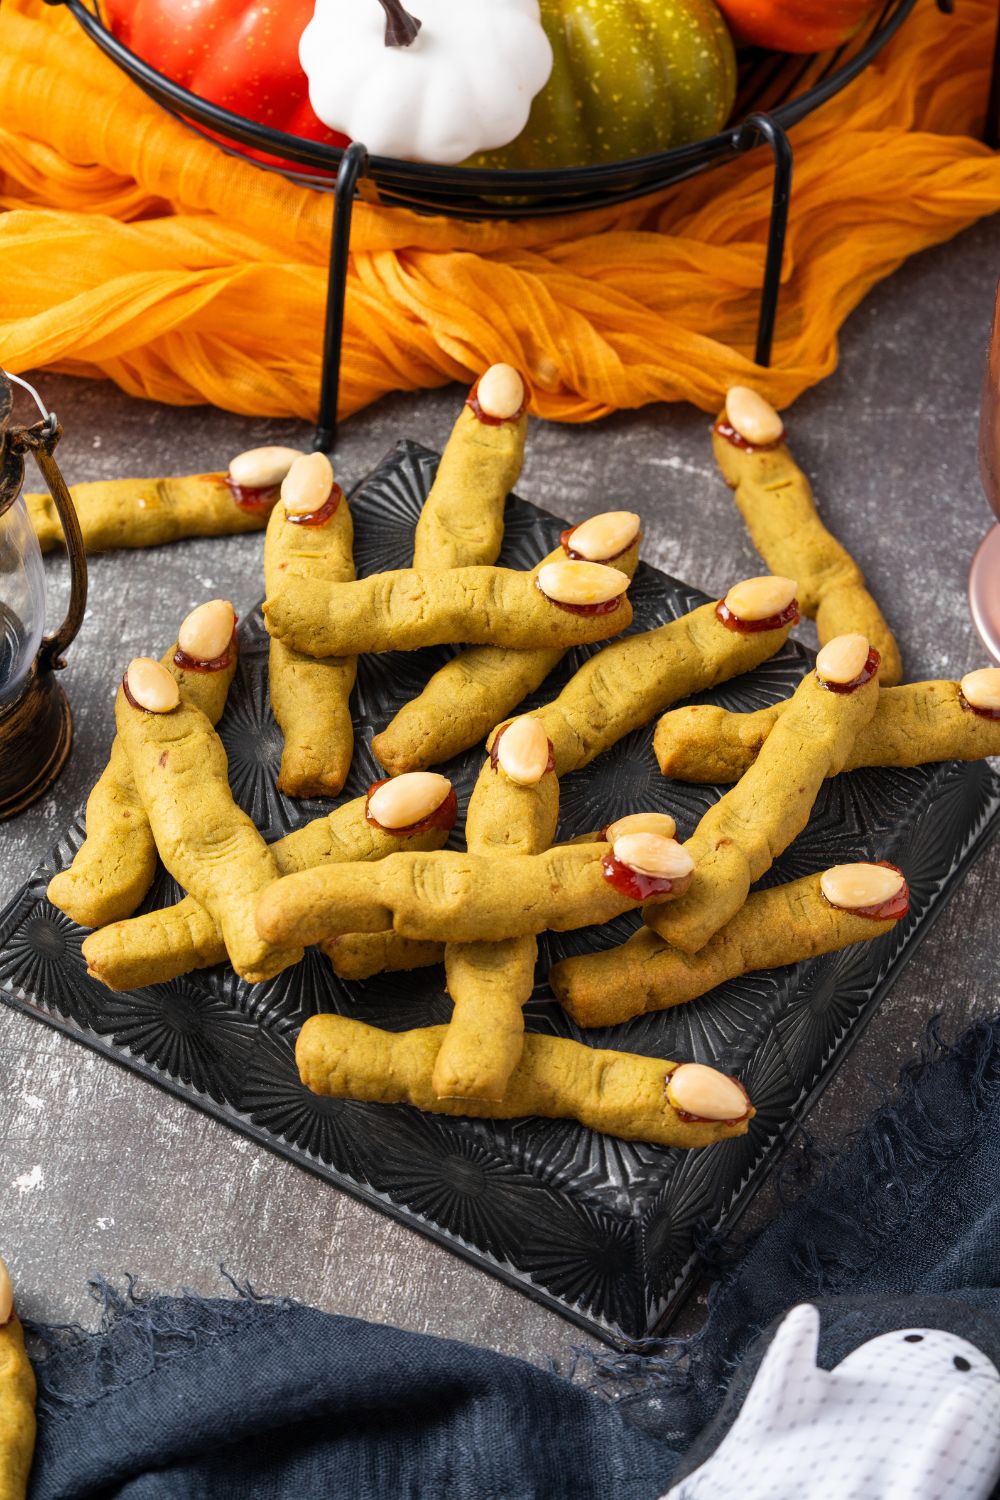
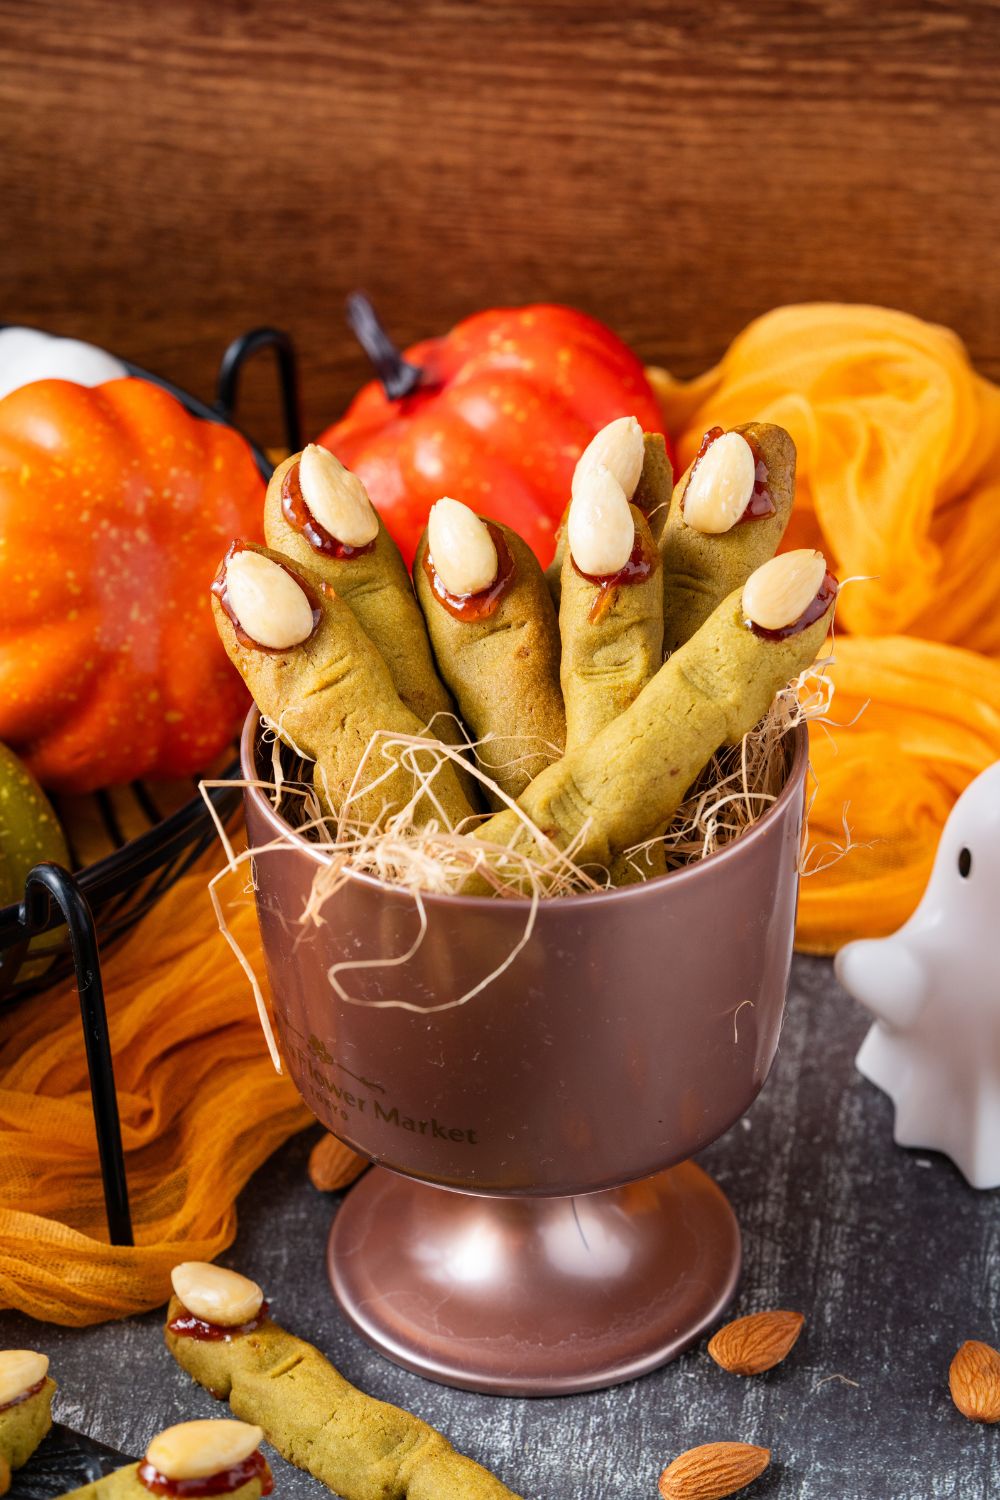
- Halloween Parties: Pile them high on a black or orange platter for the ultimate creepy centerpiece.
- School Treats: Kids go wild for them, especially when they look super spooky.
- Movie Nights: Serve with a Halloween-themed charcuterie board for a fun October snack spread.
- Trick-or-Treat Dessert Tables: Individually wrap them for grab-and-go treats.
- Fall Bake Sales: They stand out instantly — everyone loves the creative touch.
Make Ahead & Storage Tips
- Make-Ahead Dough: Shape the dough into fingers, then refrigerate for up to 2 days before baking.
- Freezing Dough: Freeze shaped, unbaked fingers on a baking sheet, then store in freezer bags for up to 2 months. Bake straight from frozen, adding 2–3 minutes to the bake time.
- After Baking: Store cooled cookies in an airtight container at room temperature for up to 5 days.
- Freezing Baked Cookies: Wrap tightly and freeze for up to 2 months. Thaw at room temperature before serving.

Why You’ll Love This Recipe
- Fun for Kids & Adults: Everyone loves shaping the dough and decorating the fingers.
- Easy Ingredients: No need for fancy specialty items; everything is pantry-friendly.
- Customizable: Change colors, flavors, and decorations for different spooky effects.
- Big Batch Friendly: Doubles easily for parties and events.
- Perfect Halloween Aesthetic: They look creepy but taste incredible — the best combo.
FAQ: Witch Finger Cookies
Q: Can I make Witch Finger Cookies without food coloring?
A: Absolutely! The green is purely for looks. The cookies will still taste amazing without it — they’ll just be a more natural cookie color.
Q: How do I keep the almond “nails” from falling off?
A: Press them into the dough firmly before baking. After baking, lift them, add a tiny bit of jam underneath, and press back down — they’ll stick perfectly.
Q: Can I use something besides almonds for the nails?
A: Yes! Pumpkin seeds, sunflower seeds, chocolate chunks, or even shaped pieces of fondant all work well.
Q: How do I make them gluten-free?
A: Substitute a cup-for-cup gluten-free flour blend. Make sure it contains xanthan gum for the best texture.
Q: Can I double this recipe?
A: Definitely. This recipe scales up beautifully — just use extra baking sheets so they’re spaced properly.
Q: How do I get realistic-looking “wrinkles”?
A: Gently press the sides with your fingers or use a butter knife to create knuckle lines before baking.
Q: Can I use homemade jam?
A: Yes, homemade jam works great! Just choose one with a thicker consistency so it doesn’t slide off the cookie.
Q: How do I keep the cookies from spreading too much?
A: Chilling the dough twice is key — once before shaping, once after. This keeps the cookies firm and finger-like.
Variations & Substitutions
- Flavor Twists: Add a little almond extract or pumpkin spice for seasonal flavor.
- Color Changes: Try purple or black food coloring for witchy vibes.
- Nut-Free Version: Use candy nails or seeds instead of almonds.
- Jam Choices: Raspberry for deep red “blood,” strawberry for brighter color, or even blueberry for a dark, spooky look.
Leftover Ideas
- Halloween Ice Cream Sundaes: Crumble leftover cookies over vanilla ice cream with extra jam drizzle.
- Milkshakes: Blend cookies into a vanilla or chocolate milkshake for a festive twist.
- Halloween Trifles: Layer crumbled cookies with pudding, whipped cream, and candy for a fun dessert cup.
Budget Breakdown
- Butter & Flour: Pantry staples keep this recipe affordable.
- Almonds & Jam: The “special” ingredients, but a little goes a long way.
- Food Coloring: Optional, and a small bottle lasts for many recipes.
Estimated total cost: Under $10 for 30 cookies — party-friendly and budget-friendly!
Lightened-Up Version
- Swap Butter for Coconut Oil: For a dairy-free, slightly lighter option.
- Reduce Sugar: Use ½ the sugar or try coconut sugar for a less sweet version.
- Whole Wheat Flour: Adds fiber and a nuttier flavor while still tasting great.

How to Package Witch Finger Cookies for Halloween Gifts
One of my favorite things about making Witch Finger Cookies is packaging them up for friends, neighbors, and the kids’ Halloween parties. They look so fun and festive in little gift bags — plus, it’s an easy way to spread a little spooky cheer without spending a fortune. Here’s how I do it so the cookies stay fresh, look adorable, and travel well:
1. Let Them Cool Completely
This is the number one rule for packaging any baked goods. Warm cookies trap steam, which makes them soft and soggy inside the bag. Always cool them completely on a wire rack before wrapping.
2. Use Food-Safe Cellophane Bags
I like the clear, gusseted treat bags you can grab on Amazon or at craft stores — they show off the creepy “fingers” perfectly. Look for bags labeled food-safe so you know they’re meant for packaging edibles.
3. Add a Festive Touch
Tie each bag with Halloween-themed ribbon, baker’s twine, or even orange and black curling ribbon. You can tuck in a little paper tag with a fun note like “Witch Fingers – Fresh from the Cauldron!”
4. Add Extras for Kids’ Bags
If you’re making them for kids, throw in a couple of wrapped candies or a little spider ring before tying the bag shut. It turns each cookie bag into a mini Halloween goodie bag.
5. Portion Sizes
I usually add 2–3 cookies per bag for kids and 4–5 for family or neighbors. It’s enough to look generous without using up all the cookies in one go.
6. Storage Tip
If you’re packaging them a day ahead, keep the bagged cookies in a cool, dry place. For longer storage, refrigerate them in a large airtight container, then bring them to room temp before gifting.
Reader Favorite Tips & Ideas
- Chill the dough twice for perfect shapes.
- Use a toothpick for knuckle details.
- Add a drop of red food coloring to the jam for extra “bloody” realism.
- Serve on a black platter with fake spiderwebs for presentation points.
Troubleshooting Tips
- Cookies Spread Too Much: Dough wasn’t chilled long enough — chill again before baking.
- Nails Popped Off: Add jam under the almond after baking for extra sticking power.
- Cookies Too Dry: Slightly underbake for a softer texture.
- Not Sweet Enough: Dust with powdered sugar or drizzle with icing.
Nutrition Information (Per Cookie)
- Calories: ~120
- Fat: 6g
- Carbs: 15g
- Protein: 2g
- Sugar: 8g
They May Look Creepy… But Just Wait Until You Taste Them
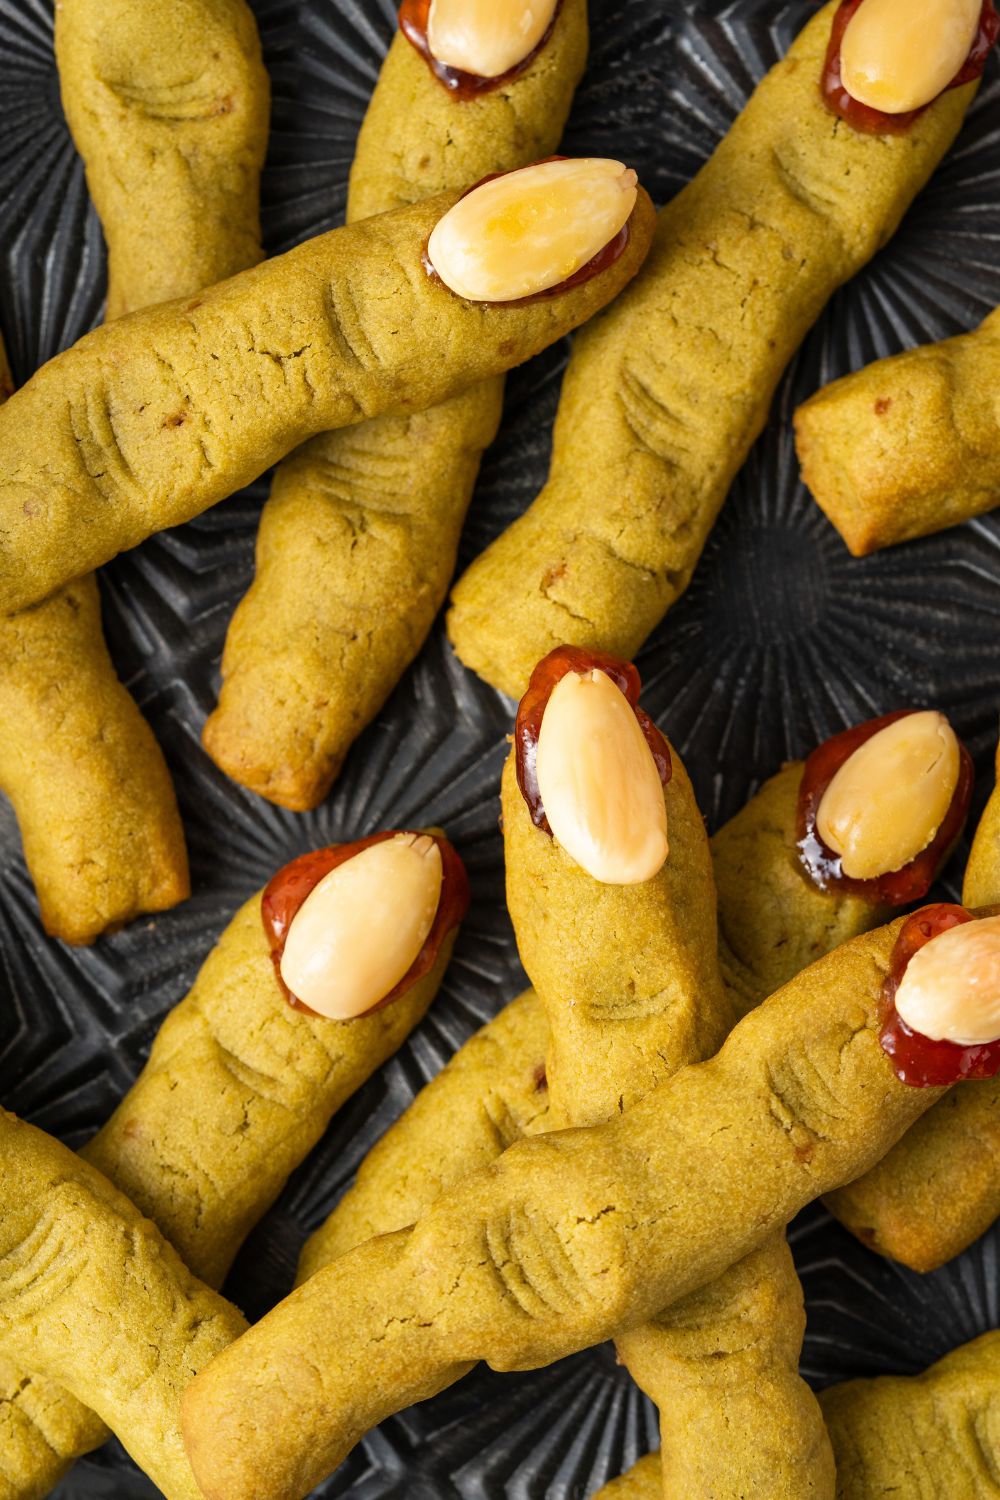
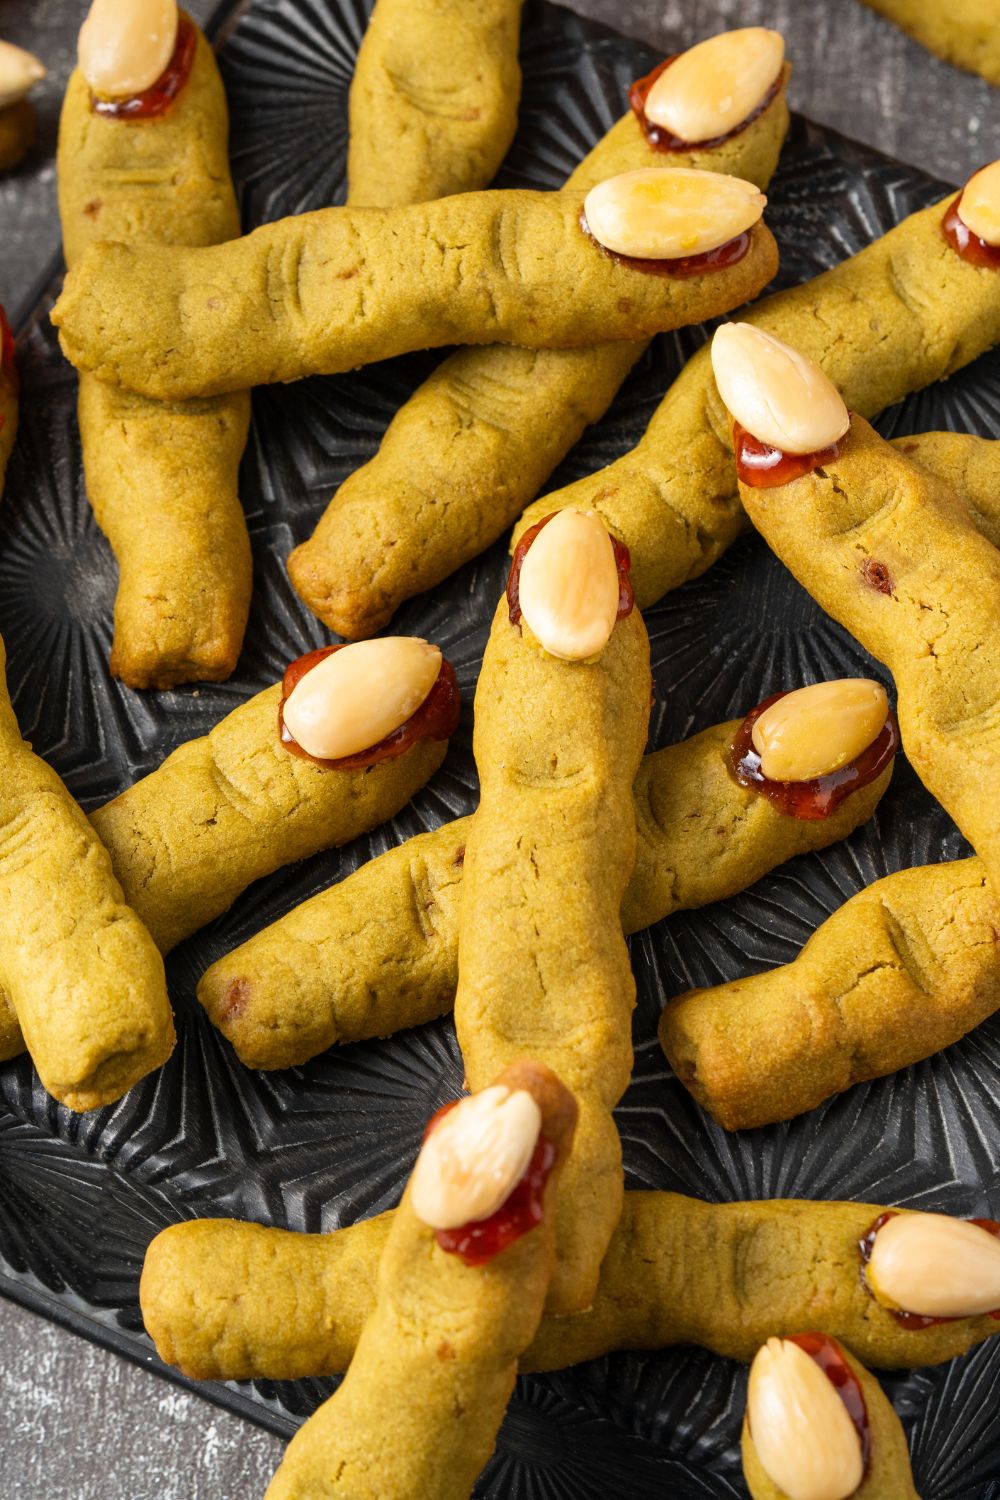
I know, I know — at first glance, Witch Finger Cookies look downright spooky… maybe even a little too realistic! The gnarled knuckles, the almond “nails,” and that drizzle of “bloody” jam definitely earn them a spot on the Halloween party table. But here’s the thing: one bite, and you’ll completely forget how creepy they look because the flavor is incredible.
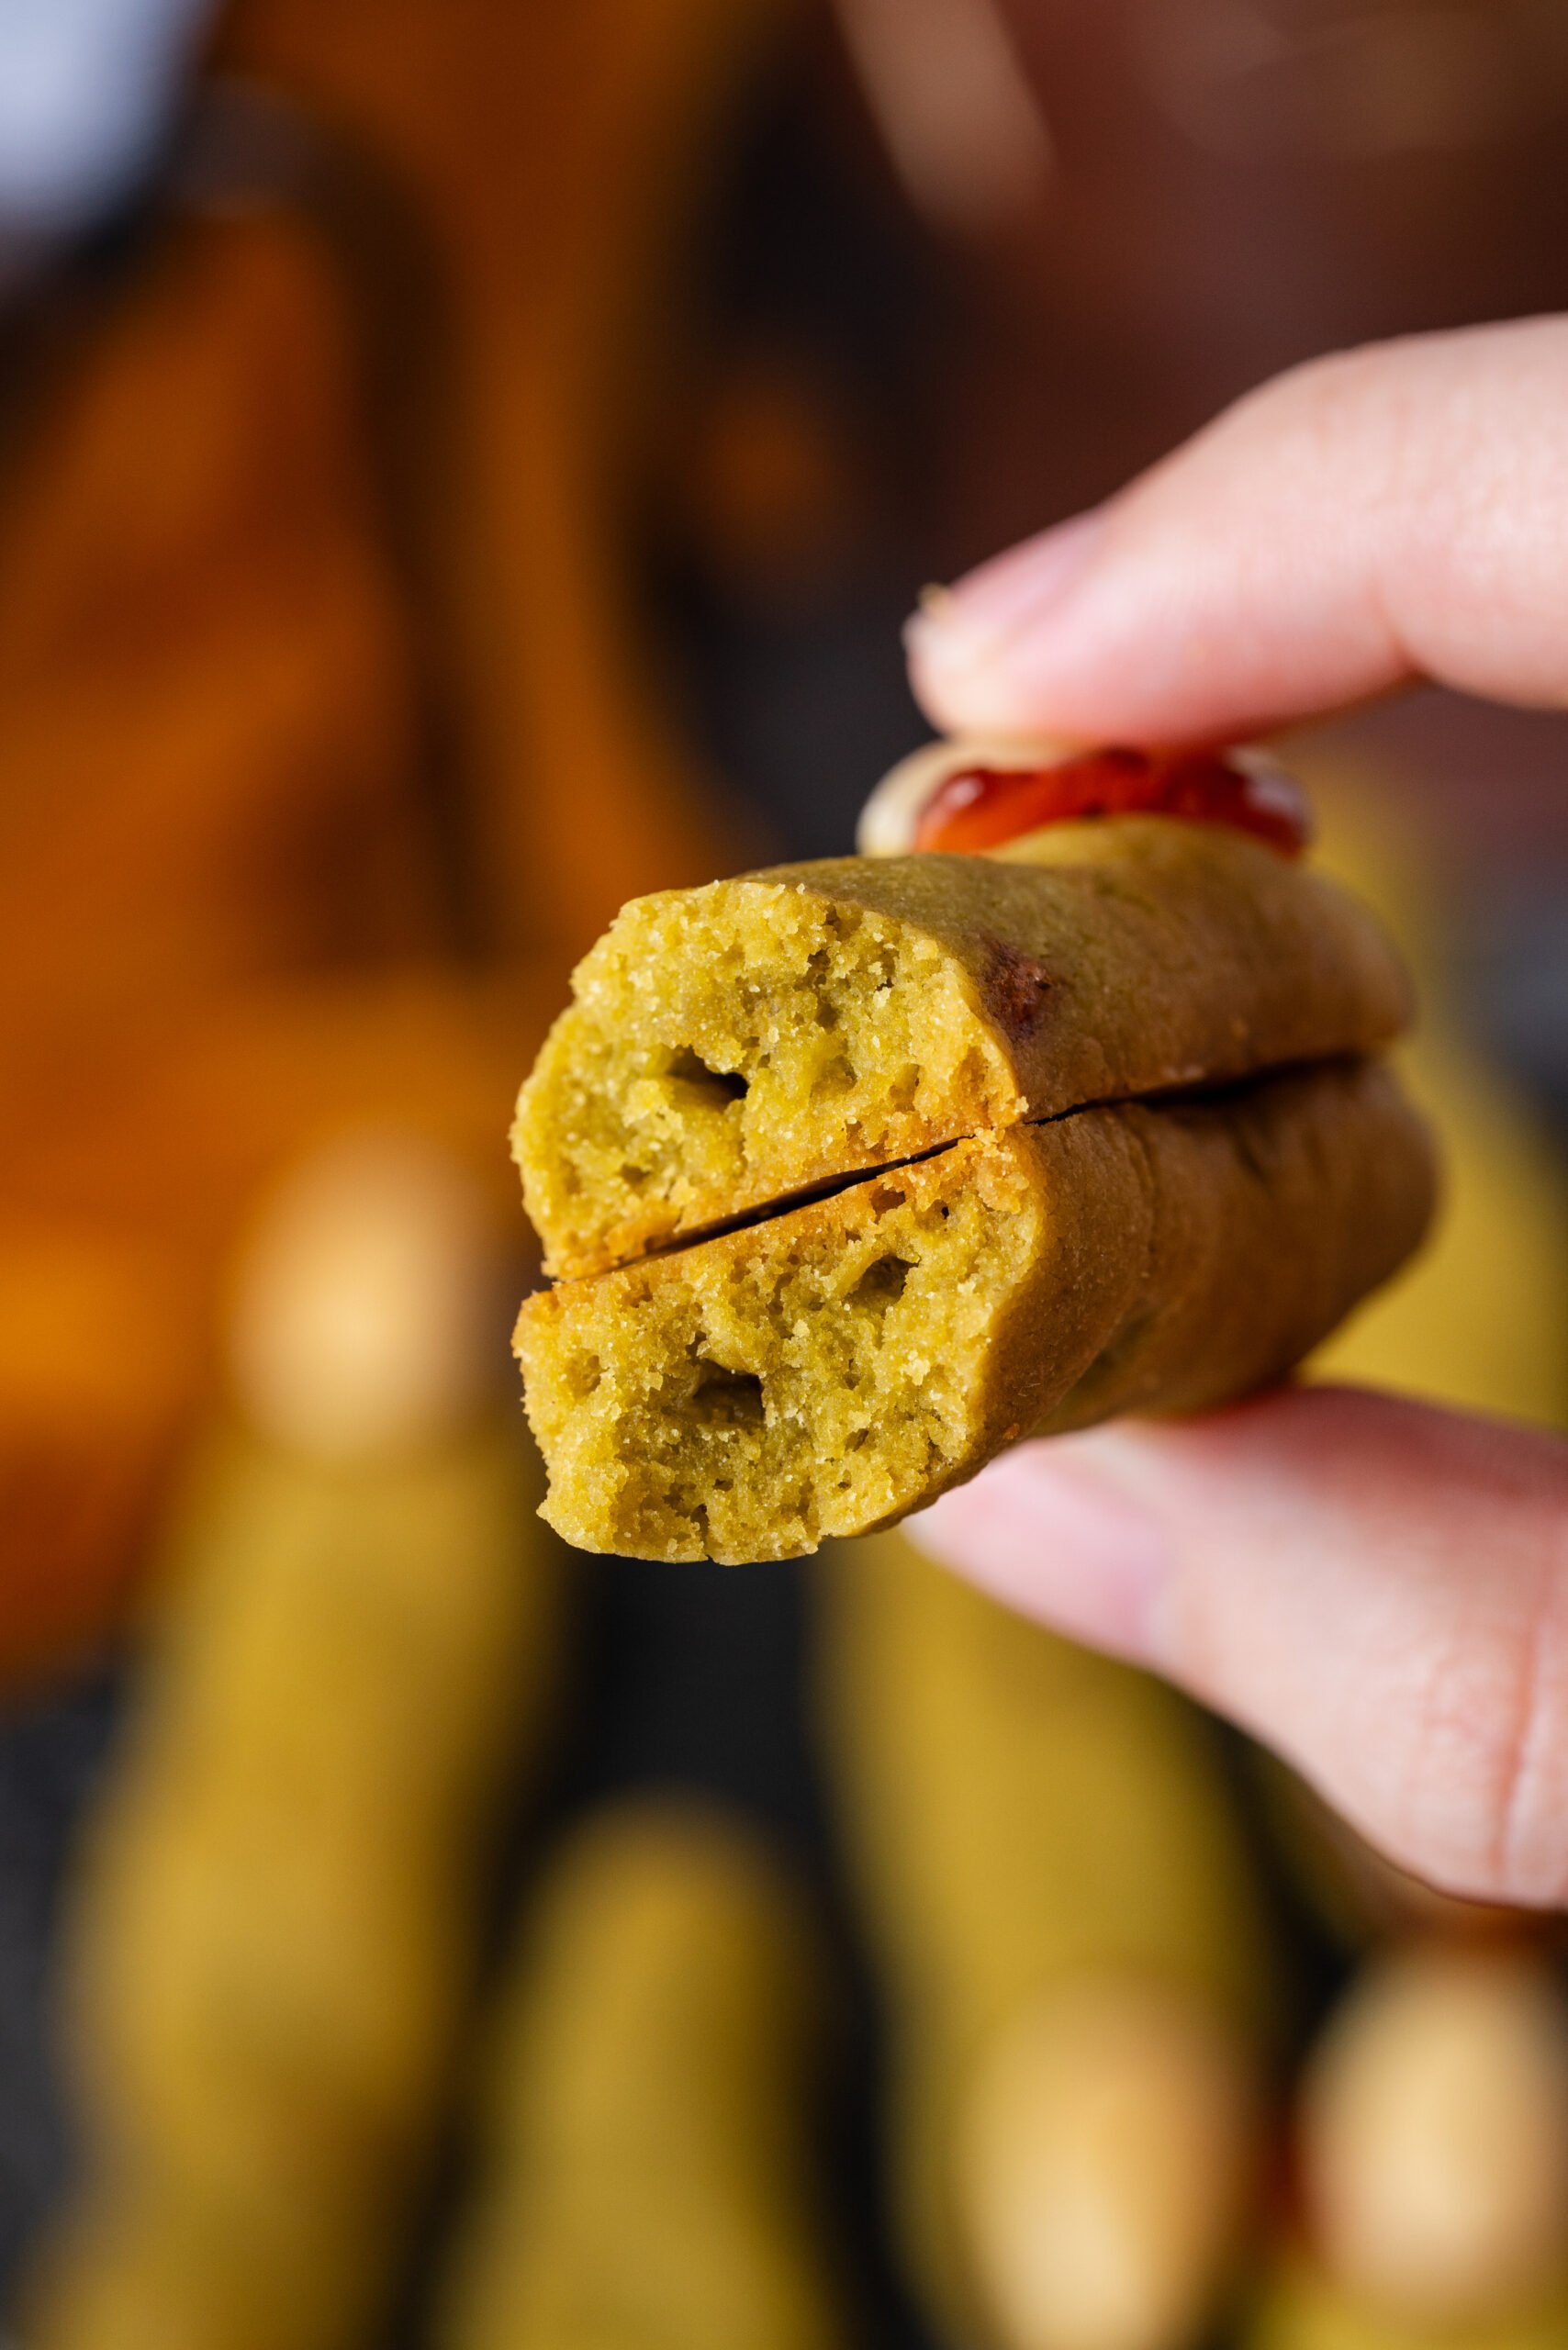
These cookies are buttery, soft in the center, lightly crisp on the edges, and packed with just the right amount of sweetness. The pistachio in the dough gives them a subtle nutty flavor, while the jam adds a pop of fruity tanginess. They’re the kind of treat that kids giggle over, adults reach for second helpings of, and everyone at your Halloween party will be talking about long after the spooky decorations come down.
So yes, they look gross in the best possible way… but that’s exactly what makes them perfect for Halloween — the flavor wins everyone over!
My Personal Kitchen Notes
I’ve tried a lot of Halloween cookie recipes over the years, but this one stays in our rotation every single October. It’s simple, fun, and my kids love shaping the dough with me. James always jokes that they look too real to eat — but that doesn’t stop him from grabbing three at a time! Honestly, they are gross enough to freak out the kids, delicious enough to keep the adults coming back for more!
My Final Thoughts
Witch Finger Cookies aren’t just a recipe — they’re a Halloween tradition waiting to happen. Fun to make, spooky to look at, and completely delicious, they’re guaranteed to disappear from the plate long before the trick-or-treaters even arrive. The only fingers you’ll actually want to eat this Halloween.
Check Out These Other Halloween Recipes

Witch Finger Cookies
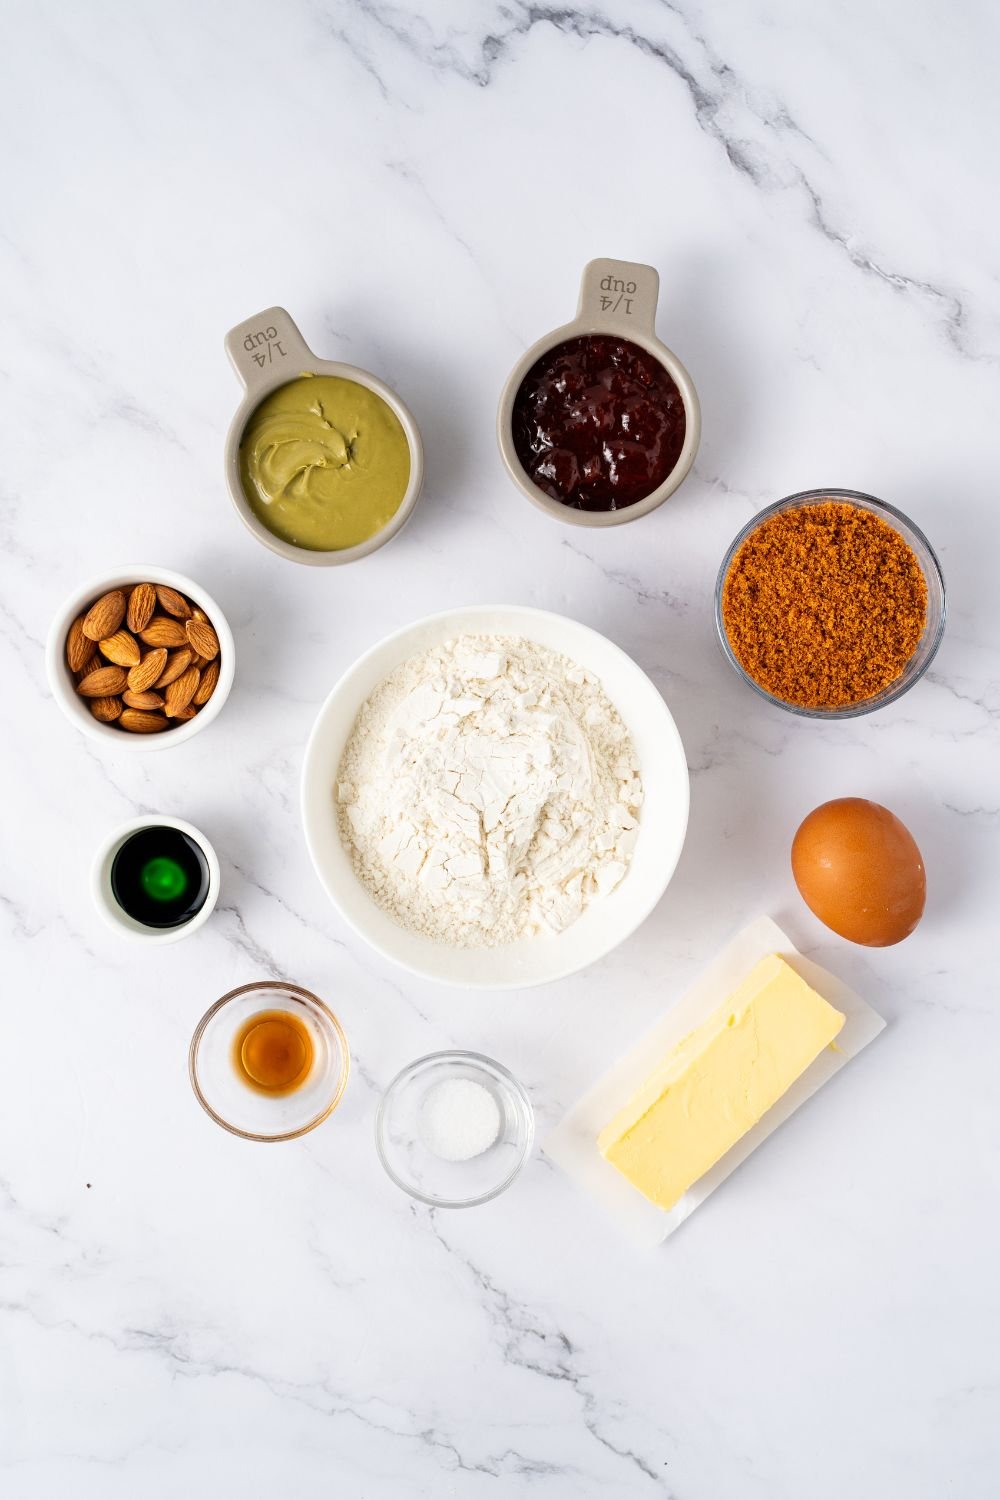
Ingredients
- 1 stick unsalted butter softened
- ¾ cup brown sugar
- 1 large egg
- ½ teaspoon salt
- ½ teaspoon vanilla extract
- ¼ cup pistachio jam or paste
- 3-4 drops green food coloring
- 2 ½ cup all purpose flour
- Strawberry jam (or raspberry, blueberry, blackberry)
- Almond
Instructions
Make the Dough
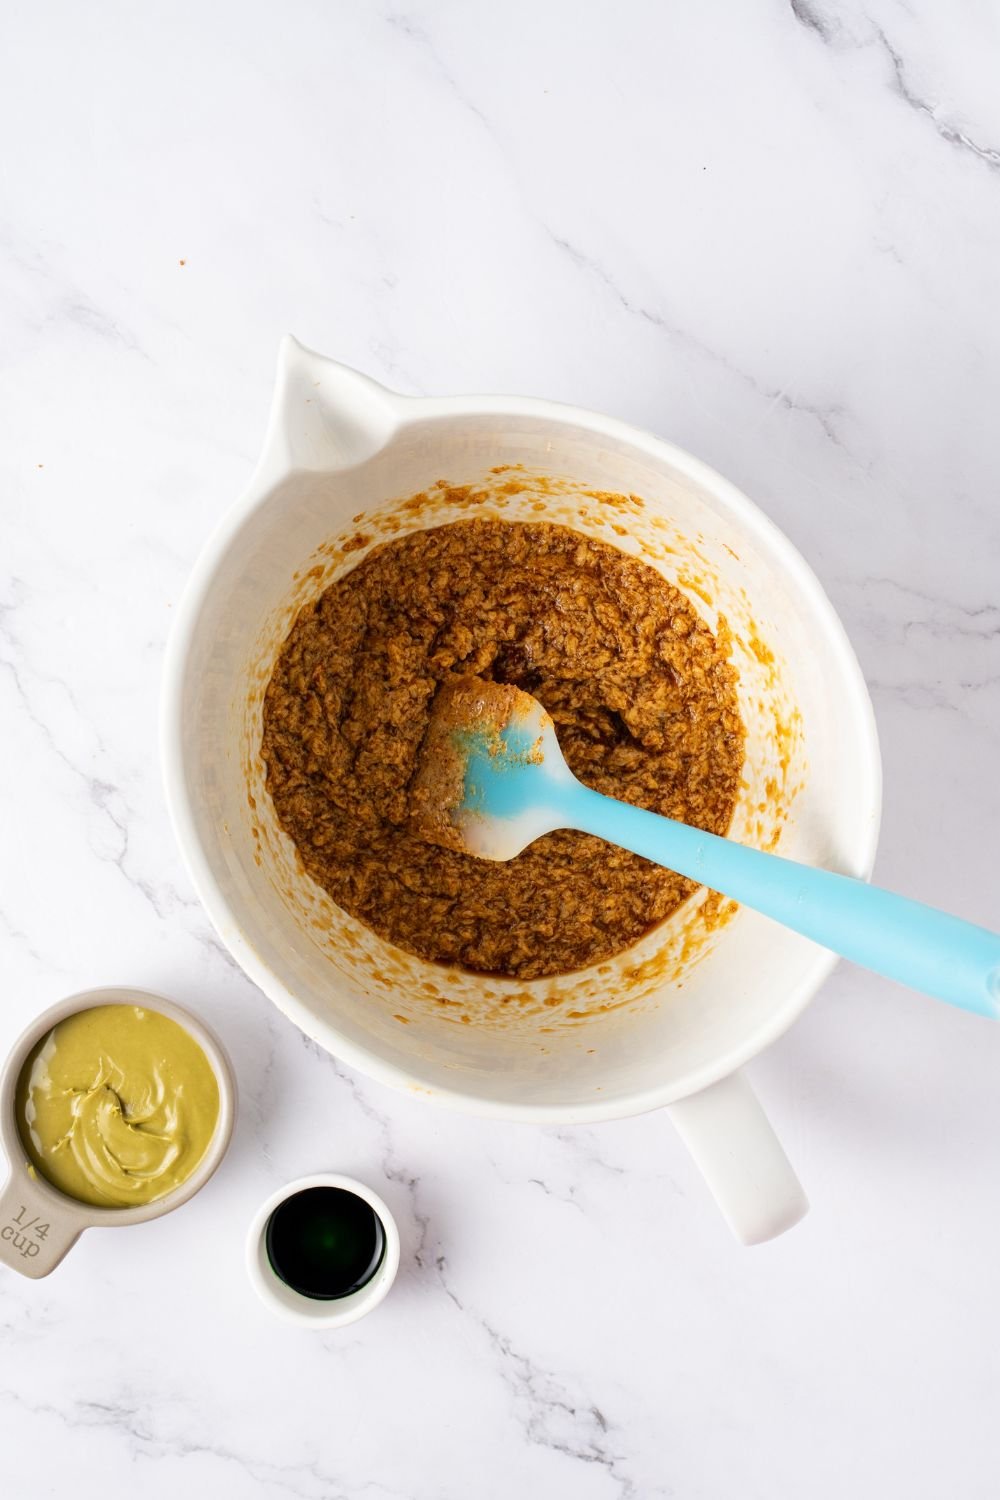
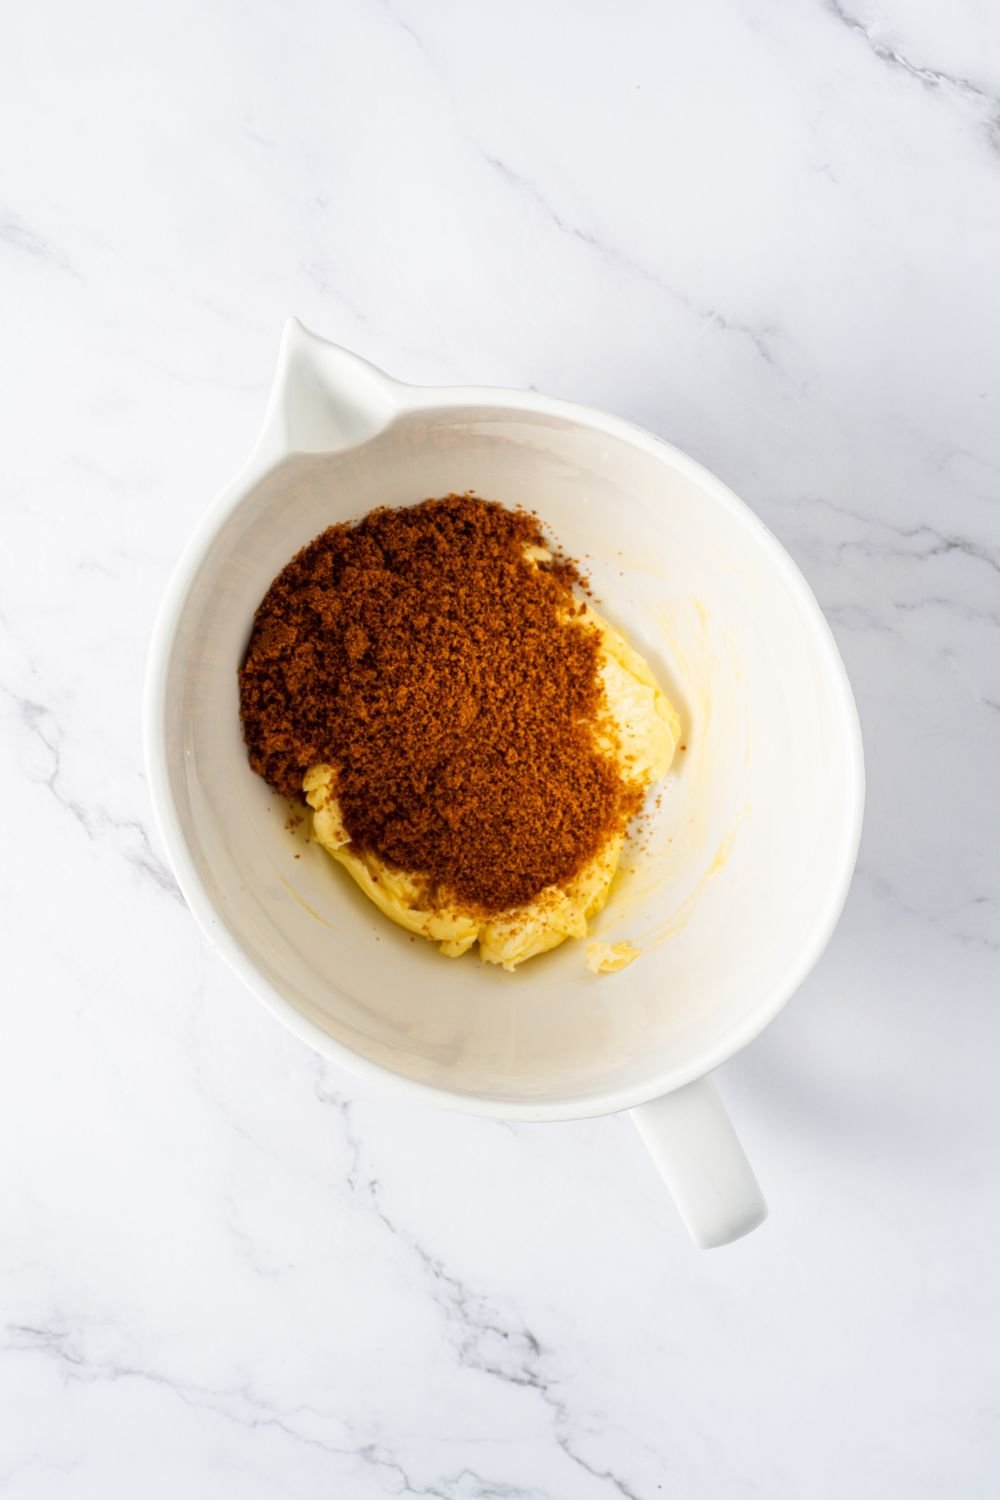
- In a large mixing bowl, cream together the softened butter and brown sugar using a spatula until smooth and fluffy.
- Add the egg, salt, and vanilla extract. Mix until well combined.
- Stir in the pistachio paste and food coloring.
- Add pistachio jam and green food coloring into the mixture.
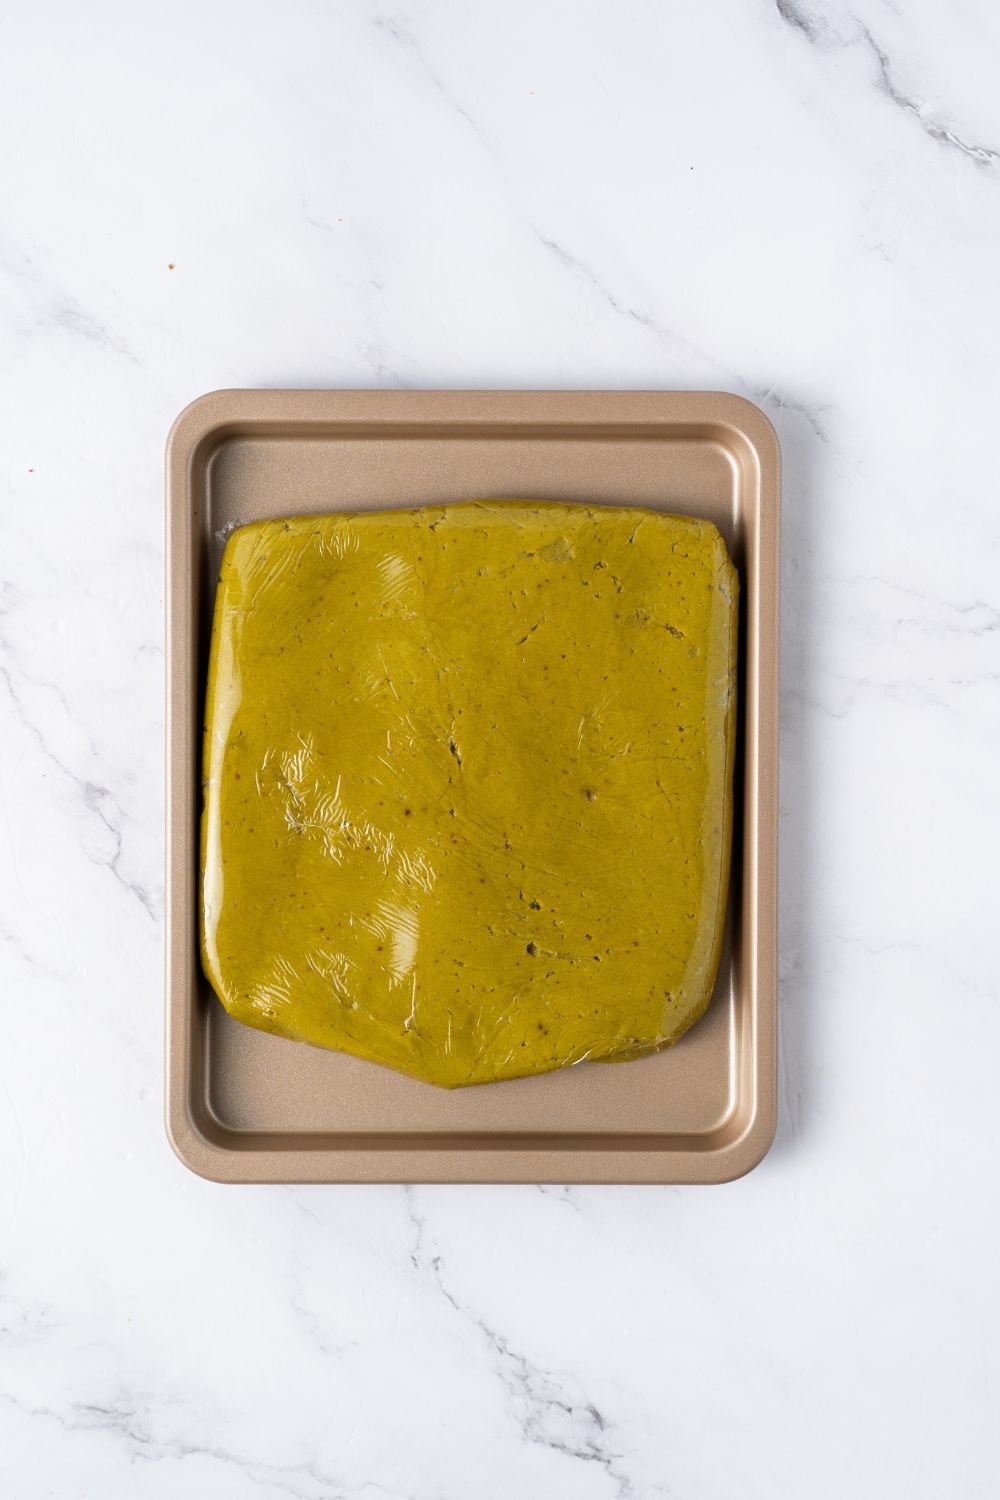
- Sift in the flour and gently fold it into the mixture using a spatula. Do not overmix.
- Wrap the dough in plastic wrap and refrigerate for 20 minutes to firm it up.
Prep the Almonds
- While the dough chills, blanch the almonds:
- Microwave almonds with water for 30–60 seconds. Drain, rinse, and peel off the skins. Set aside.
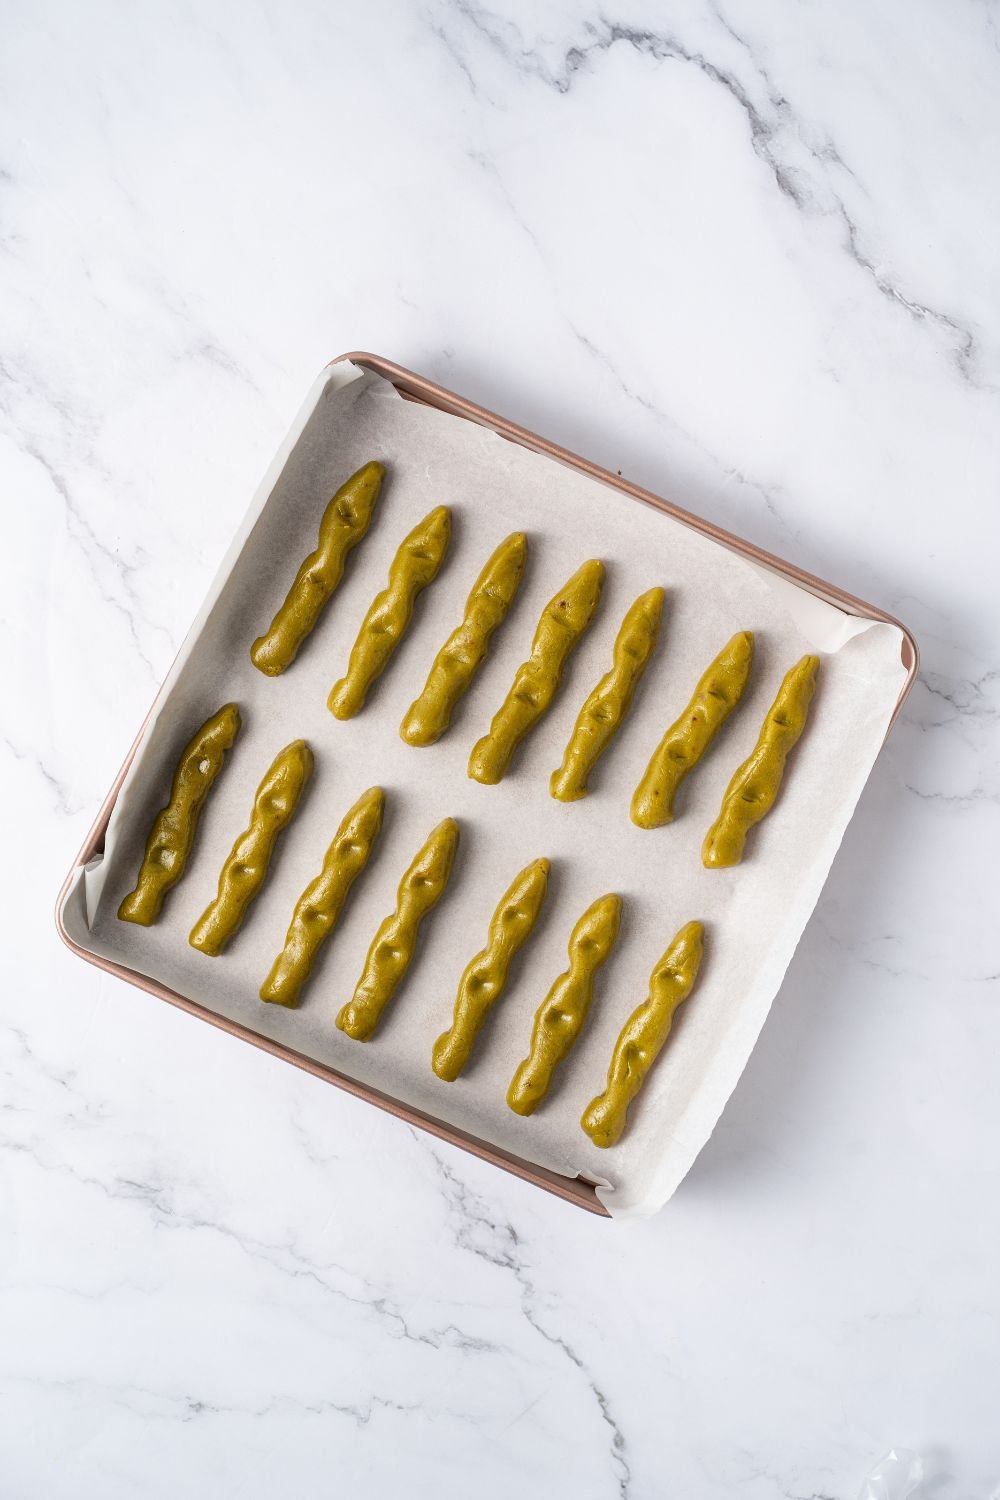
Shape the Fingers
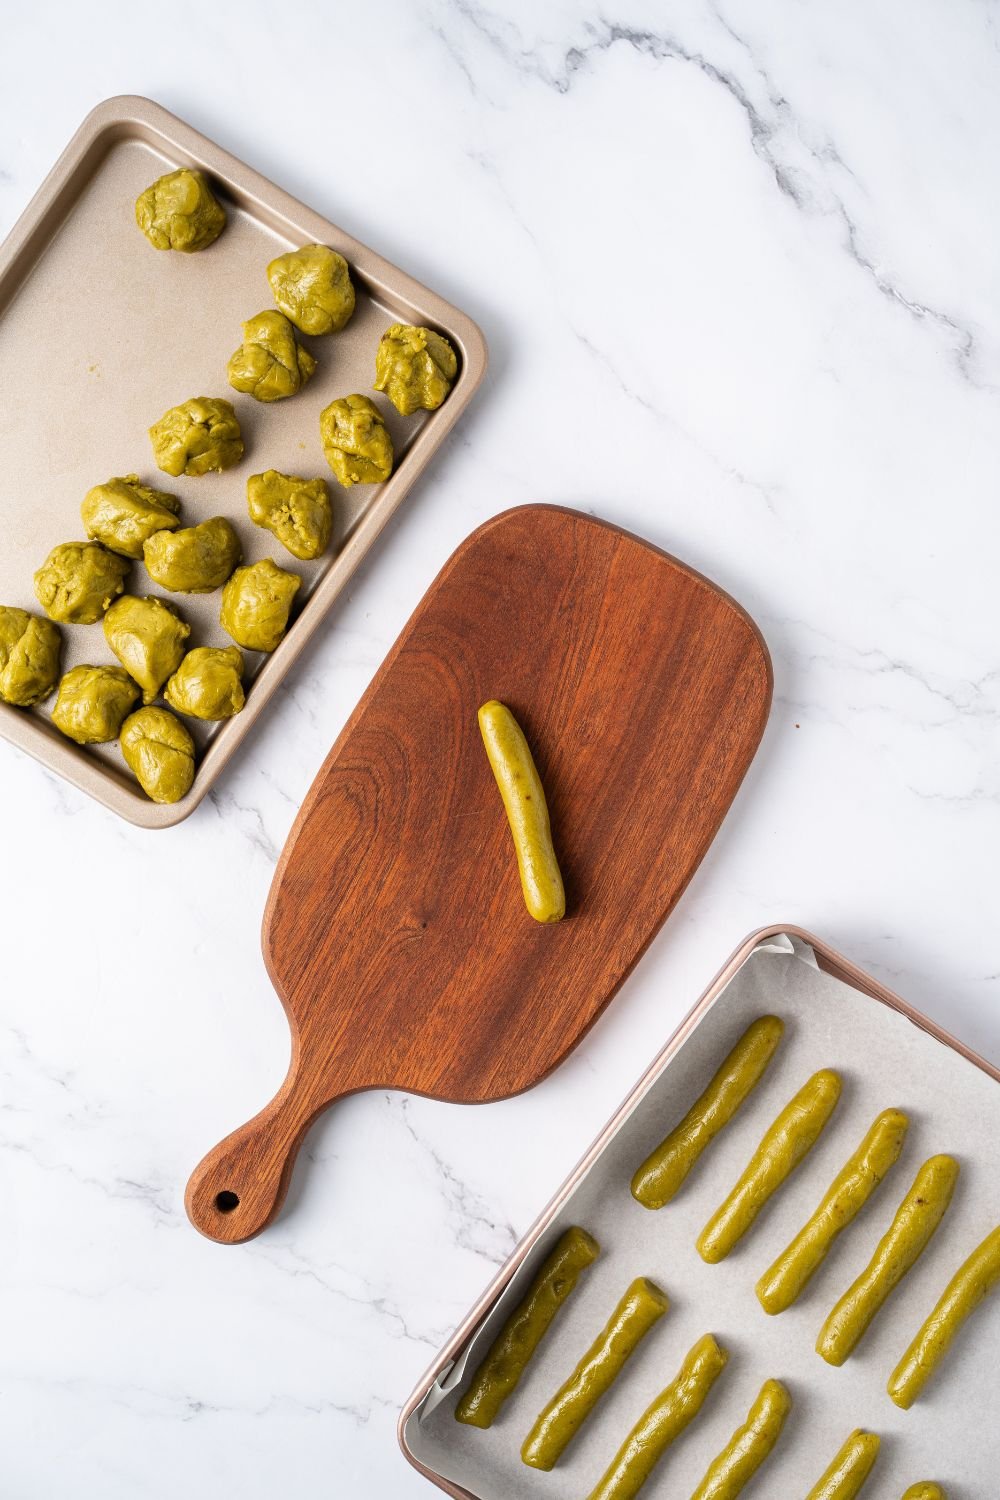
- After chilling, divide the dough into 30 equal portions.
- Roll each portion into a 3-inch (7–8 cm) cylinder.
- Place on a parchment-lined baking tray.
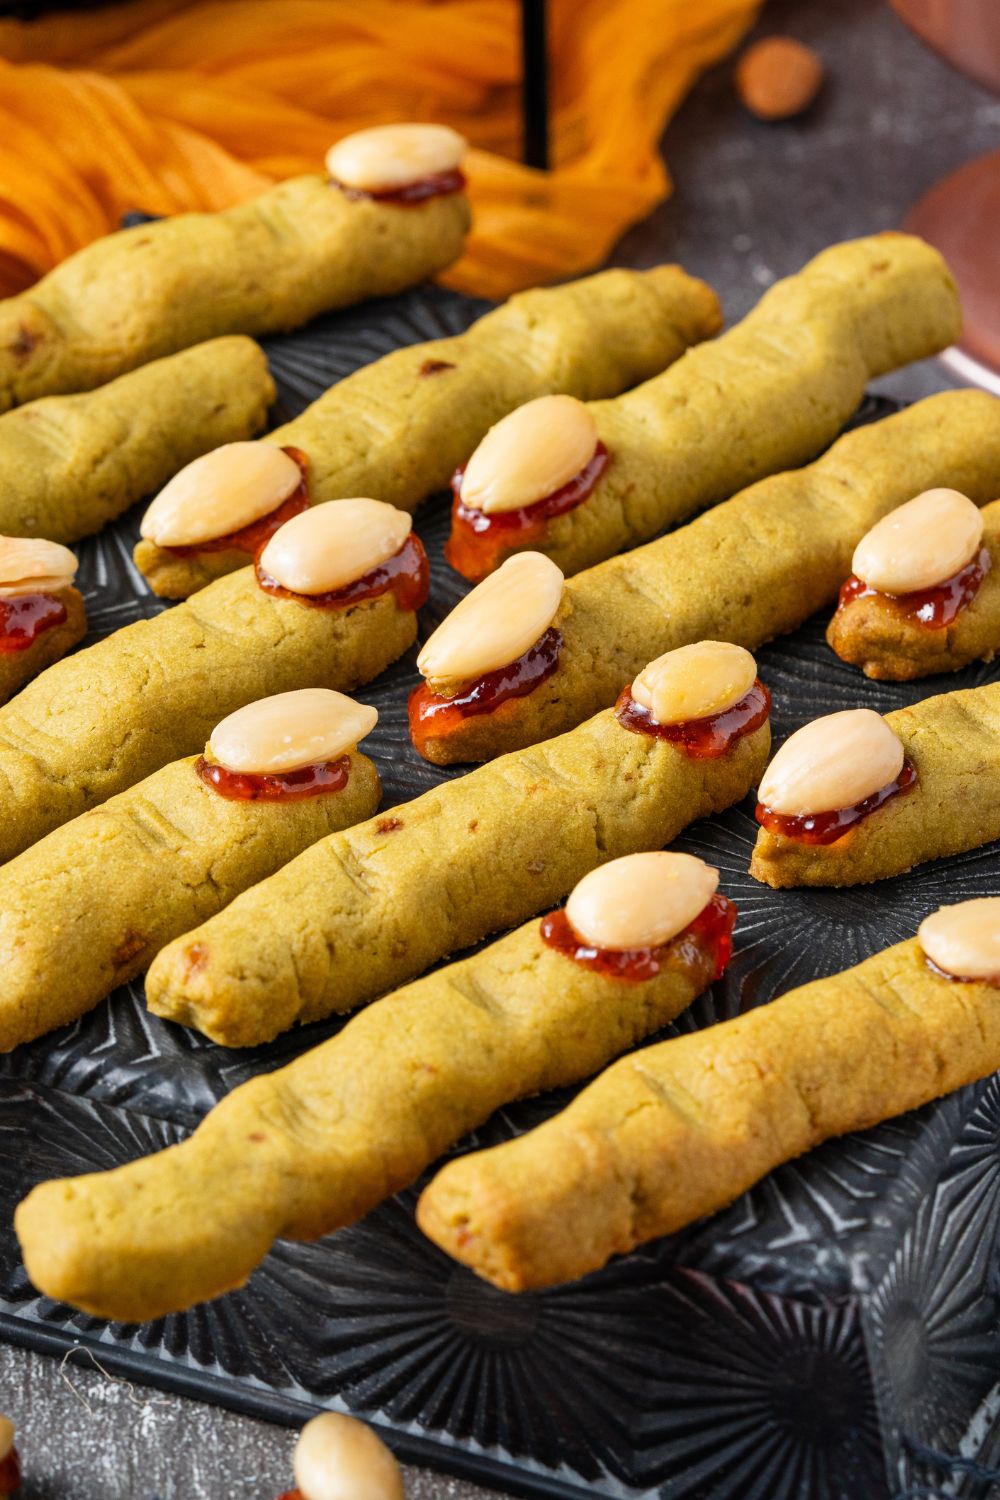
- Shape each into a “finger”. Add small wrinkles for knuckles. Taper one end slightly to resemble a fingertip.
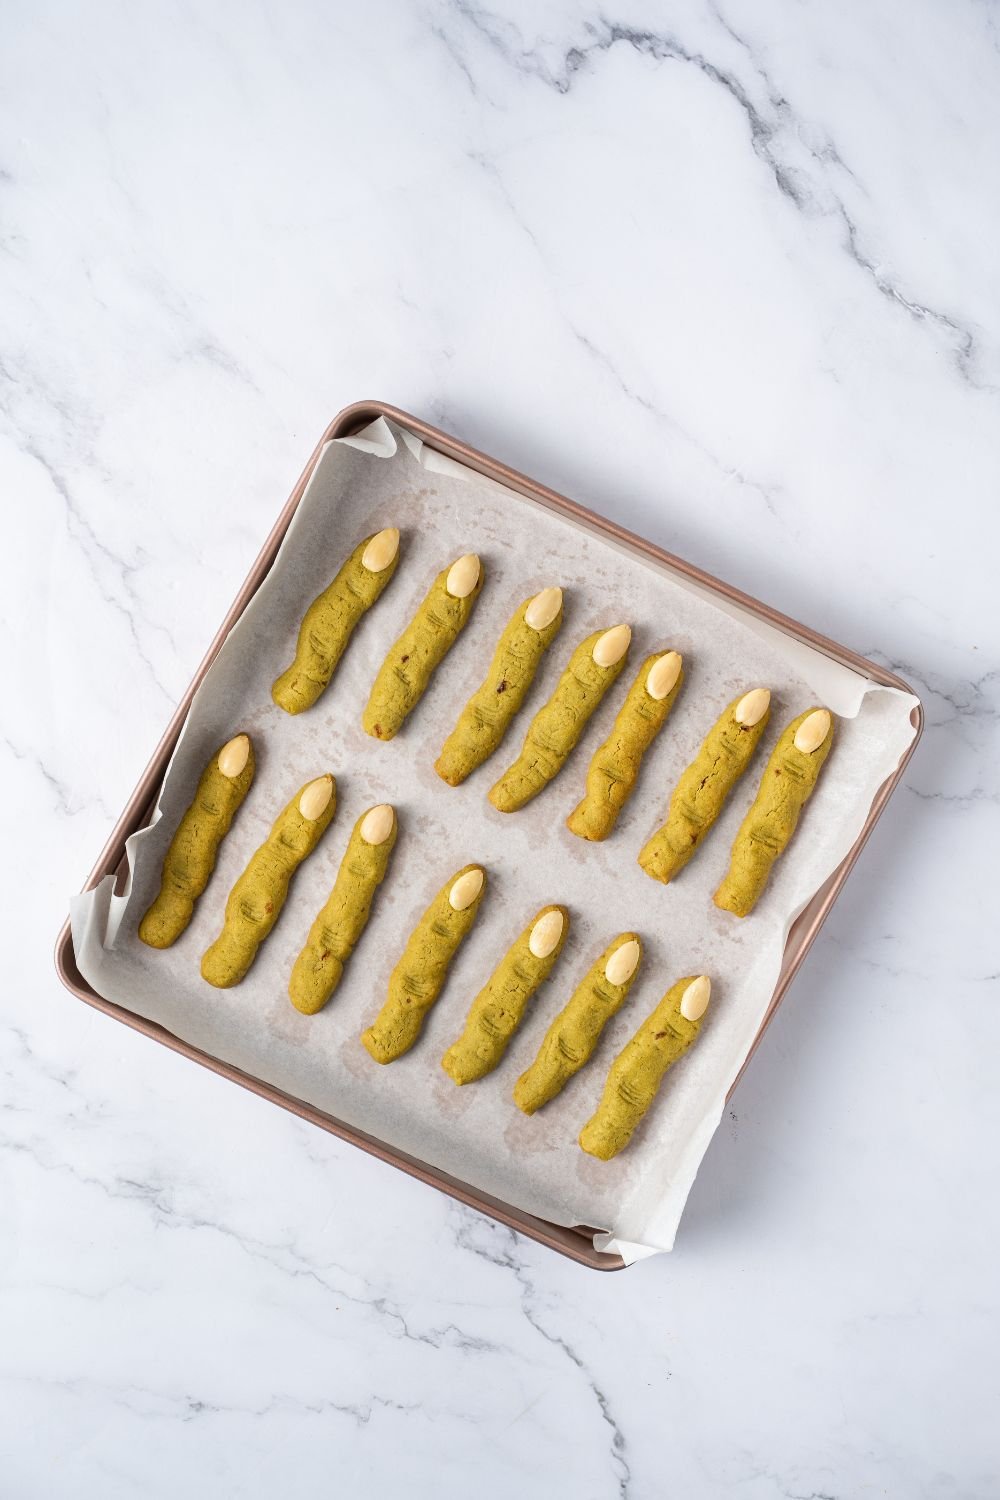
- Press a blanched almond at the tip to create the “nail.”
- Chill the shaped cookies in the fridge for another 30 minutes.
Bake
- Preheat an oven to 375°F (190°C)..
- Bake for 20–25 minutes, or until the cookies are lightly golden.
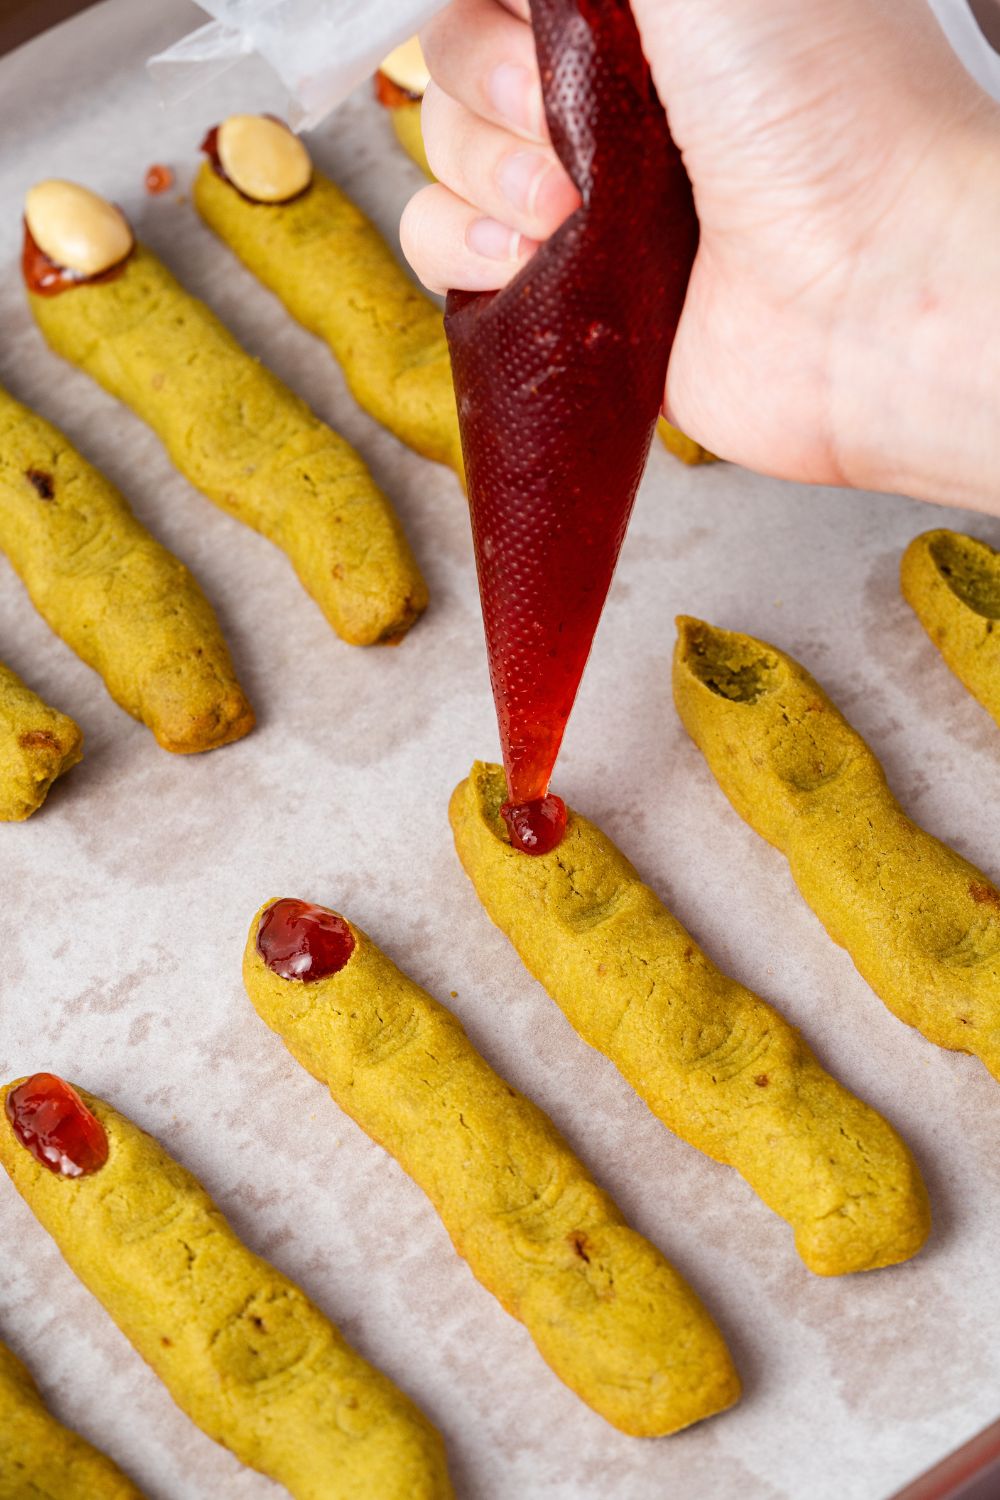
- Let them cool slightly.
- Gently remove the almond “nail,” pipe a small amount of jam into the cavity, then press the almond back in.
Serve and garnish:
- Serve once cookies are completely cool for best texture and creepy effect.
Did you make this recipe?
Make sure to follow on Pinterest for more recipes!

Leave A Reply!