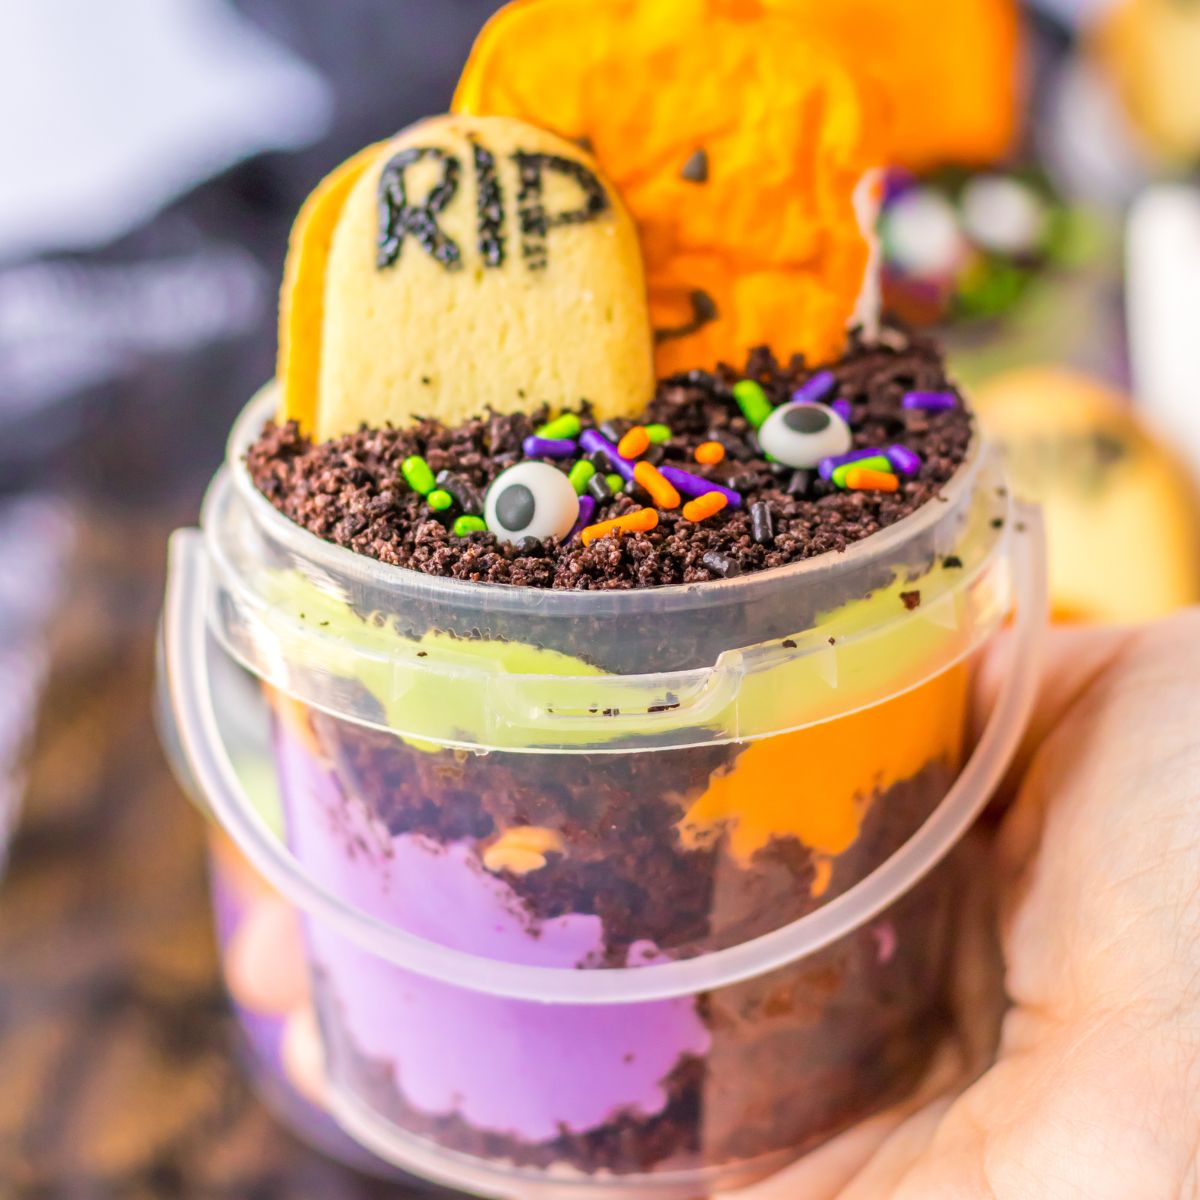
These graveyard Halloween pudding cups are a colorful and creepy tombstone-topped pudding cup recipe. This is a delicious chocolate cake paired with crushed cookies, creamy colorful pudding, Milano tombstone headstones, and more. These are festive Halloween-decorated puddings served in plastic buckets!
Whether you make this for a party snack or a treat to break up the day, you have to try these layered pudding cups. This is a fun new version of a classic dirt pudding. The added cake elevates the flavor even more.
Make sure to check out this Halloween dirt cake for another pudding and Oreo cookie dessert to consider making up. Both are fun family-friendly dessert ideas.

Reasons You Will Love These Halloween Pudding Cups
- A layered Halloween dessert that is creamy, crunchy, and bursting with sweetness in each bite.
- Quick and easy to make. You can even use a pre-made cake that will make the prep even quicker.
- An individual portioned-out dessert that is fun for parties and events. Guests can grab a pudding bucket and spoon and enjoy.
- If you have kiddos they can help make and decorate their own pudding cups to make the dessert even more fun.
- A rich and decadent chocolate dessert that will be perfect for chocolate lovers.

Ingredients Needed
- Cake – You will use a chocolate cake and the ingredients that are called on the back of the box.
- Pudding – You will use white chocolate instant pudding for this recipe. Make sure it is instant.
- Milk – Whole milk will offer the richest flavor of the pudding. But you are welcome to use less percentage of milk.
- Cool Whip – Reach for thawed Cool Whip for the mousse-like texture.
- Food Coloring – I used a few different colors of food coloring. Green, orange, and purple food coloring.
- Cookies – Crushed Oreos are going to be perfect for the “dirt” portion.
- Milano Cookies – The tombstone is going to be made with a Milano cookie. It is the perfect cookie for this.
- Halloween Candy and Sprinkles – You will use candy and sprinkles to decorate the top of the Halloween Buckets.
- Clear Buckets – Reach for plastic clear buckets or reach for plastic cups if you can’t find the buckets.


Variations to Recipe
Vanilla Flavored – Use vanilla cake, vanilla pudding that you color, and Golden Oreos, for a vanilla-flavored version instead of chocolate.
Cake – Make a homemade cake if you want. You can do any flavor of cake you would like. Vanilla, chocolate, pumpkin, etc.
Pumpkin Patch – Instead of a graveyard theme do a pumpkin patch. Top with candy pumpkins, candy corn, and other fun and friendly fall toppings.
Worms – Use gummy worms to give it that classic dirt cup vibe. But you can break Oreos in half to make them look like bat wings and then top them with candy eyes. You could also add layers of gummy worms in the layer.
Cake – Swap out the chocolate cake with a chocolate angel food cake or another type of cake if you want.
Whipped Cream – Make your own homemade whipped cream to replace the Cool Whip. Just know that homemade can break down quicker than Cool Whip.

Recipe Tips
Clear Containers
Making sure to use a clear container is going to showcase the layers of ingredients and vivid colors. This recipe is bold and colorful and so having a clear container like these plastic tubs is perfect for serving up family and friends.

Cookie Crumbs – Food Processor
Consider using a food processor to chop up the cookies to create a crumbled cookie for use in the mixture. If you don’t own a food processor you can place cookies in a bag and use a rolling pin to crush the cookies.
Coloring Pudding
You can add a little or a lot of pudding to create a vibrant and bold color for the pudding. For this recipe, we did a mix of colors to make it a blend of Halloween-themed colors.

Smooth and Even Layers
Adding nice clean layers to the pudding cups is key. That way when you look at the outside of the container you get all the colors and dimensions of the plastic container. Take your time adding layers to the containers.
Thicken Pudding
Take the time to make sure the pudding is fully mixed up and thickened before you pour it into the plastic buckets. It takes just a few minutes to thicken up the pudding.

Storing
Refrigerate any of the pudding cups until you are ready to serve them up. These are great desserts and can be made a day ahead of when you plan to serve them up.
The graveyard buckets can store for 3-5 days in the fridge. Just make sure they are fully covered so they don’t take on flavors from the fridge.
FAQs

Can I make larger batches for parties?
Go right ahead and make as many or as few as you would like. This is a fantastic recipe for making a larger batch for a crowd. Just reach for the right amount of ingredients to make a larger batch.
How do I store graveyard pudding buckets?
Cover with plastic wrap or place in a sealed container. Both of these are great for ensuring the flavors stay fresh. You can wait to top with the RIP tombstones to make it easier for storing if you want.

Are there any vegan or allergy-friendly options?
Feel free to reach for vegan-friendly or gluten-free-friendly options to make this an allergen-friendly dessert. Just read the labels of all the ingredients you purchase to use.

More Fall Recipes

Halloween Pudding Cups
Ingredients
- 1 15.25 ounce box devils food cake
- Water oil and eggs the box calls for
- 2 3.4 ounce boxes white chocolate instant pudding
- 4 cups cold milk
- 8 ounces whipped topping
- Neon green orange and purple food coloring
- 1 ½ cups crushed oreo cookies
- Milano cookies
- Halloween candy and sprinkles for decor
- 10 8 ounce clear buckets
Instructions
- Preheat the oven to 350 degrees. Then prep a 9×13 baking dish. Set it aside.
- In a large bowl add your cake mix, water, oil and eggs as directed on the cake mix box.
- Pour into the baking dish and bake as directed on the box. Once the cake is fully cooled, place on a cooling rack to cool.
- Slice the cake into bite size squares.
- While the cake is cooling you will prepare the pudding. Add the pudding in a bowl with the cold milk and mix to thicken.
- Once thickened separate into 3 bowls. Then add food coloring to each bowl to create as bright or mellow in colors as you want.
Assembling Halloween Pudding Cups
- Place some cake in the bottom of the bucket.
- Add in one color of the pudding on top.
- Repeat and add more cake, and a different color of pudidng. Repeat until all colors of pudding are used.
- Finsih the top off with Oreo cookie crumbs.
- Cut the bottom of the Milano cookie off. Then use food coloring and paint R.I.P. on the cookie and stick on top of each bucket to mimic a tombstone.
- Then you can add on candies, sprinkles, etc.
- Refrigerate for 1 hour in a covered container. Then serve and enjoy.
Did you make this recipe?
Make sure to follow on Pinterest for more recipes!

Leave A Reply!