If you’ve ever looked at a bunch of overripe bananas sitting on your counter and wished you could turn them into something magical—this is it. This Easy Banana Ice Cream is the ultimate healthy frozen treat: naturally sweet, ultra-creamy, completely dairy-free, and requires nothing more than ripe bananas and a freezer. That’s right—just bananas. It’s a little bit of soft-serve heaven made right in your food processor or high-powered blender.

My daughter absolutely loves this recipe. And even my husband—who usually turns his nose up at anything “healthy”—couldn’t believe this was made with only bananas. My 1 year old couldn’t get enough lol! It’s a staple in our house during the summer months and one of my favorite ways to reduce food waste in the tastiest way possible.
What Is One Ingredient Banana Ice Cream?
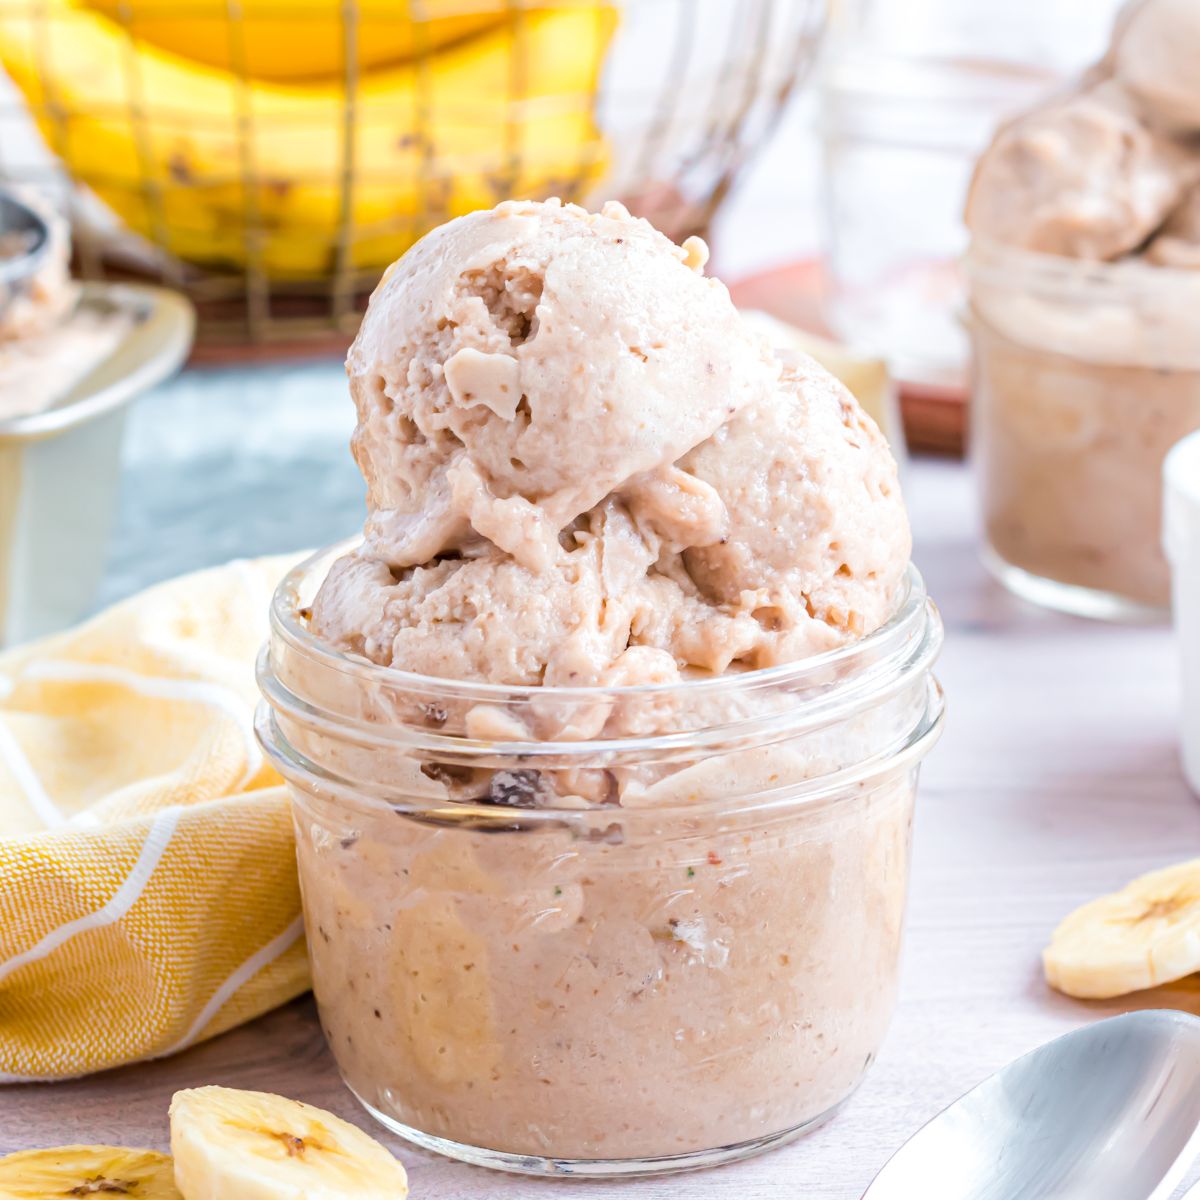
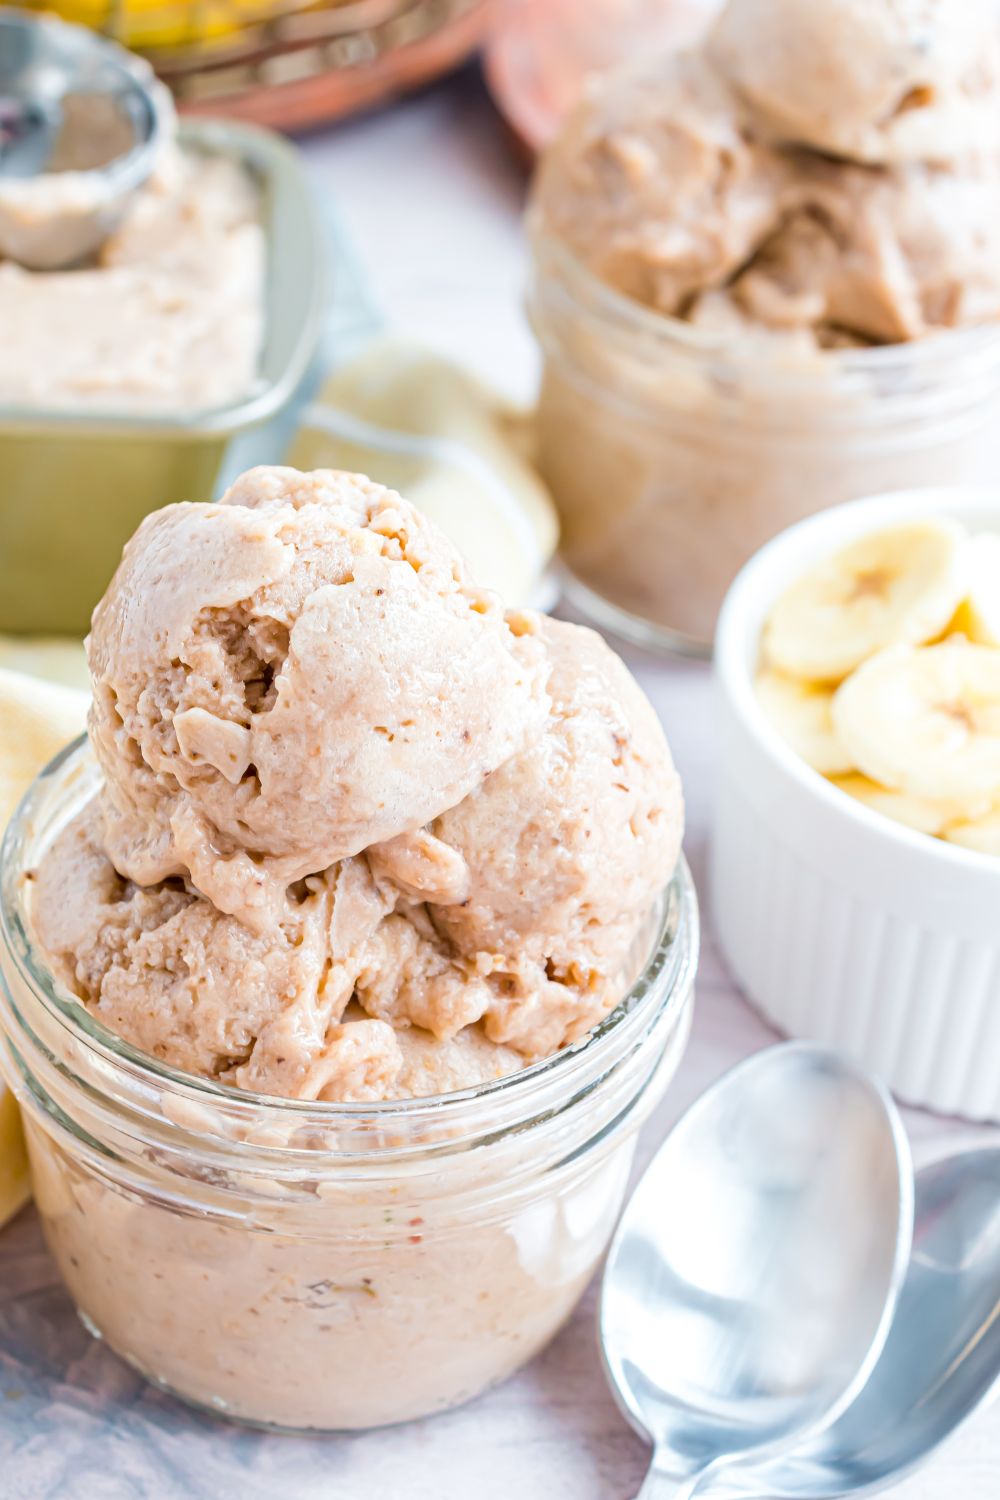
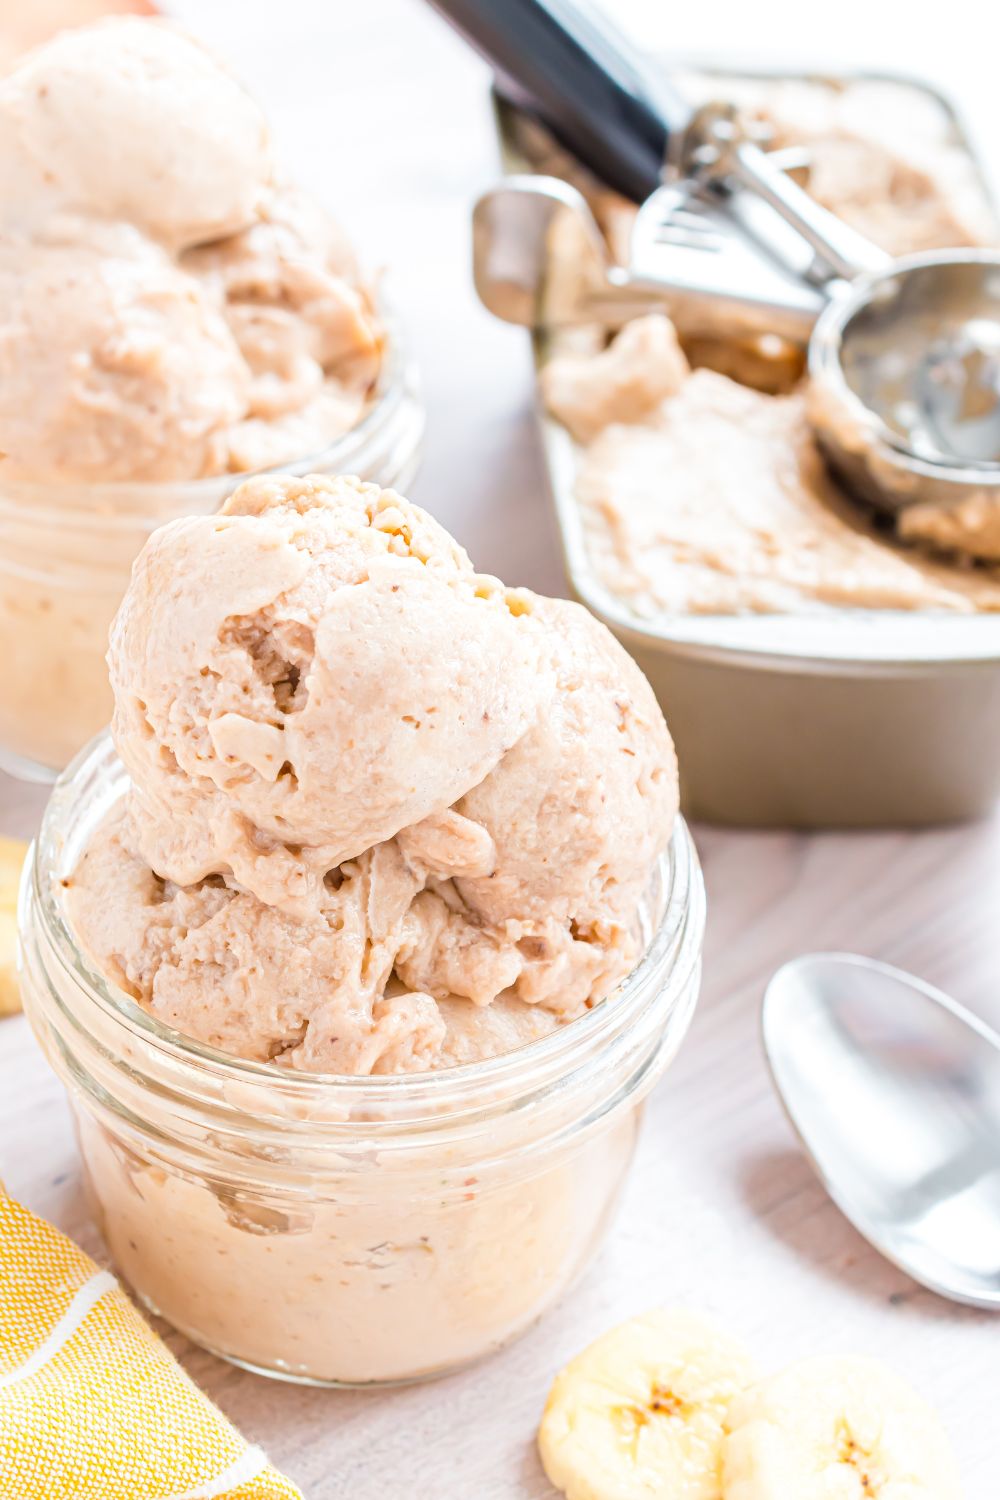
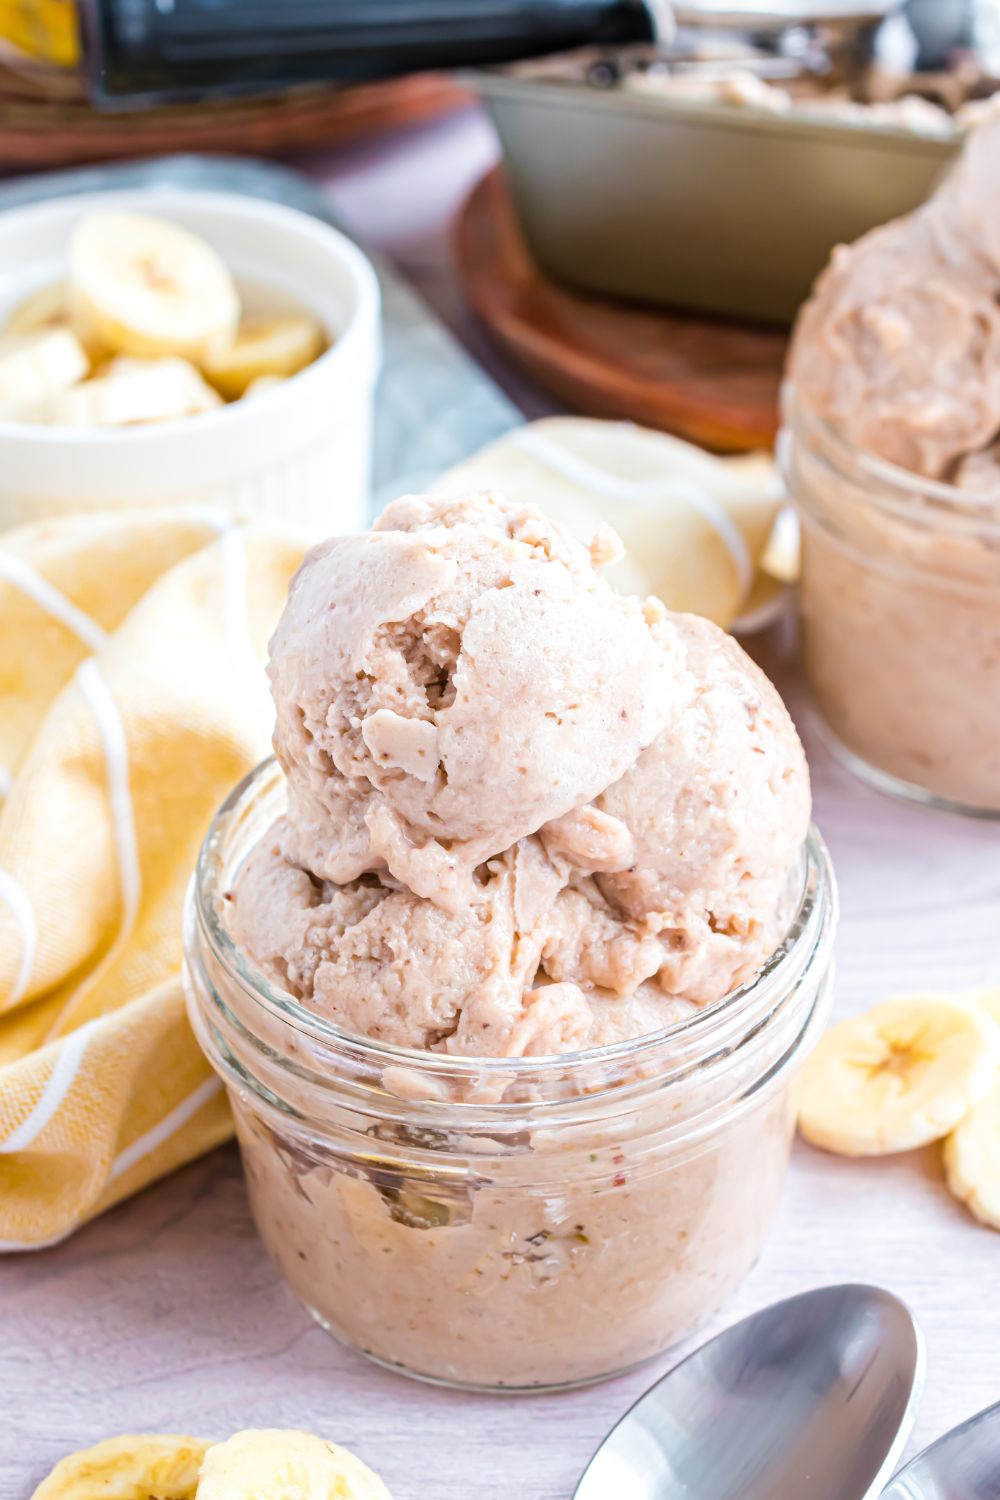
Also known as “nice cream,” this recipe is made solely from frozen bananas that have been blended into a smooth, creamy, soft-serve-style dessert. The texture is surprisingly luxurious—like real ice cream—but without the cream, eggs, sugar, or any additives. It’s naturally sweet, super customizable, and can be frozen into a firmer texture if you want to scoop it later.
When to Serve It
This banana ice cream is perfect when:
- You have ripe bananas that need to be used.
- You want a dairy-free, gluten-free, or vegan treat.
- You’re looking for a refreshing dessert during warm months.
- You want something kid-friendly and nourishing with no added sugar.
- You’re craving something cold and creamy but want to skip the guilt.
Why You’ll Love This Recipe
- One ingredient. Zero guilt. There’s literally no added sugar, dairy, or preservatives.
- Naturally sweet. The riper your bananas, the sweeter the result!
- Perfect for all diets. This recipe is vegan, plant-based, dairy-free, gluten-free, and paleo-friendly.
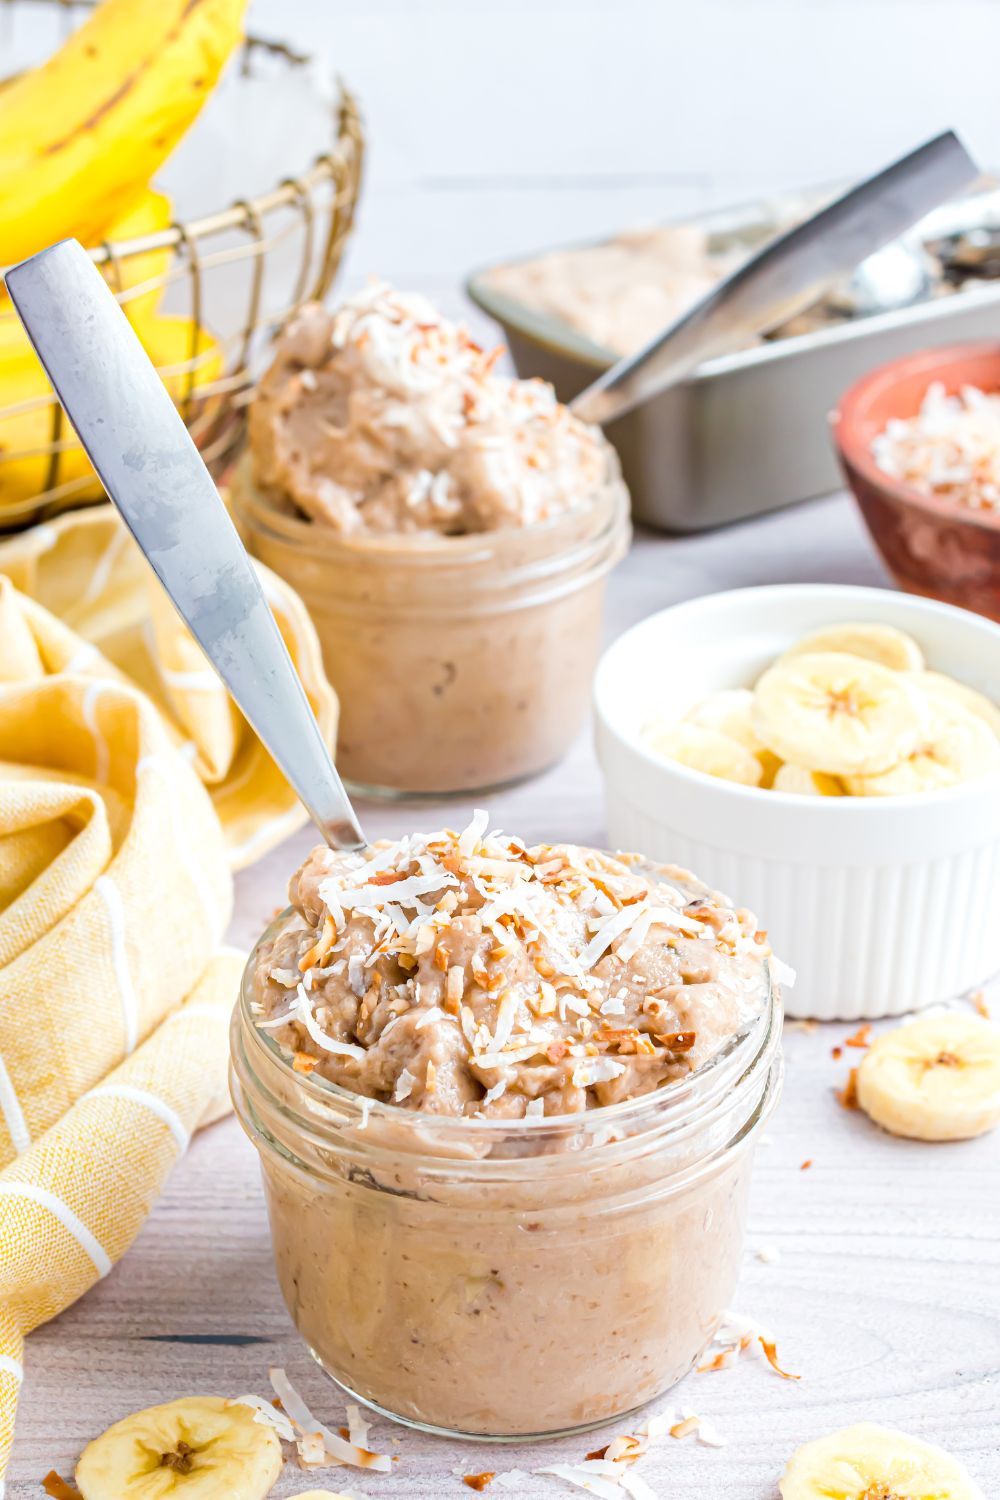
- Super customizable. Add your favorite flavors, mix-ins, or toppings.
- No fancy equipment needed. A basic food processor or high-speed blender does the trick.
Ingredient Breakdown
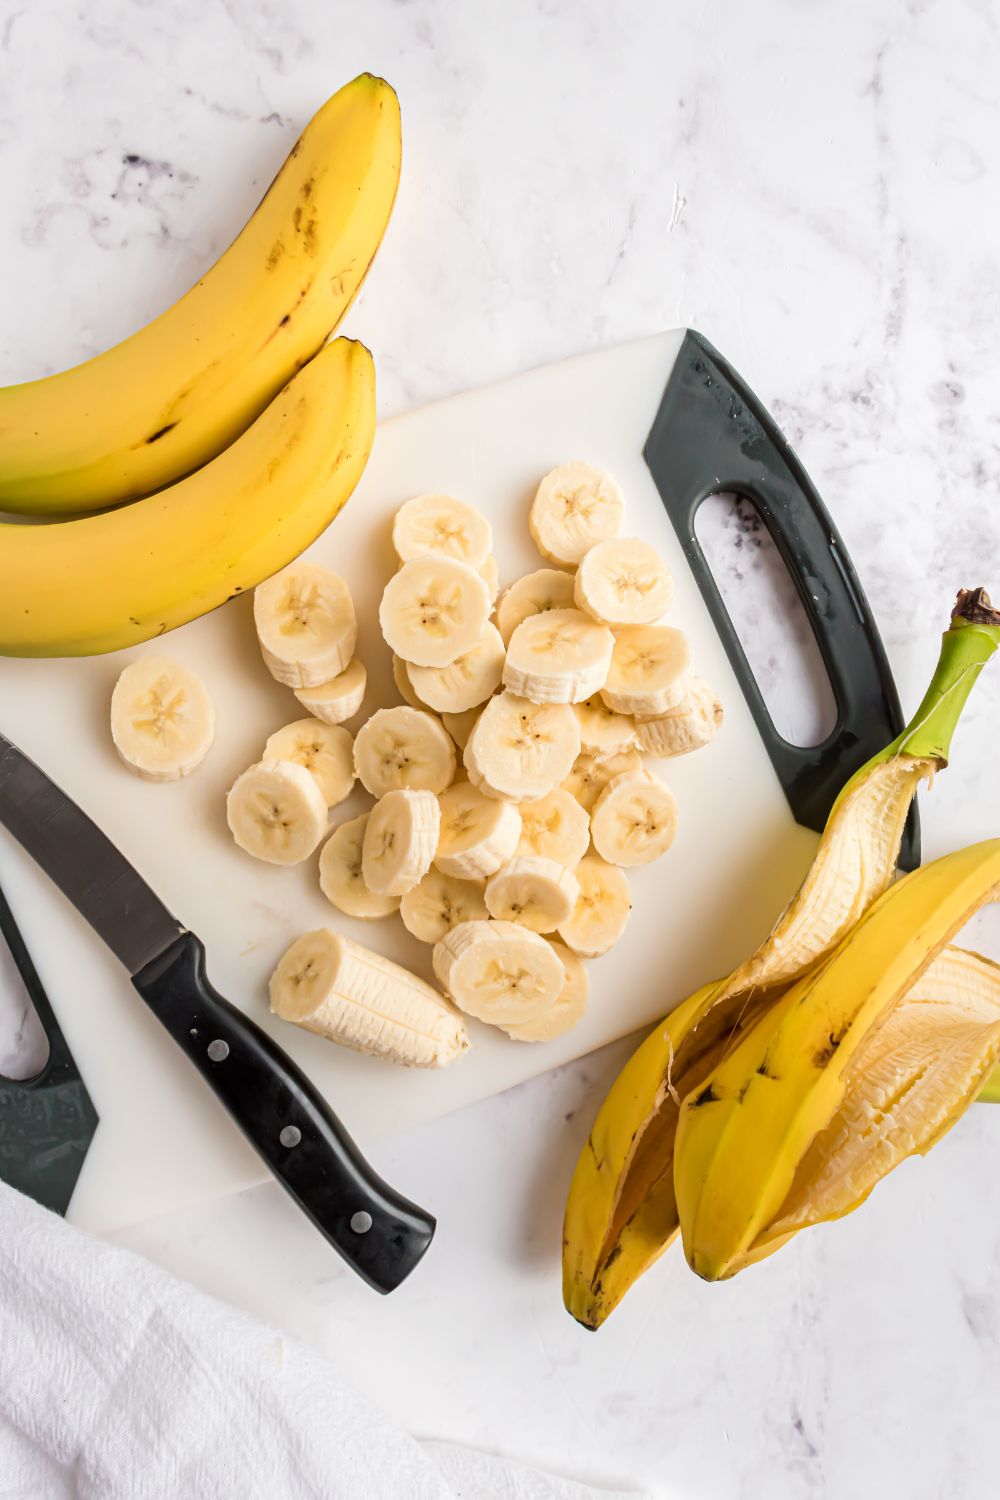
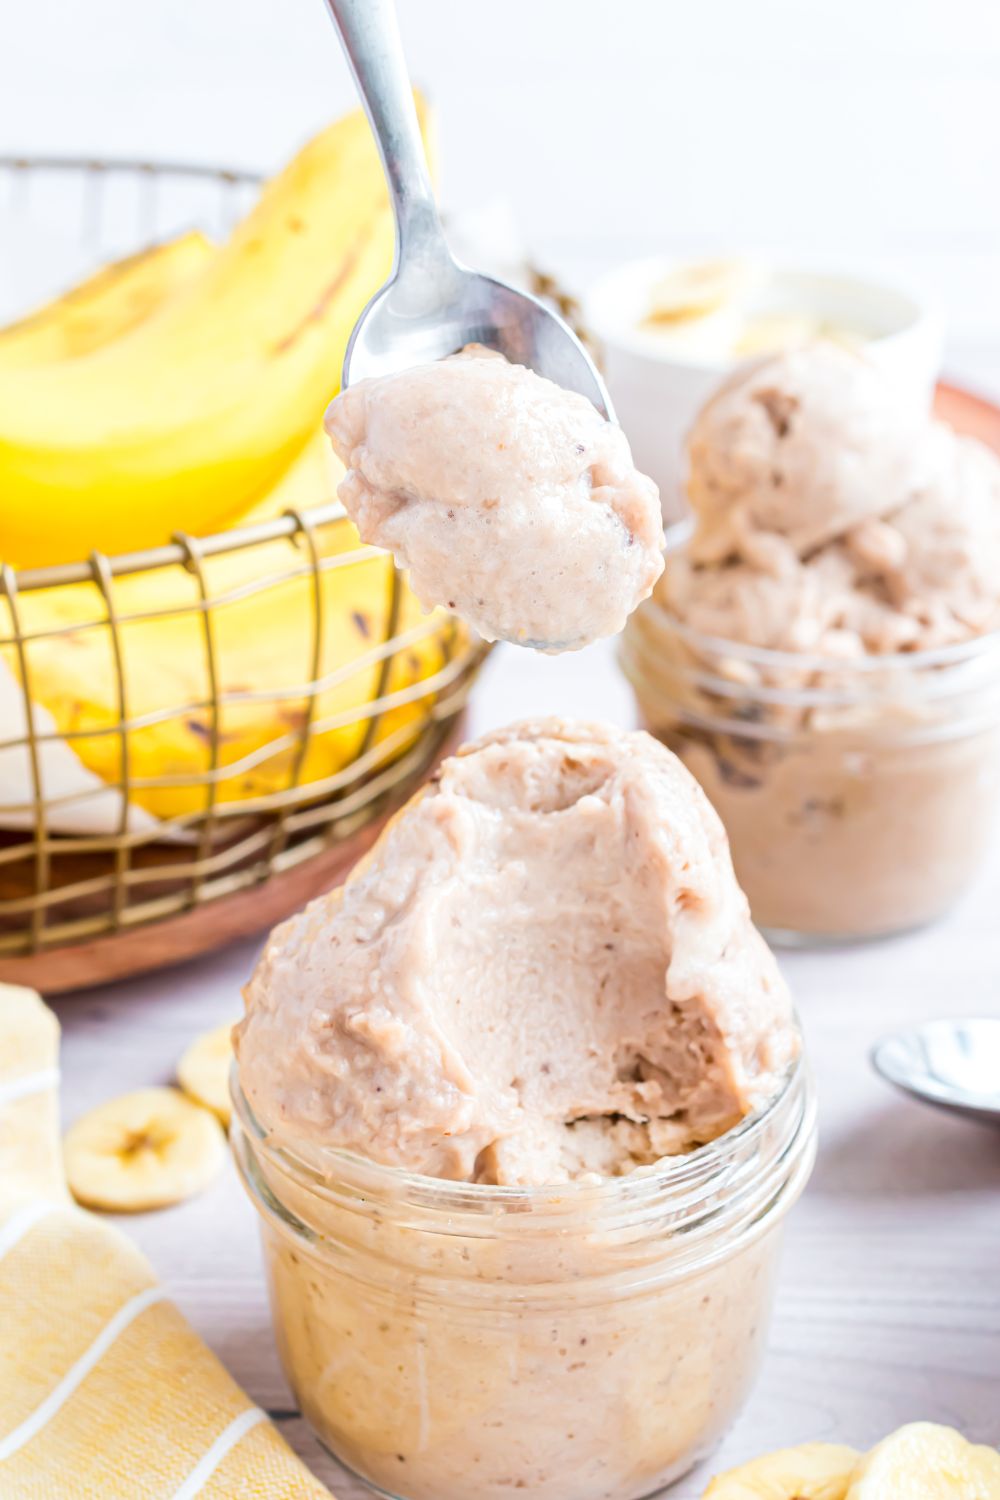
- Bananas (4 large): Use ripe bananas—those with brown spots on the peel. The more ripe, the sweeter and more flavorful your ice cream will be.
Add-Ins to Customize Your Banana Ice Cream
While the base recipe is delicious all on its own, you can take your banana ice cream to the next level with these delicious add-ins. Just toss them in during the final blending stage for best texture and distribution.
- Peanut Butter or Almond Butter – 1–2 tablespoons for creamy, nutty richness
- Unsweetened Cocoa Powder – For a chocolate banana version (use 1–2 teaspoons)
- Vanilla Extract – Just ½ teaspoon adds amazing flavor depth
- Mini Chocolate Chips or Chunks – Stir in at the end for texture
- Frozen Berries – Strawberries, raspberries, or blueberries for fruity blends
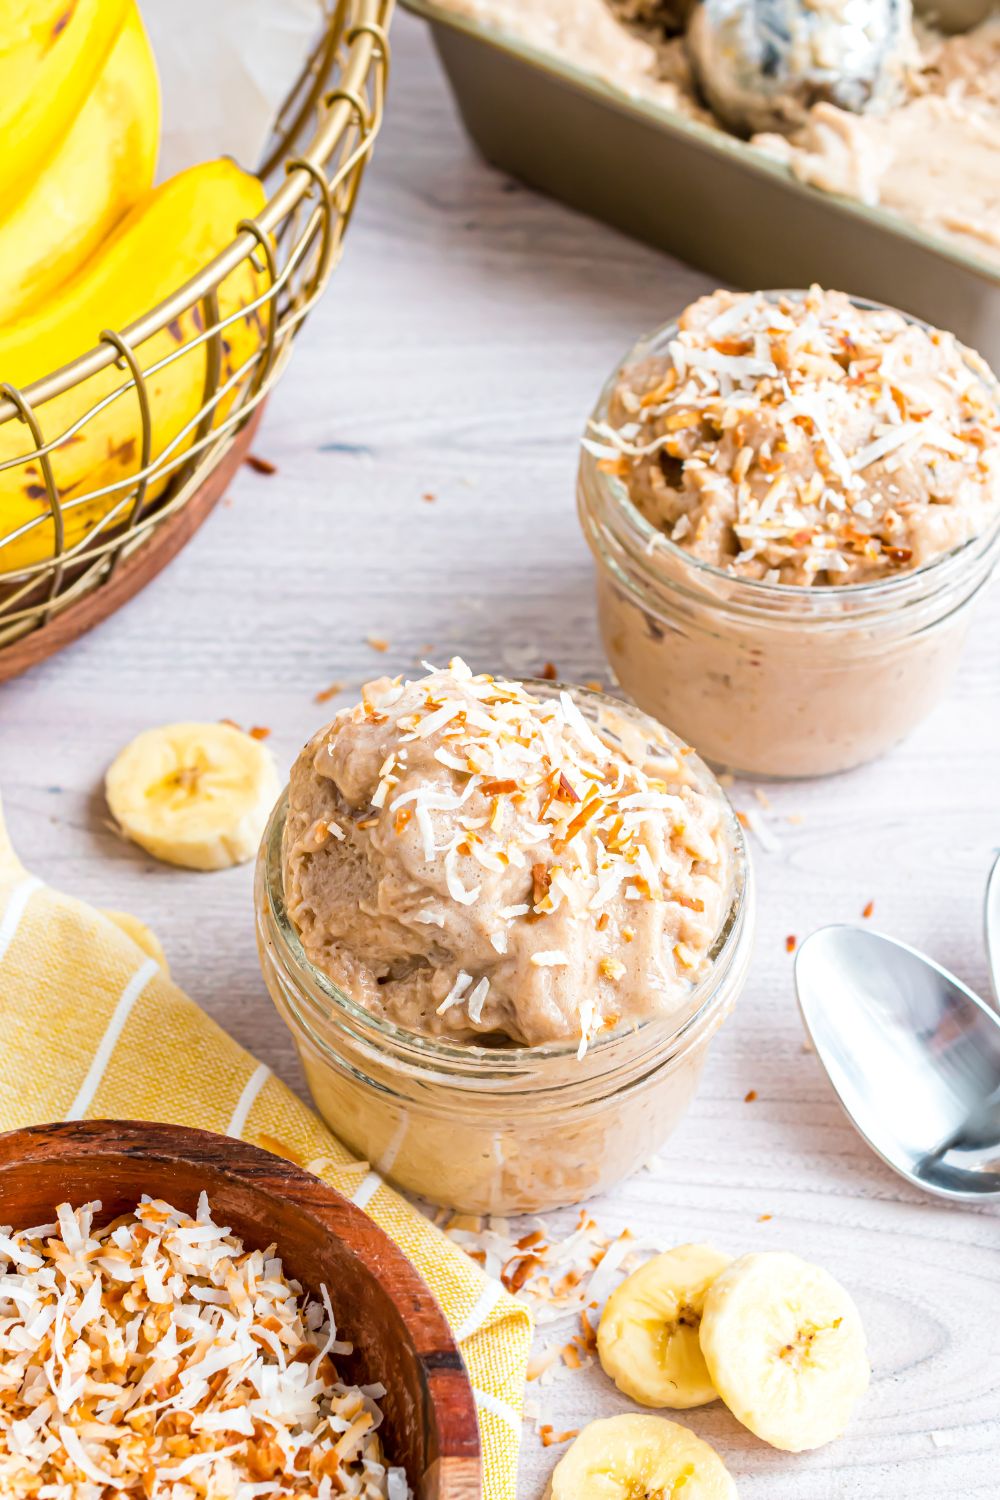
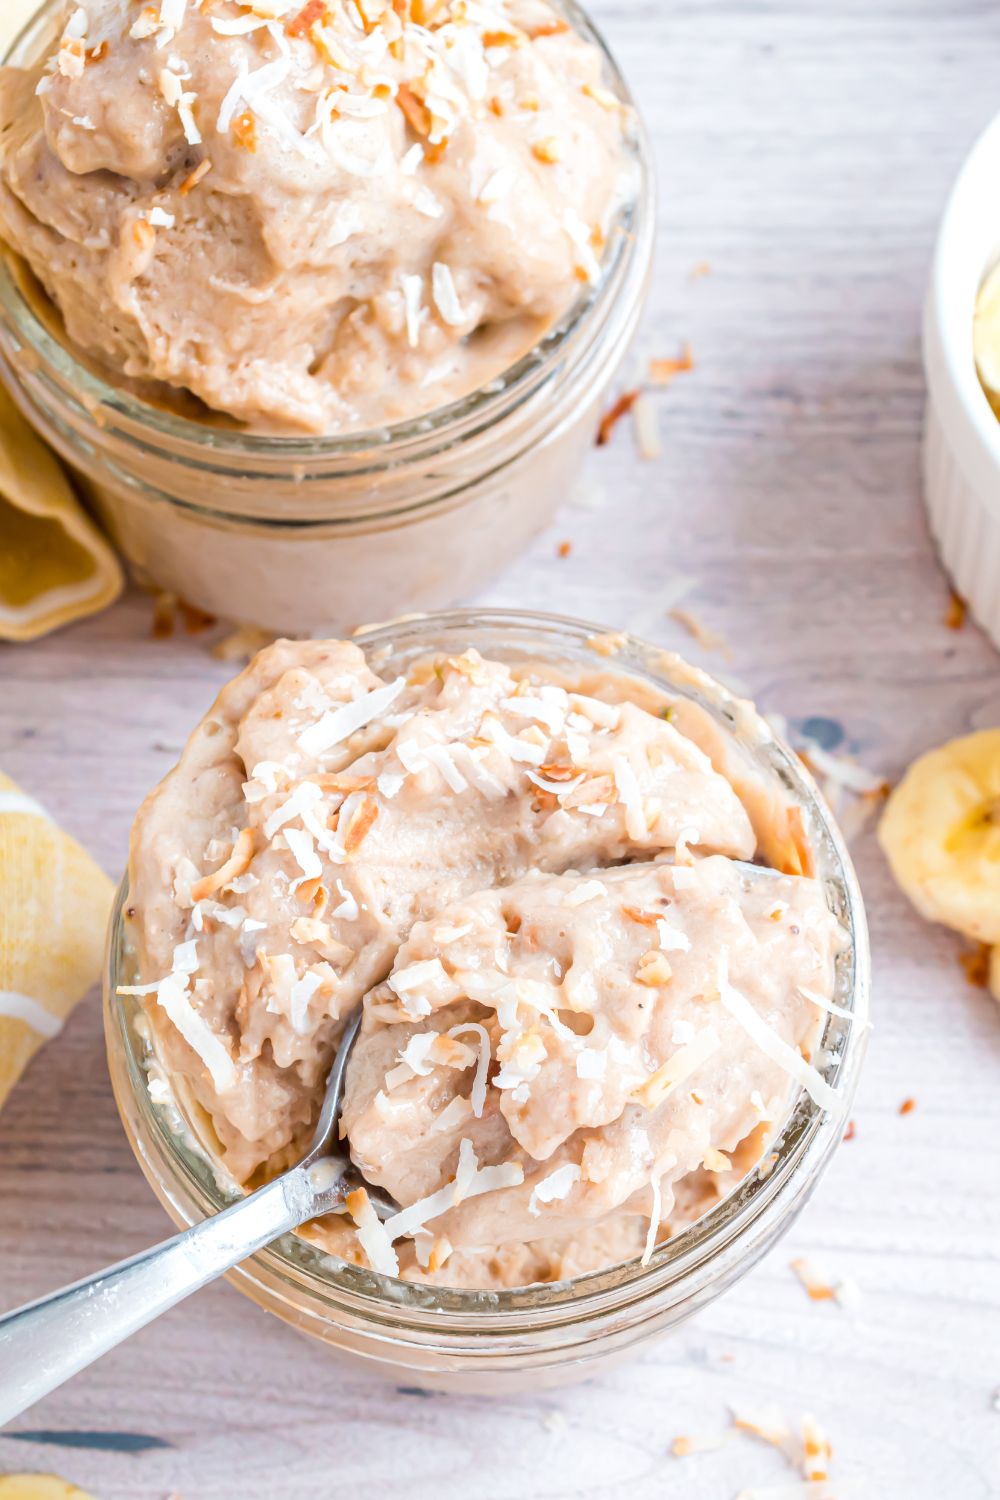
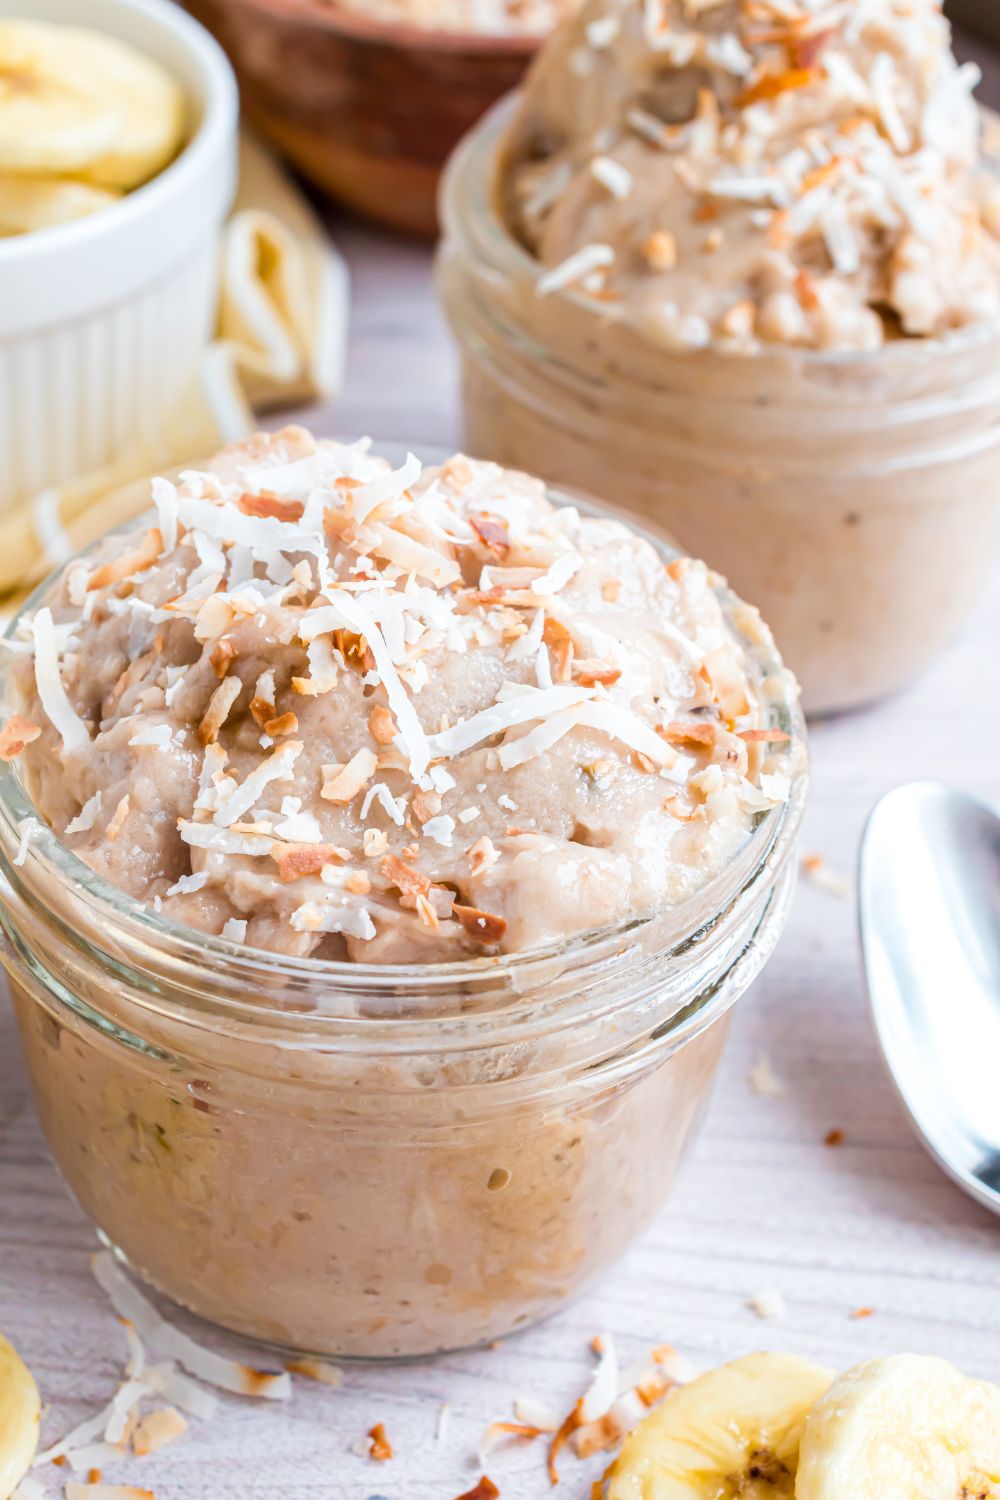
- Toasted Coconut – For a tropical flair
- Cinnamon or Pumpkin Spice – Seasonal twist perfect for fall
- Chopped Nuts – Almonds, walnuts, or pecans for crunch
- Espresso Powder – For a banana mocha experience
These small tweaks make it feel like a whole new dessert—without losing the health perks!
Lightened-Up Version Breakdown
This recipe is already about as “light” as it gets! But if you’re looking for ways to make it even more refreshing:
- Use smaller bananas to reduce portion sizes.
- Add more frozen fruit like mango or pineapple for variety and lower natural sugar per serving.
- Serve as a smoothie bowl with high-fiber toppings to increase satiety.
Budget Breakdown
Here’s how this easy banana ice cream keeps things budget-friendly:
- Bananas (4 large): ~$0.80–$1.00 total
- That’s about $0.25 per serving if you get four cups out of the recipe.
- No cream, no eggs, no sugar, no extra ingredients—just straight from your freezer.
- Cheaper (and healthier!) than any store-bought pint of dairy-free ice cream.
Troubleshooting Tips
- Ice cream is crumbly and not blending well? Add a splash of almond milk or let the bananas sit for a few minutes before blending.
- Texture not creamy? Be patient. It takes a good 8–10 minutes of pulsing and scraping for it to turn creamy in a food processor.
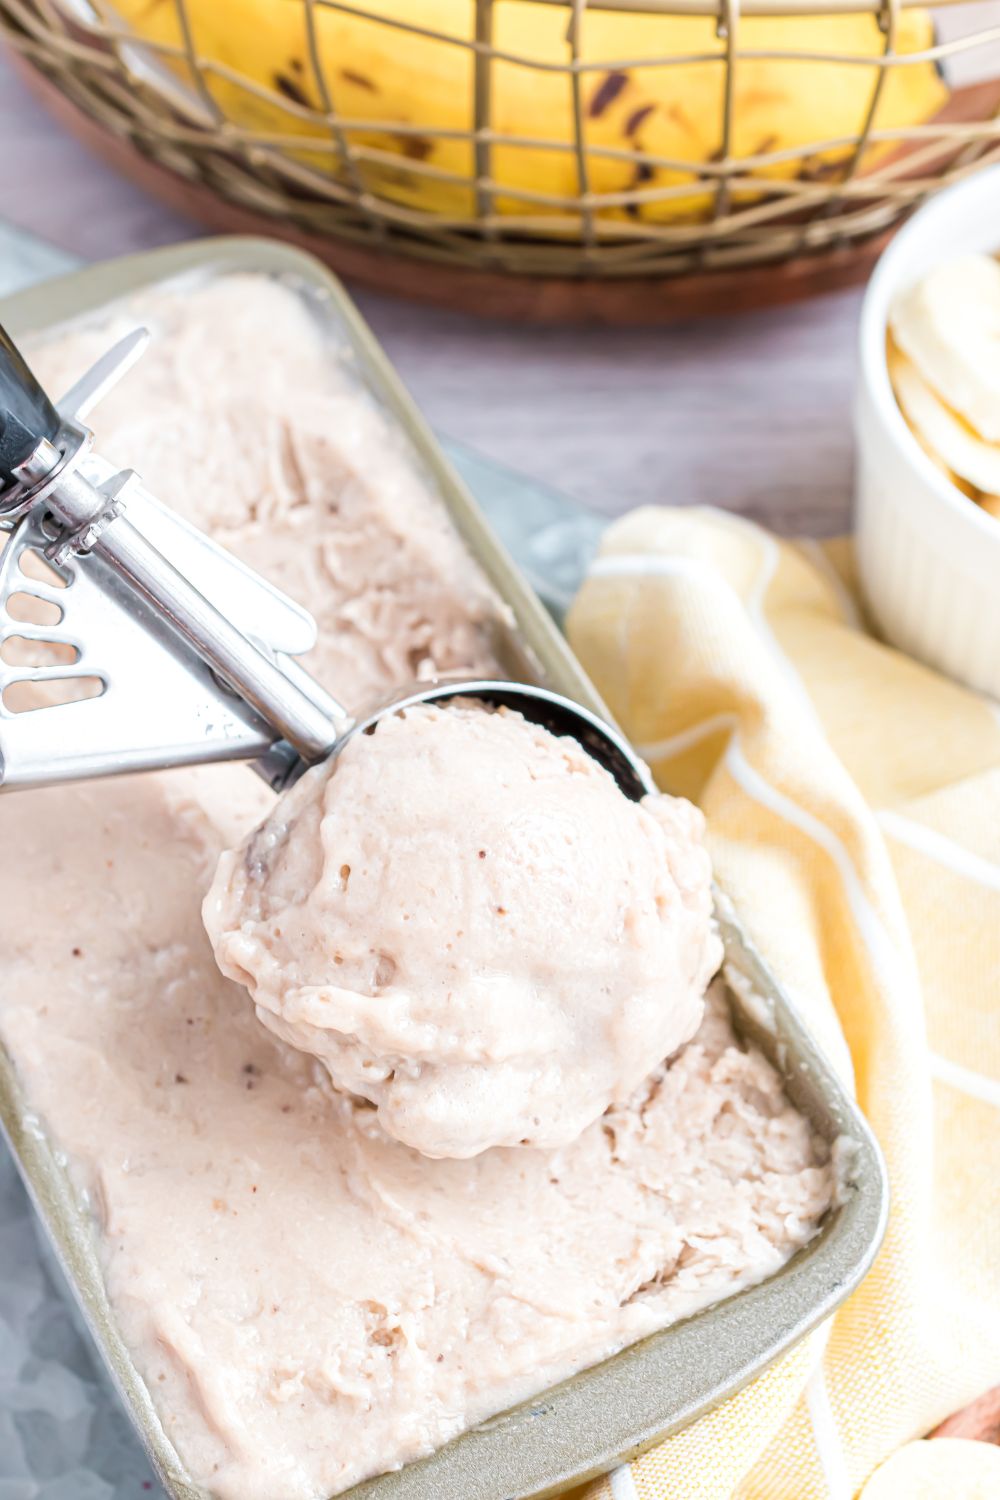
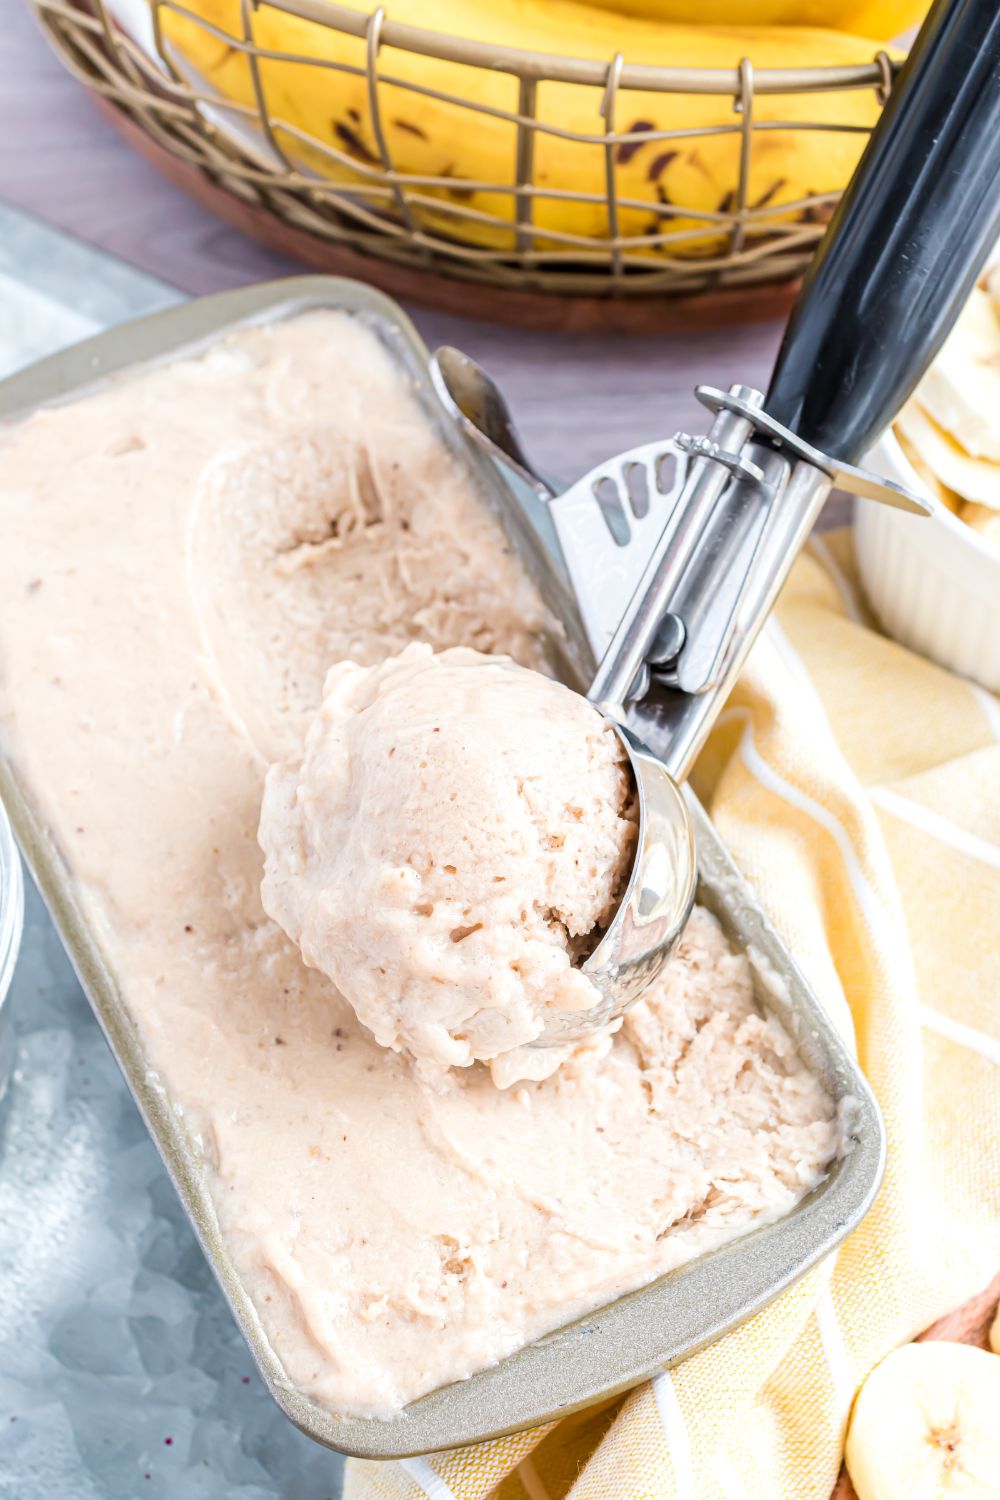
- Too soft to scoop? Freeze for 1–2 hours after blending for that classic scoopable texture.
- Brown and gooey? This happens if you mash then freeze. Always freeze banana slices, not mashed bananas.
Make-Ahead & Tips
- For the creamiest texture, serve as soft serve right after blending or freeze in popsicle molds for a fun handheld version.
Banana Ice Cream Storage Hacks
You’ve made the perfect batch of banana nice cream—now how do you store it?
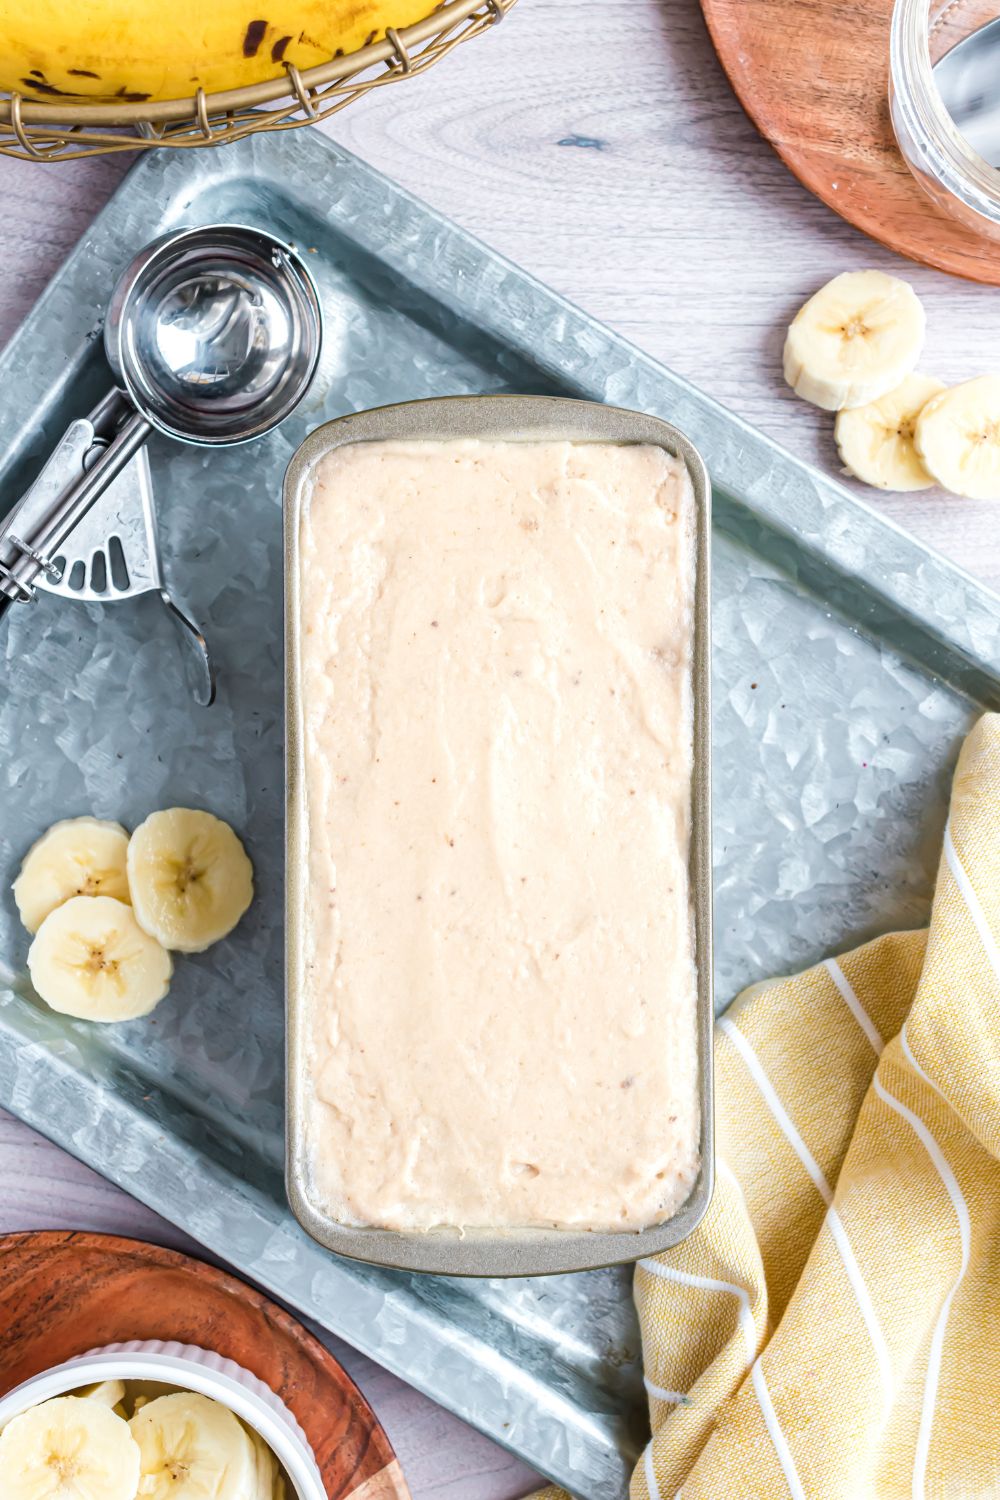
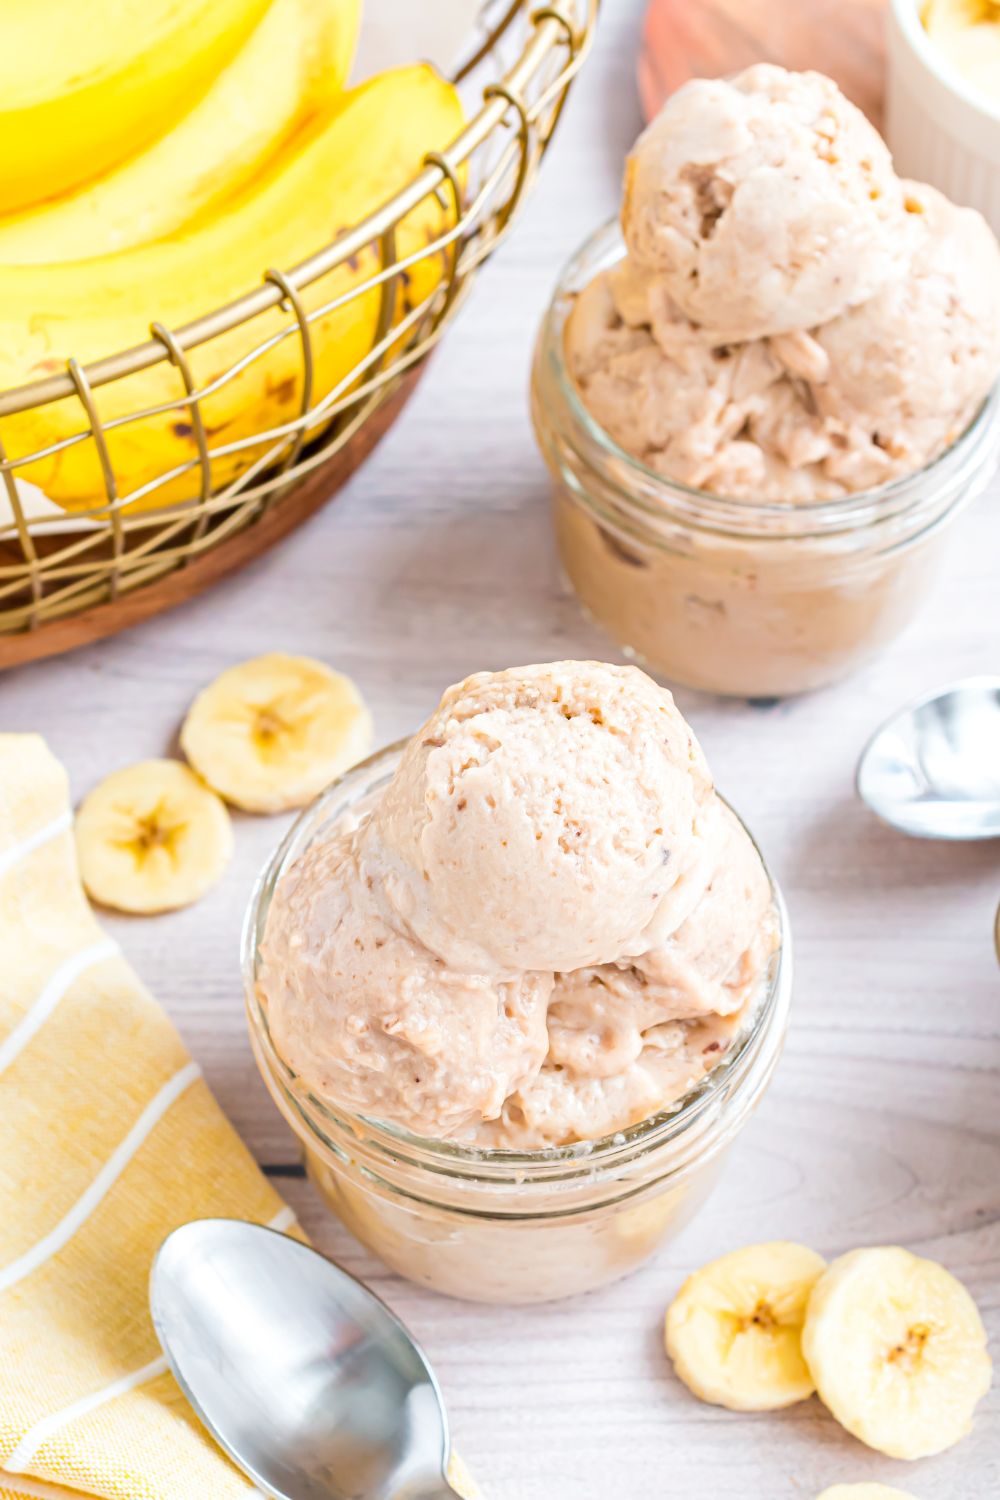
- Freeze in a loaf pan – Line a small loaf pan with parchment paper for easy removal and classic scooping.
- Use silicone molds – Great for kid-friendly portions or making fun shapes.
- Portion into small jars – Handy for grab-and-go desserts or single servings.
- Store airtight – Always use an airtight container to prevent freezer burn and maintain that smooth, creamy texture.
Banana ice cream is best enjoyed fresh, but it can be stored in the freezer for up to 3 months. Let it sit out at room temperature for 10–15 minutes before scooping to soften it slightly.

Flavor Variations to Try
Once you’ve mastered the base recipe, the possibilities for creative twists are endless. This banana ice cream is the perfect blank canvas for so many delicious flavors! Here are a few of our favorite variations:
- Peanut Butter Banana Ice Cream – Add 1–2 tablespoons of creamy peanut butter while blending. It’s rich, nutty, and incredibly satisfying.
- Chocolate Banana Ice Cream – Blend in 1 tablespoon of unsweetened cocoa powder for a decadent, dairy-free chocolate treat.
- Strawberry Banana Ice Cream – Toss in a handful of frozen strawberries for a fruity, naturally sweet blend that kids adore.
- Vanilla Bean Banana Ice Cream – Add ½ teaspoon of pure vanilla extract or real vanilla bean paste for an elegant, creamy finish.
- Cinnamon Banana Ice Cream – A pinch of ground cinnamon adds cozy warmth and is especially delicious when topped with nuts.
These simple add-ins transform your one-ingredient banana base into a gourmet frozen dessert with barely any extra effort!
Sugar-Free Version?
Good news—this recipe is naturally sugar-free as-is! There’s no added sugar required. The sweetness comes from the ripeness of the bananas. The riper they are (think brown speckled skins), the sweeter your ice cream will taste.
Why This is Called ‘Nice Cream’
If you’ve seen the term “nice cream” floating around online, this banana ice cream is exactly what that means! It’s a plant-based, dairy-free ice cream alternative made entirely from frozen fruit—most often bananas—without added sugar or cream.
What makes it “nice”?
- No dairy
- No added sugar
- No weird ingredients
- No guilt
It’s a healthier option for those following a vegan, gluten-free, or refined sugar-free lifestyle, and it still satisfies those ice cream cravings. The naturally sweet flavor and creamy consistency of ripe bananas makes this dessert feel indulgent—without any of the typical ice cream heaviness.
FAQ
Can I use a blender instead of a food processor?
Yes, but make sure it’s a high-powered blender, and cut the bananas into small chunks before freezing for easier processing.
How many bananas do I need per serving?
One large banana yields about 1 cup of ice cream. So for four servings, use about four large bananas.
Can I add other fruits?
Absolutely! Blueberries, strawberries, mango, and even pineapple work well. Add them during the final stage of blending.
Why is my banana ice cream too runny?
It likely wasn’t frozen long enough, or your kitchen appliance warmed it up during blending. Freeze for 1–2 hours before serving to fix this.
Can I use frozen bananas that were mashed before freezing?
No, this results in an unpleasant, sticky, and gooey texture. Always freeze banana slices or small chunks instead.
Can I refreeze banana ice cream after serving?
Yes, but it will harden significantly. Let it sit at room temperature for 10–15 minutes before scooping.
Can I make this in bulk?
Yes! Just scale the bananas to the size of your food processor. Store extras in loaf pans or freezer containers.
Can kids eat this?
Yes—this is a kid-friendly, allergy-conscious treat that’s perfect for toddlers and older kids alike.
Best Bananas to Use
For the best texture and flavor, always use ripe bananas—the kind you’d usually save for banana bread. Look for bananas that are:
- Deep yellow with plenty of brown spots
- Very soft when gently squeezed
- Extra sweet and fragrant
These bananas have broken down more starch into sugar, which is key for the smoothest, creamiest “ice cream.” Under-ripe bananas are too firm and bland, while overly mushy ones may have too much moisture.
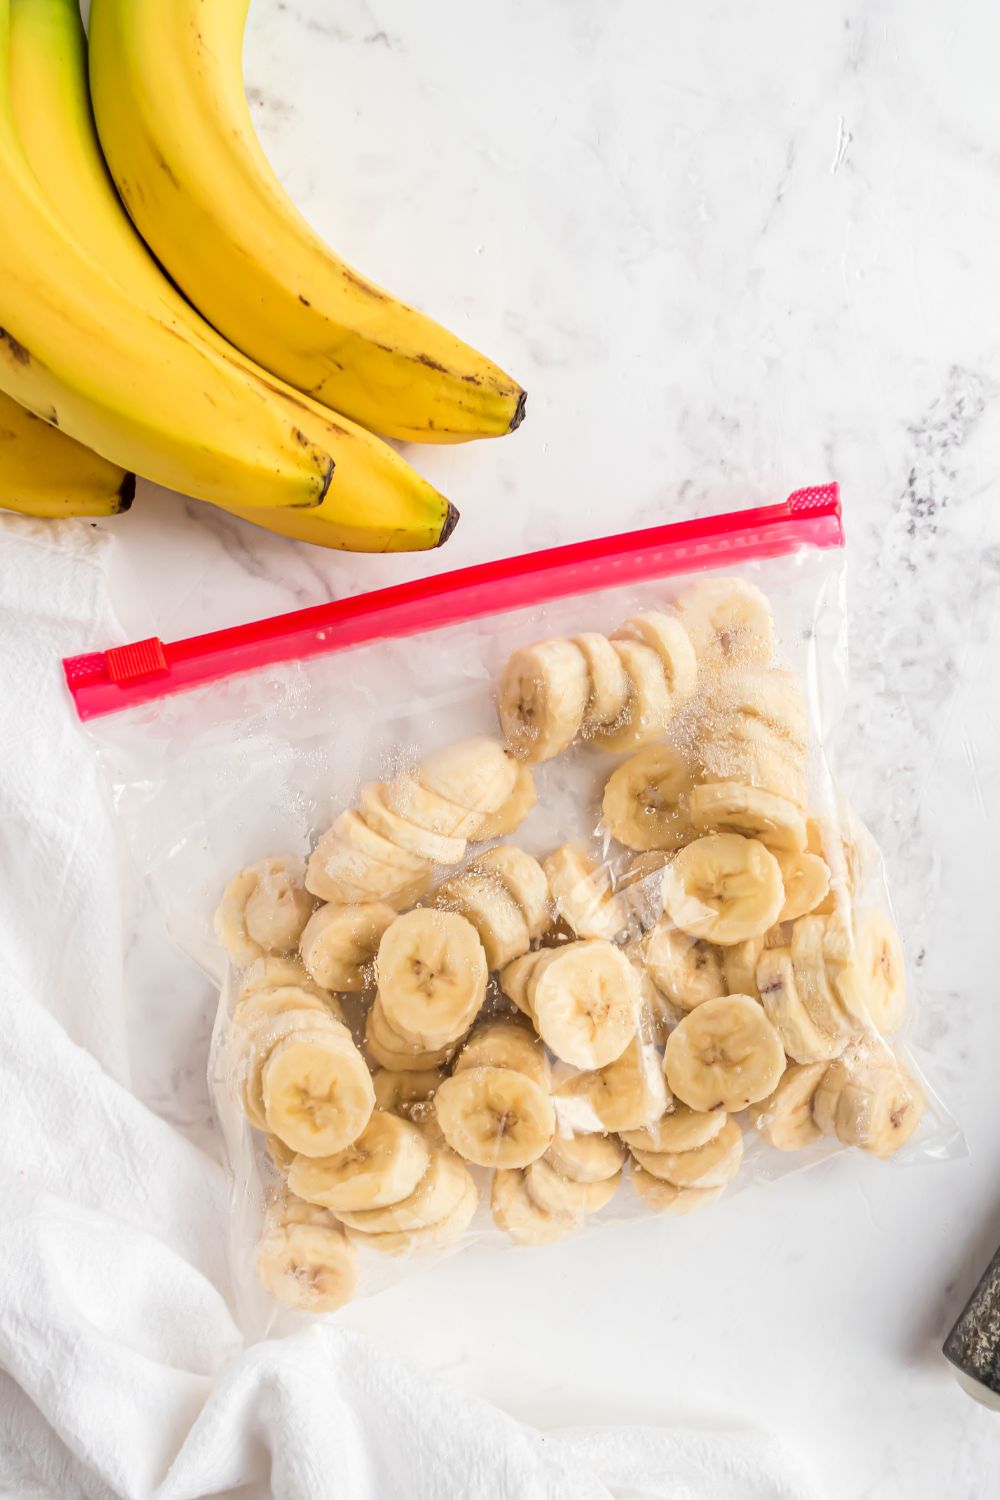
Tip: Cut the bananas into smaller pieces before freezing to speed up the blending process and reduce strain on your processor.
What Equipment Works Best?
Even though this recipe only requires one ingredient, the equipment you use can make a big difference in how creamy and luscious your banana ice cream turns out.
Best Options:
- Food Processor (Preferred) – A strong food processor is ideal for breaking down frozen banana chunks. It powers through the frozen pieces and whips them into a soft serve texture with ease.
- High-Powered Blender – Like My Vitamix A3500
I personally adore my Vitamix A3500 and use it often for this recipe. It’s powerful enough to handle frozen bananas with minimal fuss, especially when the bananas are cut into small pieces before freezing. It blends everything down into a velvety soft serve and is worth every penny. If you’re looking for a serious blender upgrade, this is the one I recommend buy HERE, which helps support my blog at no extra cost to you!
💡 Tip: Add a splash of unsweetened almond milk while blending if your machine needs a little help getting started.
Equipment to Avoid:
- Standard Low-Power Blenders – These often lack the strength needed to fully process frozen bananas without overheating or jamming. If you’re using one, be sure to freeze your banana pieces very small and add a little liquid to help things along.
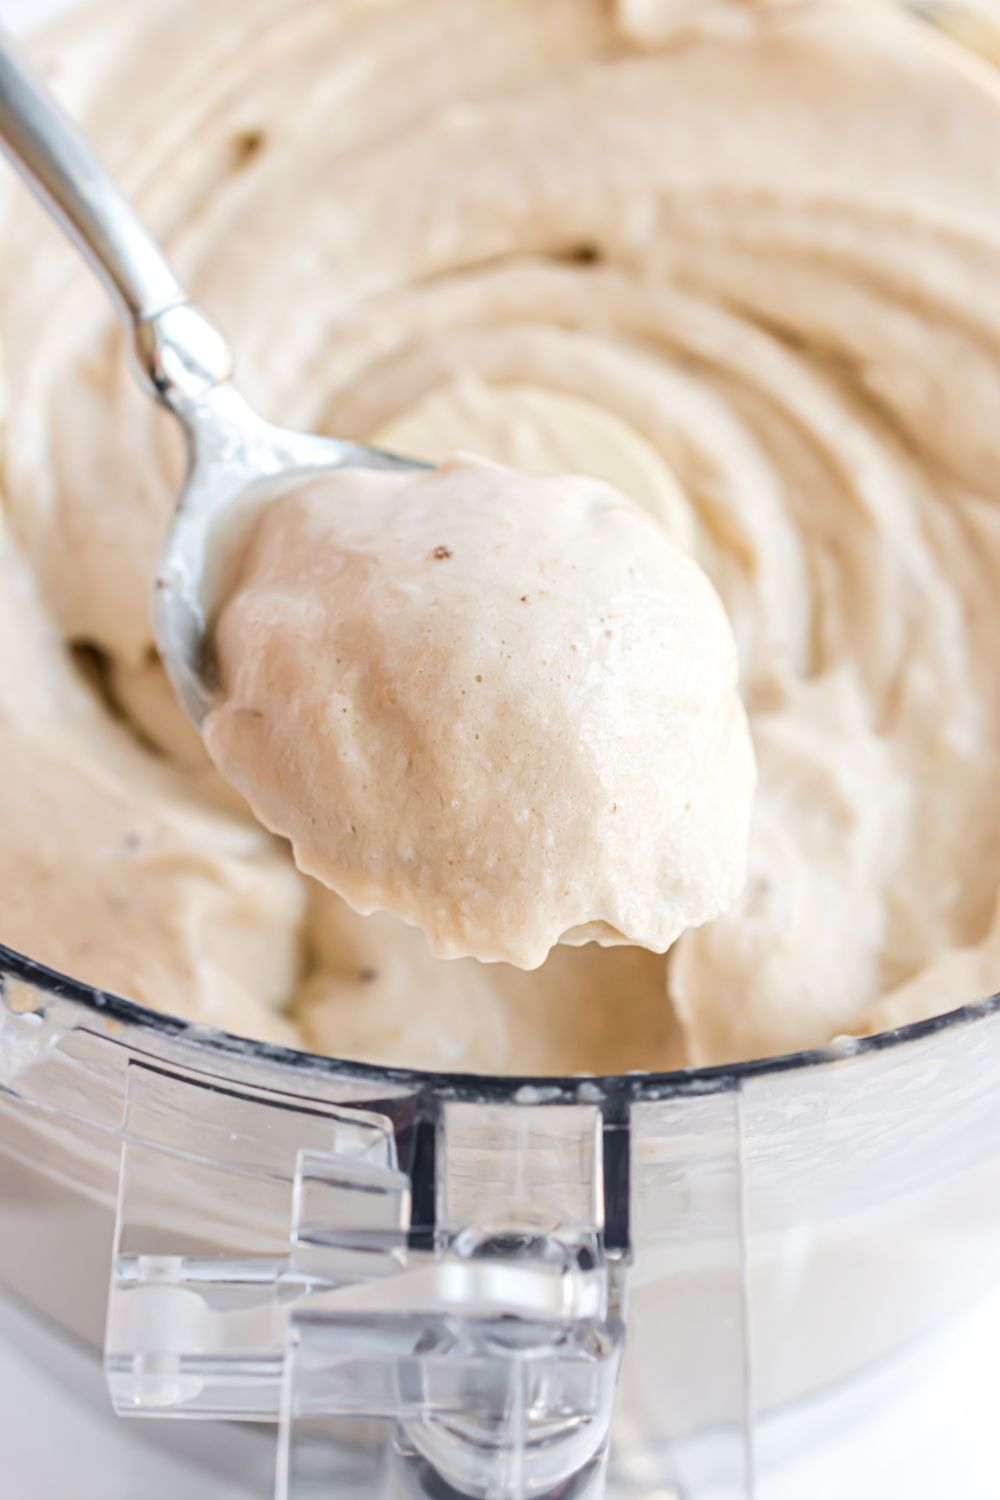
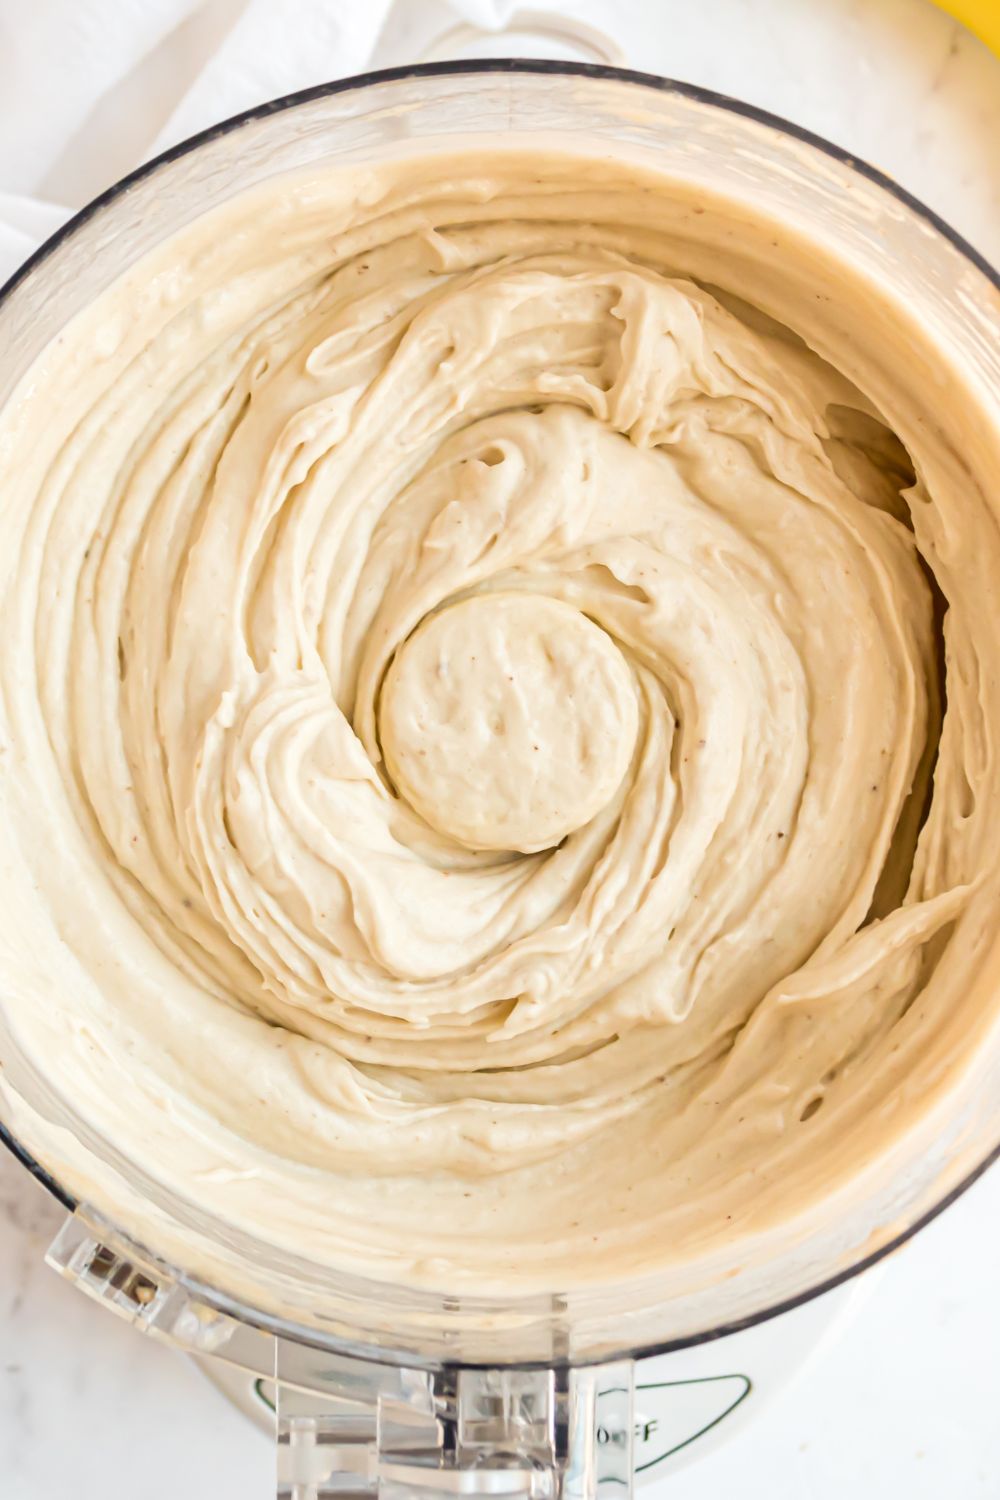
Blending tip: Go slowly. Start with pulsing to break down the chunks, scrape often, and once the mixture gets smooth, blend a little longer to whip air in. It’ll take about 10 minutes total to transform your frozen bananas into a dreamy soft serve texture.
Final Thoughts
One Ingredient Banana Ice Cream is the ultimate minimalist dessert that checks every box—healthy, affordable, kid-approved, vegan, gluten-free, dairy-free, and downright delicious. Whether you enjoy it soft and creamy straight from the blender or frozen to scoop and serve later, this is one of those “too good to be true” recipes that delivers every single time. It’s a staple in our freezer now, and I can’t wait for you to try it!

My Favorite Blender for Banana Ice Cream
When it comes to frozen banana ice cream, texture is everything—and the right blender makes all the difference. I use my Vitamix A3500, and honestly, I couldn’t love it more. It blends frozen bananas into a smooth, scoopable “ice cream” texture without any added liquid, which is exactly what you want for that soft-serve consistency.
What I especially love is how it powers through rock-solid banana chunks without overheating or getting stuck. I just toss the frozen banana slices in, use the “Frozen Desserts” preset, and let it do its thing. The result is creamy, silky, dairy-free banana ice cream in under 2 minutes. If you’re serious about smoothies, frozen desserts, or meal prep, this is one kitchen tool that pays for itself. I’ve used mine almost daily for years now.
👉 Here’s the exact one I use – the Vitamix A3500 on Amazon
It’s worth every penny, and yes—you’ll taste the difference.
Dessert Ideas
- No Bake M&M Energy Balls
- Weight Watchers Strawberry Muffins
- Banana Cream Cheesecake
- Strawberry Cheesecake Ice Cream

Banana Ice Cream
Ingredients
- 4 large bananas sliced or cut into small pieces
Instructions
- Place sliced bananas into a freezer bag and freeze for at least 4 hours until solid, preferably overnight.
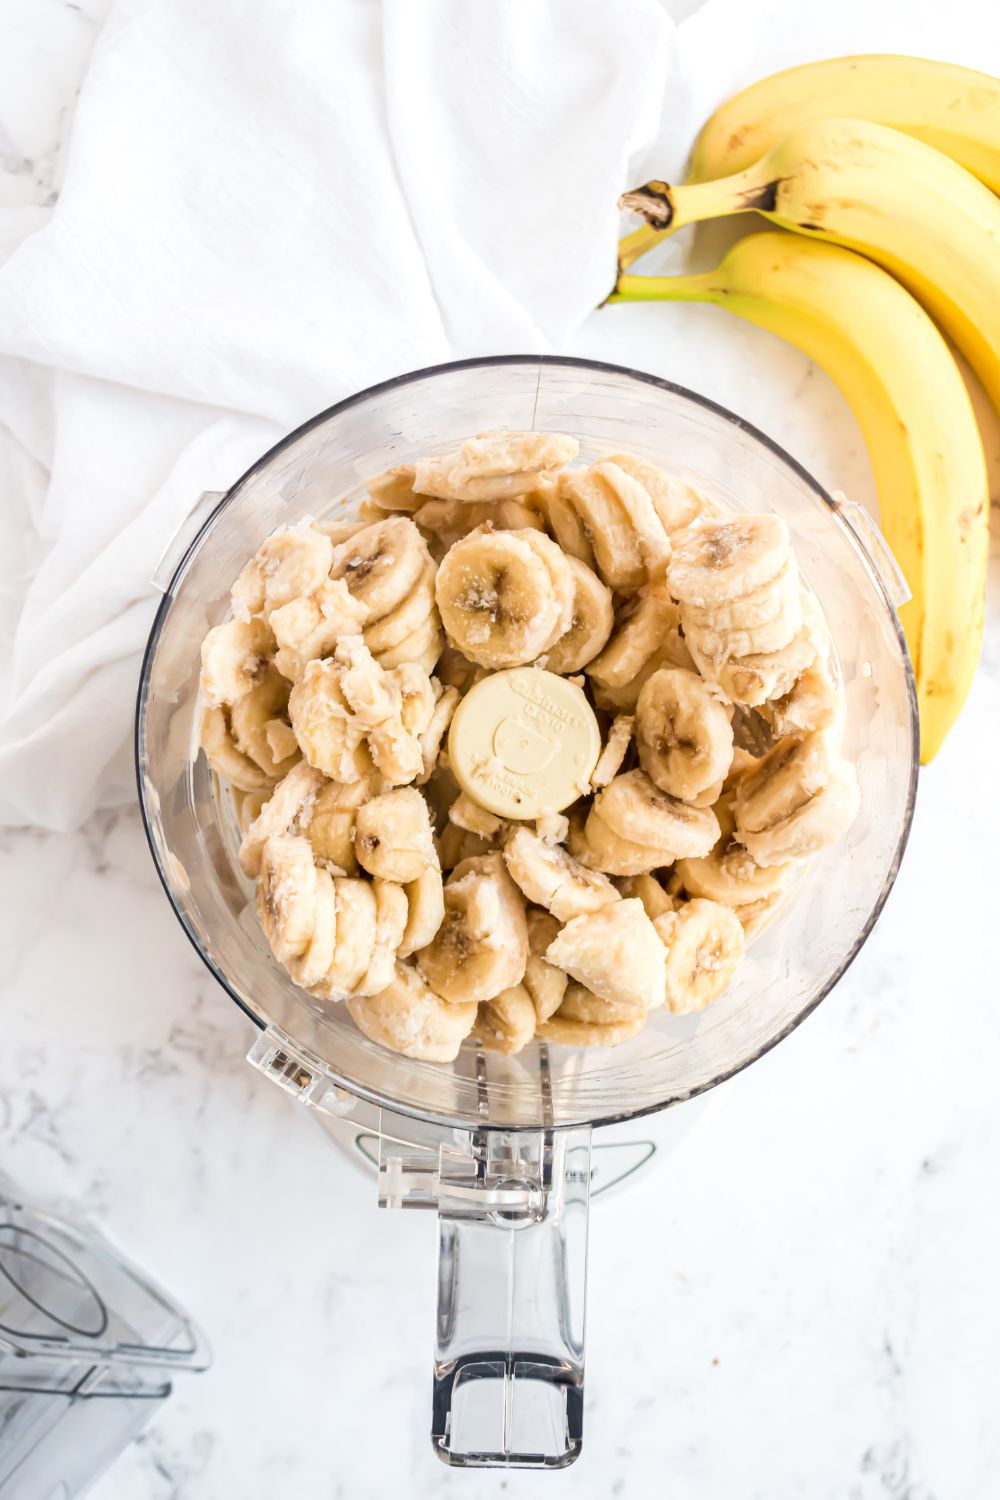
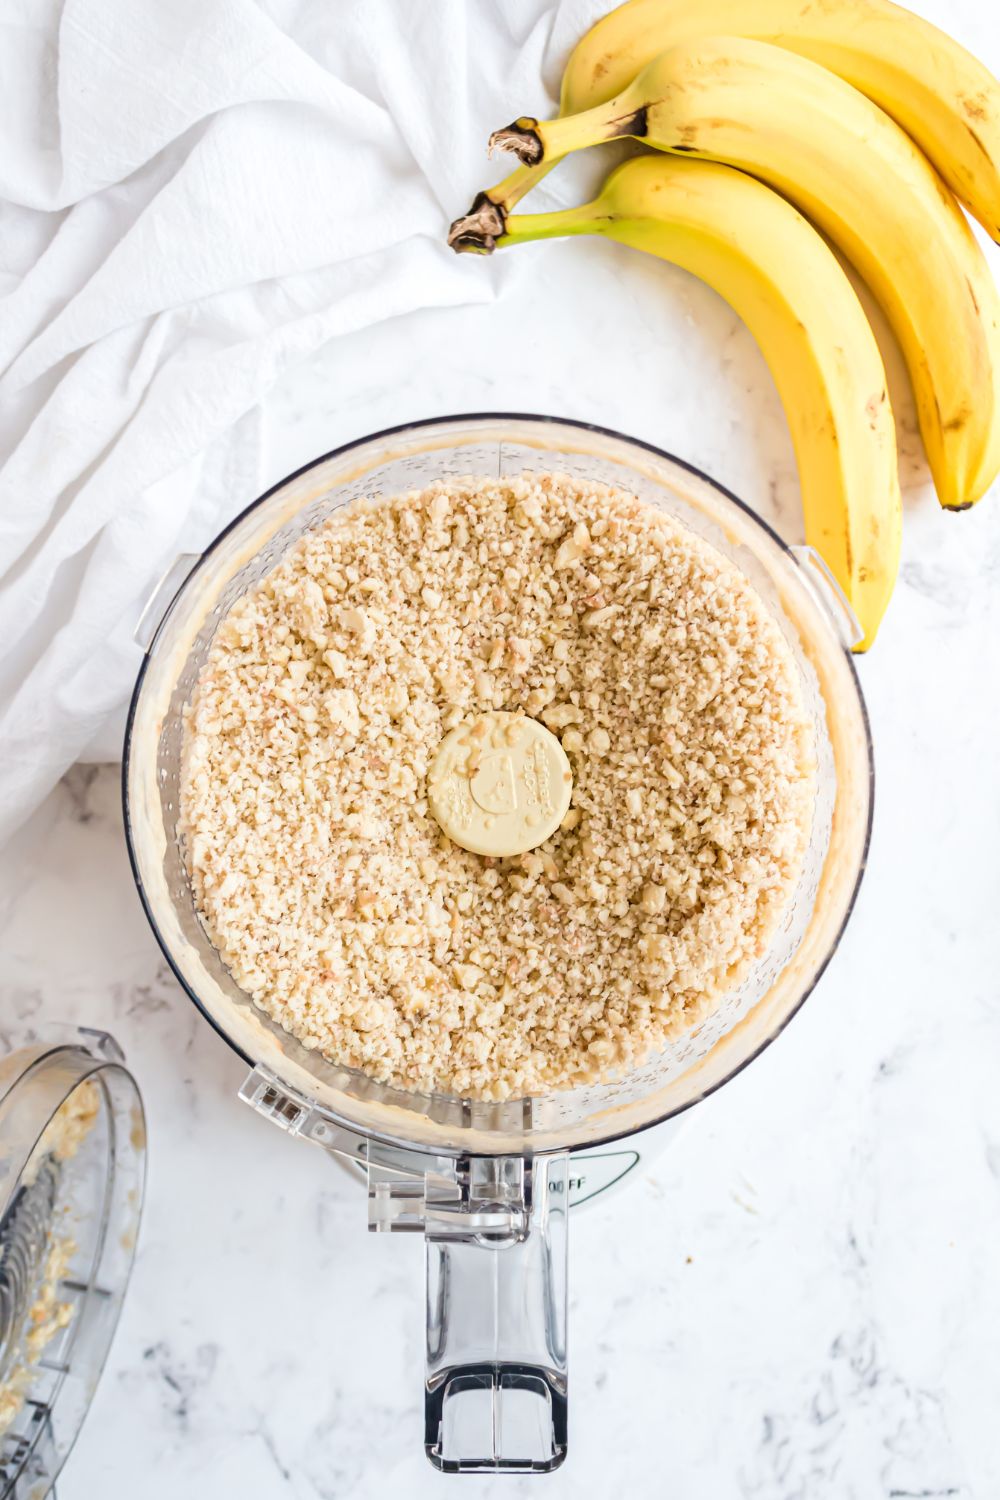
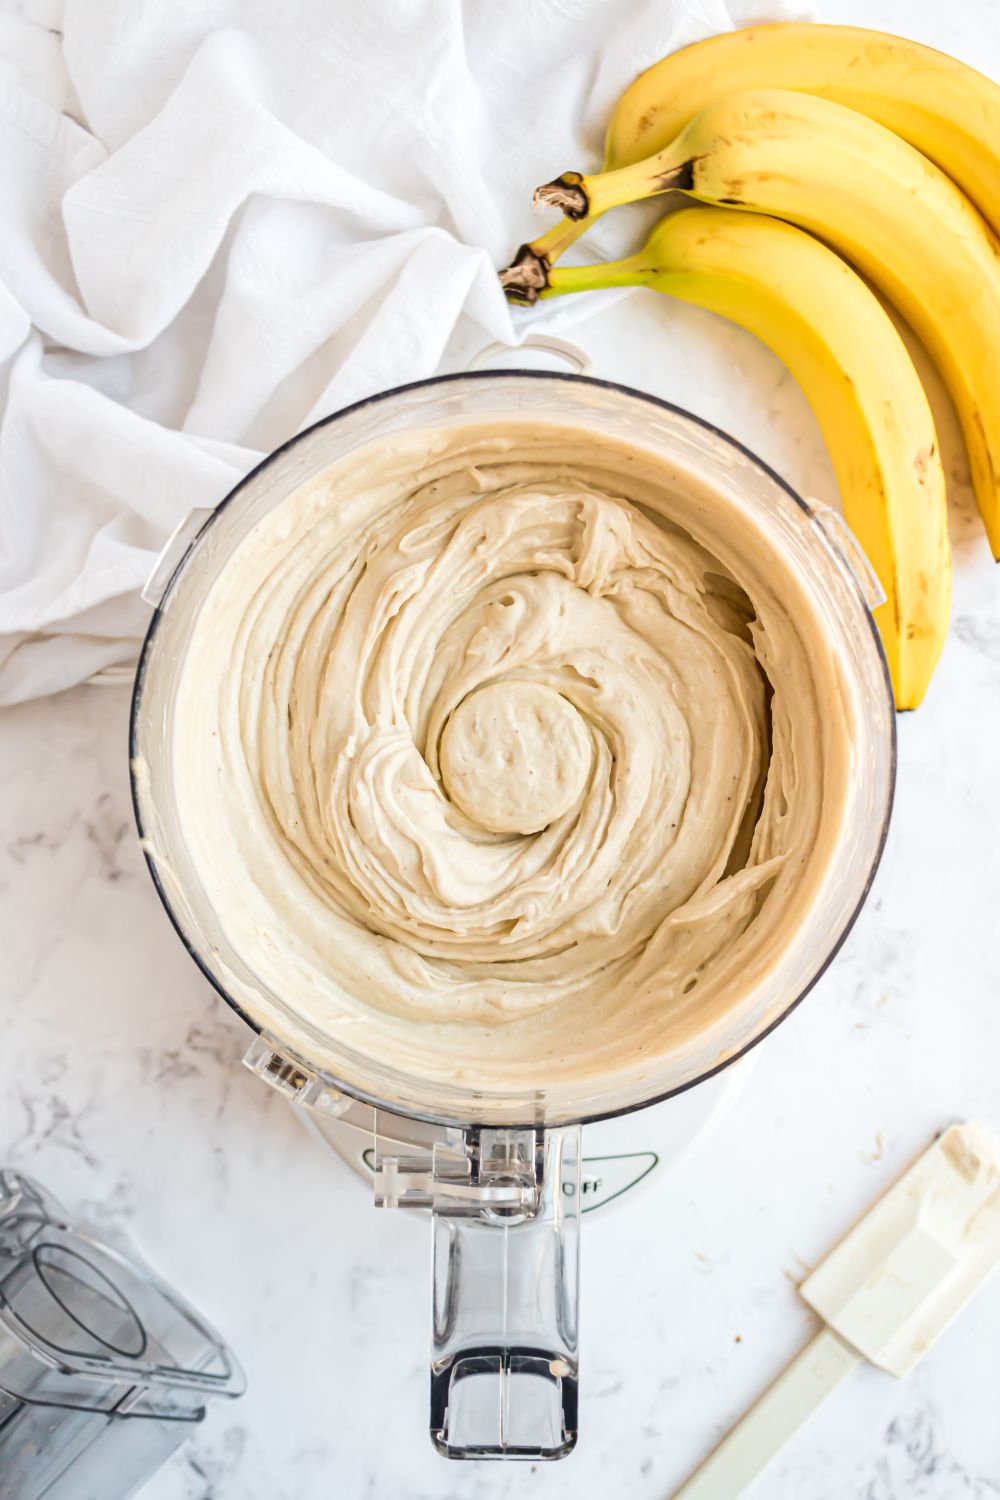
- Place frozen bananas into a food processor or heavy-duty blender and begin pulsing. The bananas will resemble crumbs at first, similar to oatmeal.
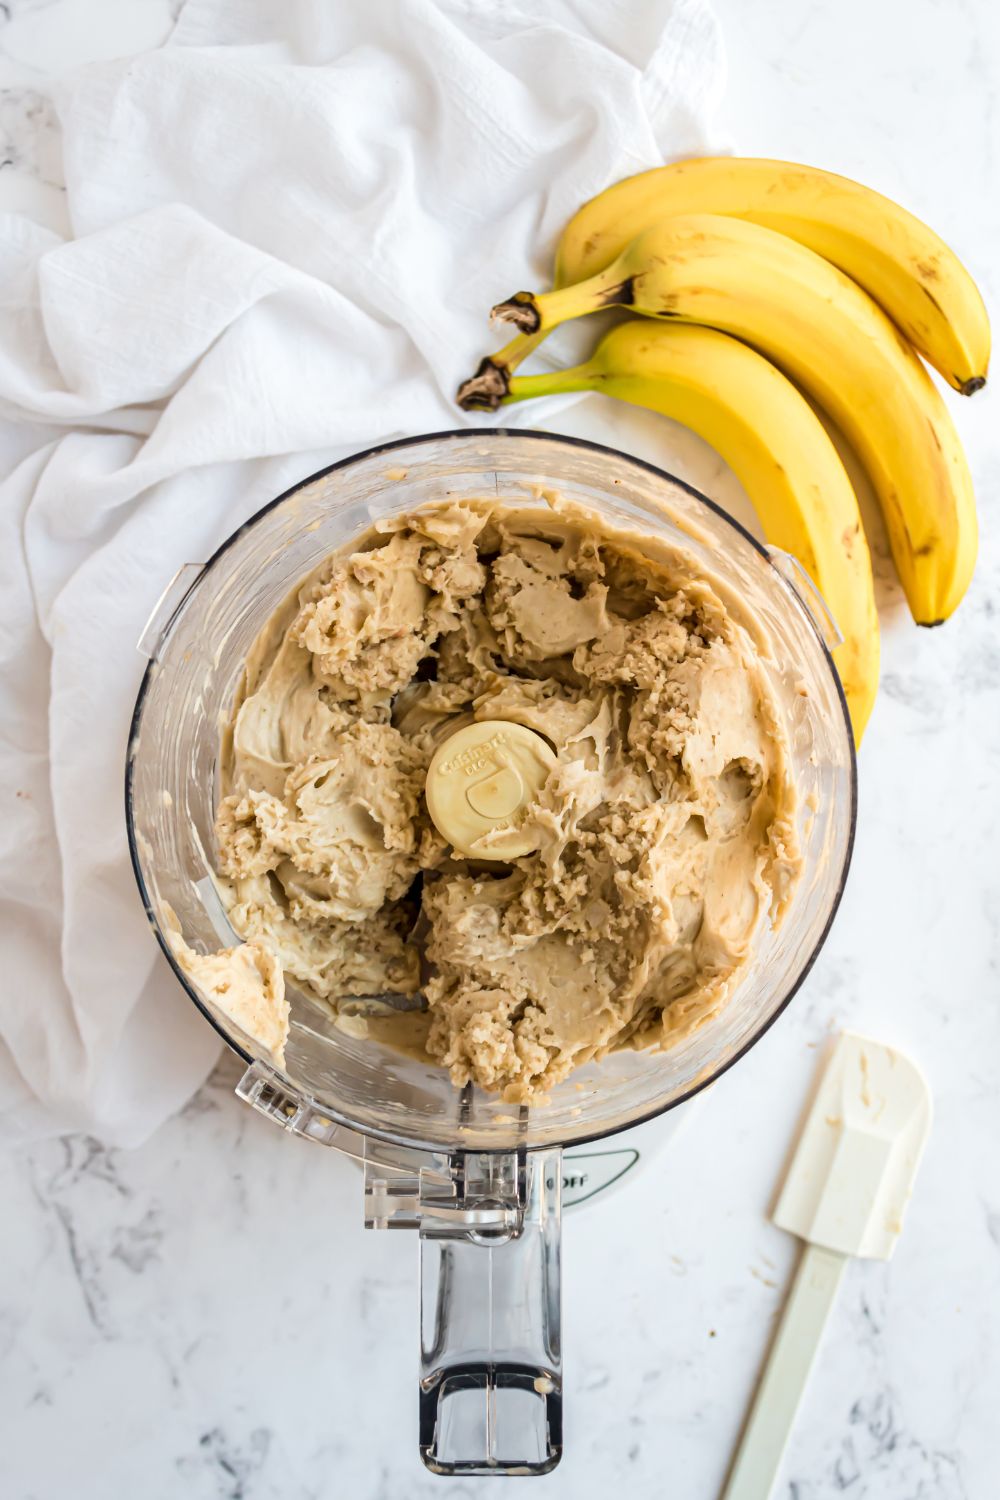
- Continue processing and, as the mixture begins to get smoother, scrape down the food bowl with a rubber spatula.
- As the consistency begins to smooth out, switch to blending and stop frequently to scrape the mixture down so that it continues to be processed by the blade.
- After about 10 minutes, the mixture will turn into a creamy consistency resembling a soft serve ice cream. Blend for about 30 seconds longer to incorporate air into the ice cream.
- Serve immediately for soft serve ice cream. For a more firm, scoopable ice cream, transfer the mixture to a freezer-safe, airtight container, and freeze for about 2 hours, or until it reaches the desired texture.
Did you make this recipe?
Make sure to follow on Pinterest for more recipes!

Leave A Reply!