Homemade Snickers Bars: A Candy Lover’s Dream Come True! – Let’s get one thing out of the way: making your own candy bars at home sounds intimidating. I get it. We’re used to tearing open a wrapper and letting the magic happen without thinking twice. But let me tell you—once you make these Homemade Snickers Bars, the store-bought ones kind of lose their spark. These aren’t a knock-off. They’re better. Chewier. Creamier, and just melt in your mouth. They taste like the real thing—but fresher, softer, and somehow more satisfying. You no longer have to run to the store to buy your favorite candy bar. These Homemade Snickers Bars are irresistible and so creamy and crunchy!
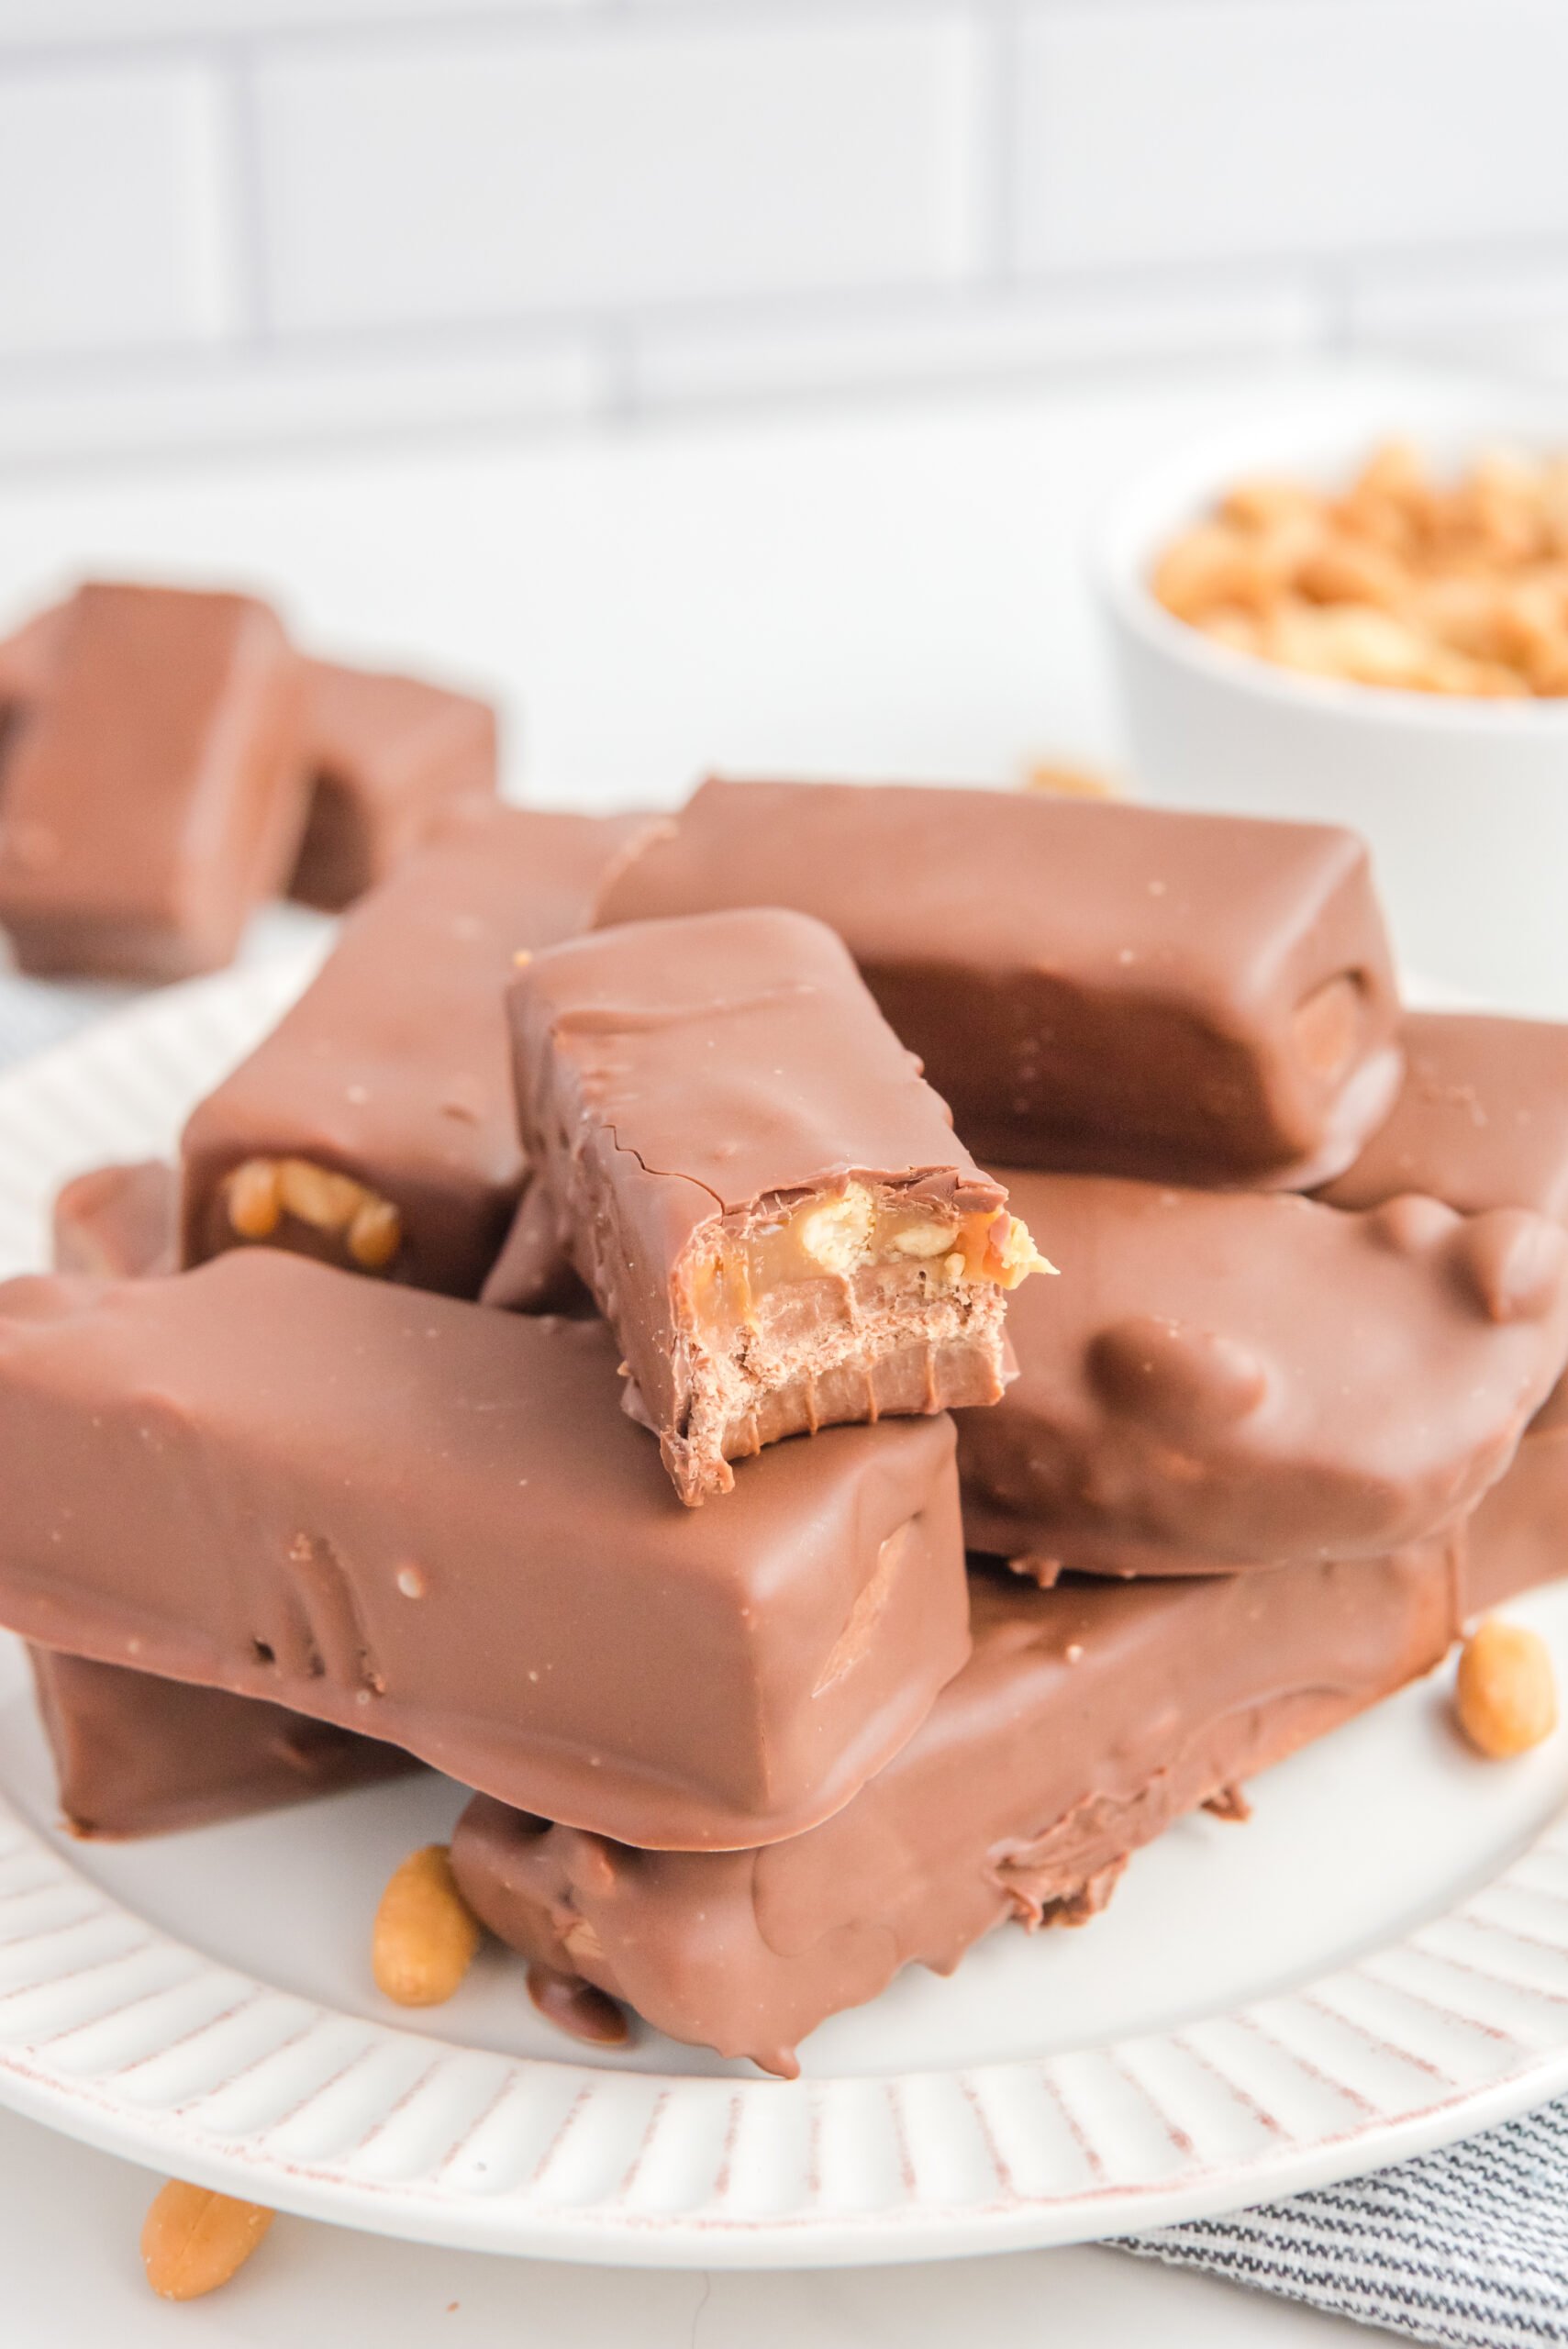
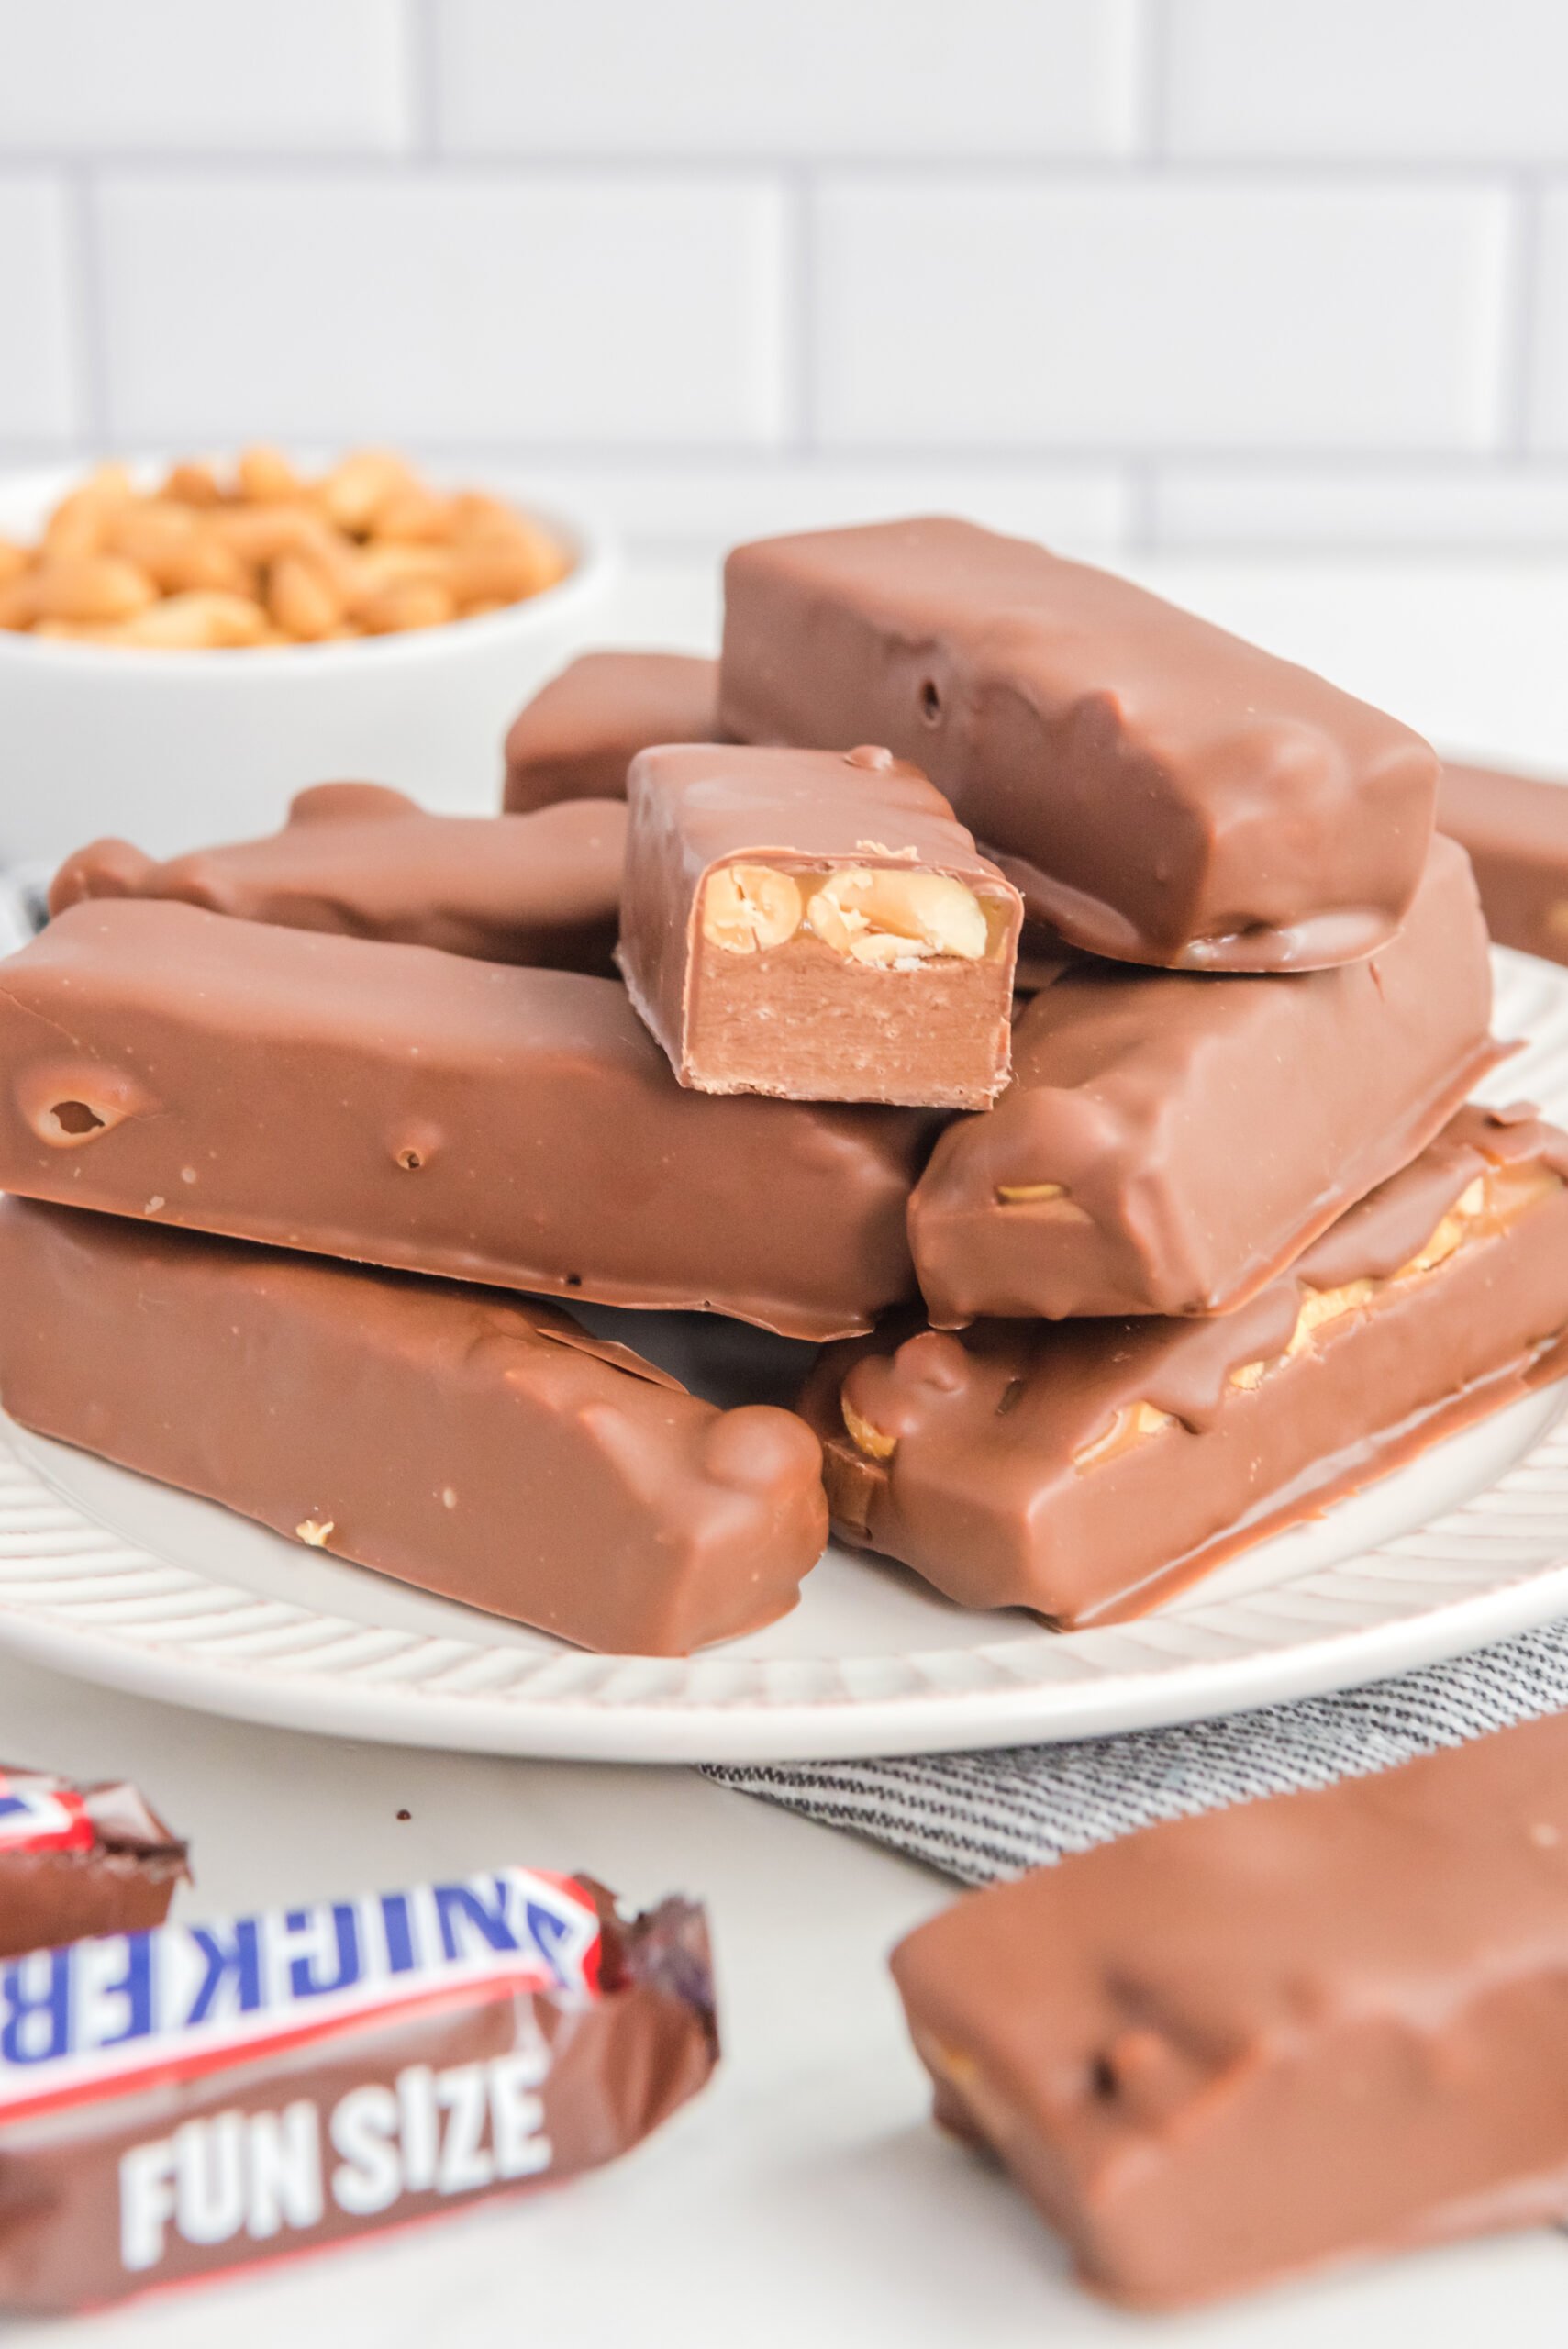
Get ready to satisfy your sweet tooth with these homemade candy bars! This delicious treat combines crunchy peanuts and chewy nougat with a creamy caramel layer, all covered in a rich chocolate coating. Bite into one of these bars and you’ll be feeling that irresistible snicker’s satisfaction! Making them yourself has never been easier. So grab some ingredients and get ready to whip up a batch of Homemade Snickers Bars!

Then come the peanuts. Lightly salted ones, because balance is everything. You sprinkle them on and press them in gently so they’re hugged by the nougat. A good handful of sea salt goes over the top, and this is where things start to get really good. That combo of salty crunch against the creamy layer below? It’s already got your attention.

Why You’ll Love Homemade Snickers Bars
- They’re Delicious! – They taste as good, if not better, than the store-bought kind. Plus, you can customize them with your favorite ingredients for a truly unique experience.
- They’re Easy to Make – With just a few simple steps and ingredients, it’s easy to whip up delicious homemade snickers bars in no time.
- You Know What’s In Them – By making your own version of these classic treats, you can rest assured that you know exactly what is going into them and avoid any unwanted additives or preservatives that might come with store-bought versions.

And no, you don’t need to be a pro baker. You don’t need a candy thermometer or special equipment. All you need is a little time, a solid sweet tooth, and some patience while everything chills in the fridge.
Here’s how this goes down: you’re basically building the bar in layers. That’s the whole game. First, there’s this rich, gooey base made of chocolate, peanut butter, and marshmallow fluff that basically mimics that soft nougat layer we all know and love. It’s a little melty, a little sticky, and very scoopable—no mixer required. Once you pour that into your parchment-lined pan (and yes, use the parchment—trust me), it levels itself out like a dream. No stress.

Ingredients Needed
- Milk Chocolate Melting Wafers – Rich, creamy melting wafers that give your homemade Snickers bars a sweet and smooth chocolatey flavor.
- Evaporated Milk – A thick and creamy dairy product used to give your homemade Snickers bars that classic “Snickers” taste.
- Vanilla Extract – A sweet extract that is used to add just the right amount of sweetness to the Snickers bar mixture.
- Creamy Peanut Butter – Smooth, creamy peanut butter that gives a nutty crunch to your homemade Snickers bars.
- Vegetable Oil – Used to make sure all your ingredients mix together perfectly and create a delicious sticky texture for your homemade Snicker Bars.
- Mallow Fluff – Super fluffy marshmallow cream that adds a light sweetness and texture to your homemade Snicker Bars.
- Lightly Salted Peanuts – Deliciously salty peanuts that are lightly salted for maximum crunchiness in each bite of your homemade Snicker Bars.
- Sea Salt – Delicate, lightly salted flaked sea salt sprinkled all over your homemade Snicker Bars for an added level of salty sweetness and crunchy texture.
- Soft Caramels – The gooey caramel center of these delicious treats is made with soft caramels for extra deliciousness in every bite!


How to Store
Storing homemade Snickers bars is easy! Once they are completely cooled, place them in an airtight container or zip-top bag and store them at room temperature for up to a week. You can freeze your homemade Snickers for up to 3 months. When you’re ready to eat them, just let them thaw at room temperature before enjoying them!
Common Questions
What is the nougat in a traditional Snickers made of?
The nougat that is used in Snickers bars consists of sugar, corn syrup, evaporated milk, peanut butter and egg whites. This mixture is then cooked until it forms a creamy and fluffy texture. The nougat is then cooled and cut before being covered with caramel and chocolate.
Can I freeze homemade snickers bars?
Yes, you can freeze homemade Snickers bars! Once they are completely cooled, place them in an airtight container or zip-top bag and store them in the freezer for up to 3 months. When you’re ready to eat them, just let them thaw at room temperature before enjoying them!
Can I add toppings to my snickers bar?
Yes, you can add toppings to your homemade Snickers bar! Try adding different types of nuts, dried fruits, chocolate chips or sprinkles. You can also drizzle melted chocolate or peanut butter over the top. Get creative and experiment with different combinations until you find a favorite!
Homemade Snickers bars are a fun and delicious treat that you can easily make at home. They can be stored in the freezer for up to 3 months, and can be customized with different toppings for added flavor.

Caramel
Store-bought soft caramels and a splash of evaporated milk go into the microwave. This part’s simple, but you’ve gotta stir between bursts—don’t try to rush it or you’ll end up wrestling with a sugar rock. Once it’s smooth and pourable, you carefully drizzle it over the peanut layer. This won’t self-level, so you need to spread it out yourself. But no worries—imperfect is fine here. Homemade candy has character.

Now comes the part that tests your willpower: chilling. This whole glorious pan of layered sweetness goes in the fridge for at least four hours (overnight is ideal). It’s a waiting game, but the payoff is 100% worth it. Once it’s chilled and set, you lift the whole slab out using the parchment, slice it into bars, and you’ve got what basically looks like a tray of candy store perfection.

But we’re not done yet. The final step is what pushes this over the top: the chocolate coating. Each bar gets a dip in silky melted chocolate mixed with a little oil to keep things glossy and smooth. It’s messy in the best way. Two forks, a little patience, and maybe a helper if you’ve got one around—it’s a good excuse to make this a team effort.

Once dipped, they go back into the fridge one last time to set up. After that? Game over. You’ve just made your own batch of full-sized Snickers-style candy bars. They’re chewy, crunchy, salty-sweet, chocolate-drenched magic. And they’re in your kitchen.

These bars are dangerous in the best way. Keep them chilled in the fridge and they’ll last a good while (if they don’t get devoured in a day). They’re great for sharing, packing into lunchboxes, wrapping up for homemade food gifts, or stashing in the back of the fridge for your own personal candy stash.

Honestly, there’s something special about recreating something so familiar with your own two hands. It’s that moment of “Whoa, I made this?” paired with the pure joy of biting into something that tastes just like the original—but better.

So yeah, it takes a little time. But not in a hard way—more in a “slow down and enjoy the process” kind of way. And once you taste the final result, you’ll understand why homemade Snickers aren’t just a fun kitchen project. They’re a full-on obsession waiting to happen.

So whether you’re making these for a party, a weekend treat, or just because you want to flex your homemade candy game, these Snickers bars are the real deal. They’re rich, nostalgic, and straight-up addictive in the best way. Don’t be surprised if you find yourself sneaking one from the fridge every time you walk by—it happens. Just embrace it. You made candy bars from scratch, and that’s pretty awesome.

More Recipes You Will Love!
Reeses Peanut Butter Cup Cookies

Homemade Snickers Bars
Ingredients
- 3 cups milk chocolate melting wafers divided
- 3 tablespoons evaporated milk divided
- 1 teaspoon vanilla extract
- ½ cup creamy peanut butter
- 1½ tablespoons vegetable oil
- 7 oz mallow fluff
- 1 cup lightly salted peanuts
- 1 tablespoon sea salt
- ½ 10.8 oz bag of soft caramels (about 24 caramels)
- 1½ tablespoons evaporated milk
Instructions
- Prepare an 8×8 inch pan with parchment paper. See notes for directions & tips.
- In a medium saucepan, combine half of the milk chocolate melting wafers, half of the evaporated milk, vanilla extract, and the peanut butter over low-medium heat. Mix with a rubber spatula until smooth and thick.
- Reduce heat to low and fold in the mallow cream and stir constantly until fully combined.
- Pour mixture into the bottom of the 8×8 pan. This will self-level well.
- Top with peanuts gently pressing into the mixture. Add sea salt over top and set aside.
- In a microwave safe dish, combine caramels with the remaining evaporated milk.
- Microwave on 50% power for 1 minute, stirring afterwards (it will be very hard to stir. Use another utensil to clear your stirring utensil from the caramel). Return to the microwave and continue to heat on 30-second, 50% power bursts, stirring in between until the caramel is smooth.
- Pour caramel overtop of the peanuts, spreading evenly. The caramel will not self level or spread as much so be sure to pour the caramel over the entire dish, not just one location.
- Place the dish inside the refrigerator and allow it to chill for 4 hours or overnight.
- When done, remove the Snickers mixture from the dish by pulling up on the parchment paper.
- Using a sharp knife, cut the Snickers bars by making one cut in the middle from top to bottom and another 5 cuts in the opposite direction.
- Prepare a large baking sheet with parchment paper and place each Snickers bars on the sheet. Place the sheet inside the refrigerator to keep chilled while you prepare the melting chocolate in step 13.
- In a medium microwave safe bowl, add the dark chocolate wafers and place inside the microwave to heat on 50% power for 1 minute. When done, add the vegetable oil and stir. Return to the microwave and heat in 30-second bursts on 50% power, stirring in between, until the chocolate is silky smooth.
- Using two forks or dipping tools, dip each Snickers bar into the chocolate, coating it completely. Gently shake off any excess chocolate before placing the bar back on the baking sheet. Repeat this process for each bar.
- Place the baking sheet back inside the refrigerator for 30 minutes or until the chocolate is completely hardened. When the chill time is complete, serve immediately.
Did you make this recipe?
Make sure to follow on Pinterest for more recipes!

Leave A Reply!