I make my Sheet Pan Pumpkin Pie Every Thanksgiving! During the holidays, I feel like my kitchen is bursting at the seams. Between turkey, mashed potatoes, stuffing, and all the little extras that my husband James insists “make the meal complete,” I’m usually scrambling for oven space and counter space. Add in Ariya, my curious 5-year-old who always wants to “help” roll pie crusts, and Cameron, my 13-month-old, tugging at my leg while I’m trying to measure sugar, and you can picture the beautiful chaos of the holiday season in our home!
That’s exactly why I lean on recipes like my easy Sheet Pan Pumpkin Pie. It’s just four ingredients, feeds a crowd, and doesn’t require juggling multiple pie pans. Instead, it bakes up in one quarter sheet pan, cools quickly, and slices into neat squares that are easy to serve. This dessert has become one of my holiday lifesavers, and every year I get asked for the recipe. Today, I’m sharing it with you—because if it saves me time and stress, it just might save you, too.

What is Sheet Pan Pumpkin Pie (4 Ingredients)?
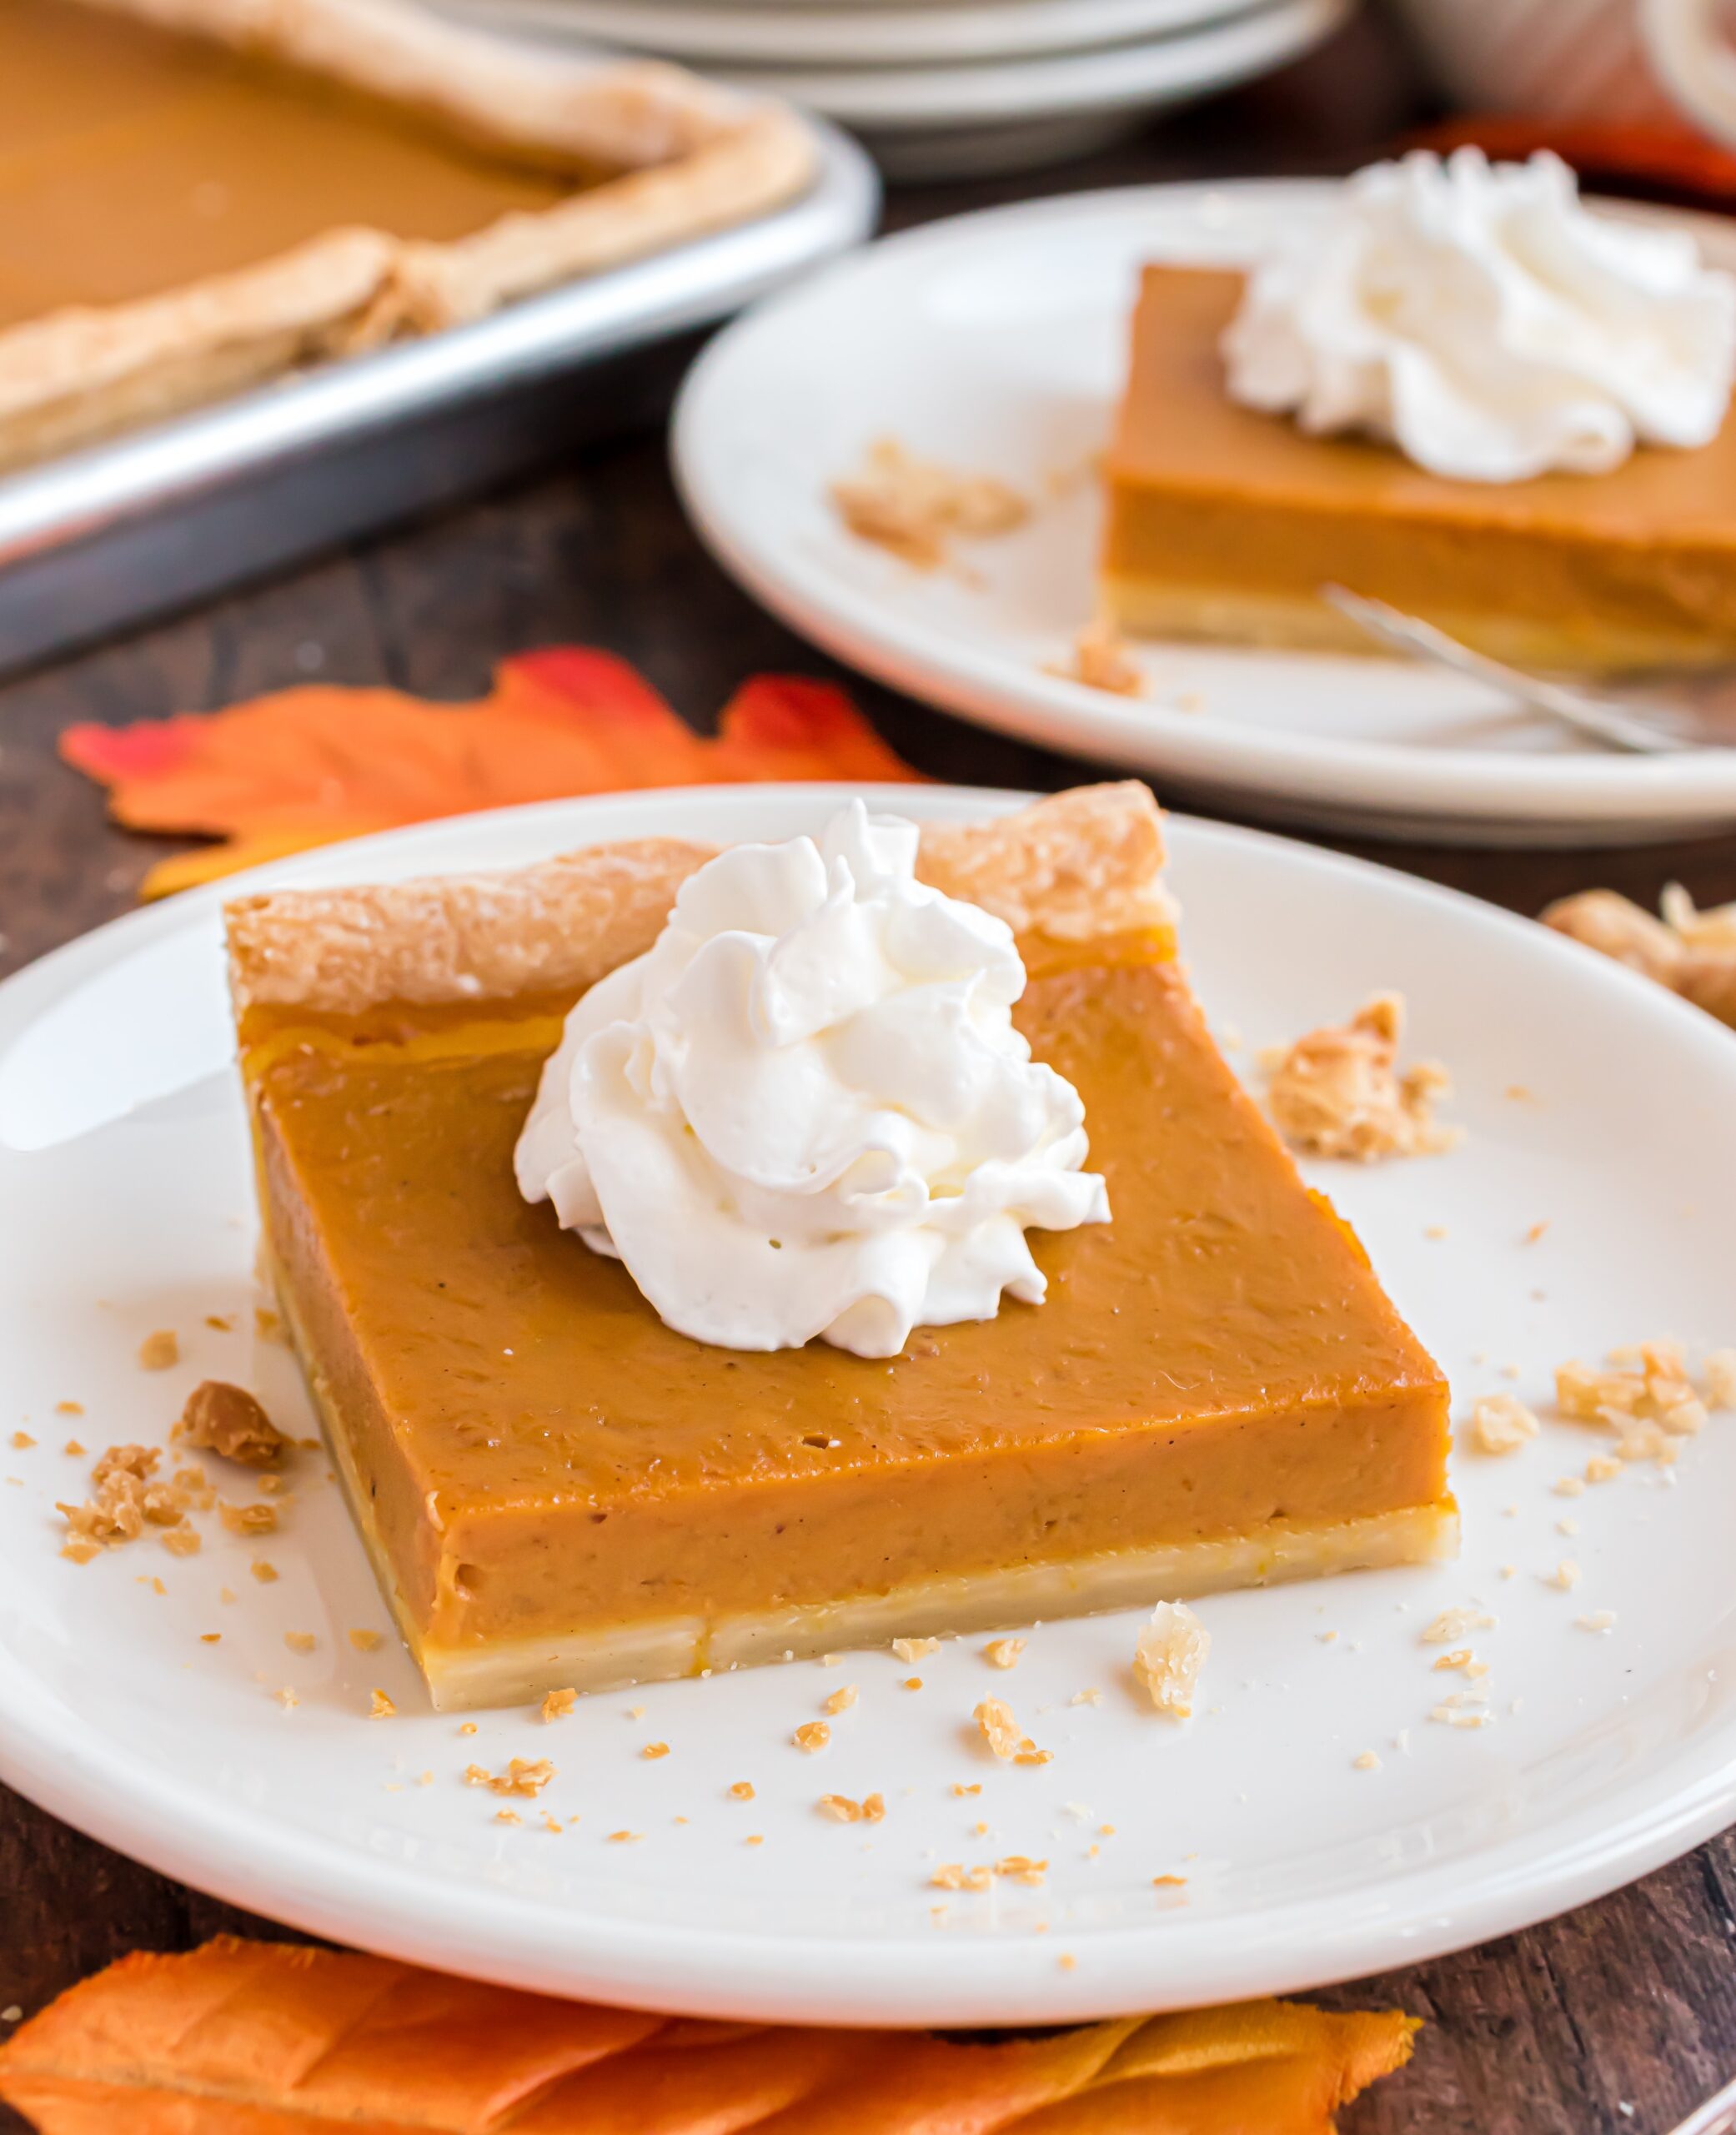
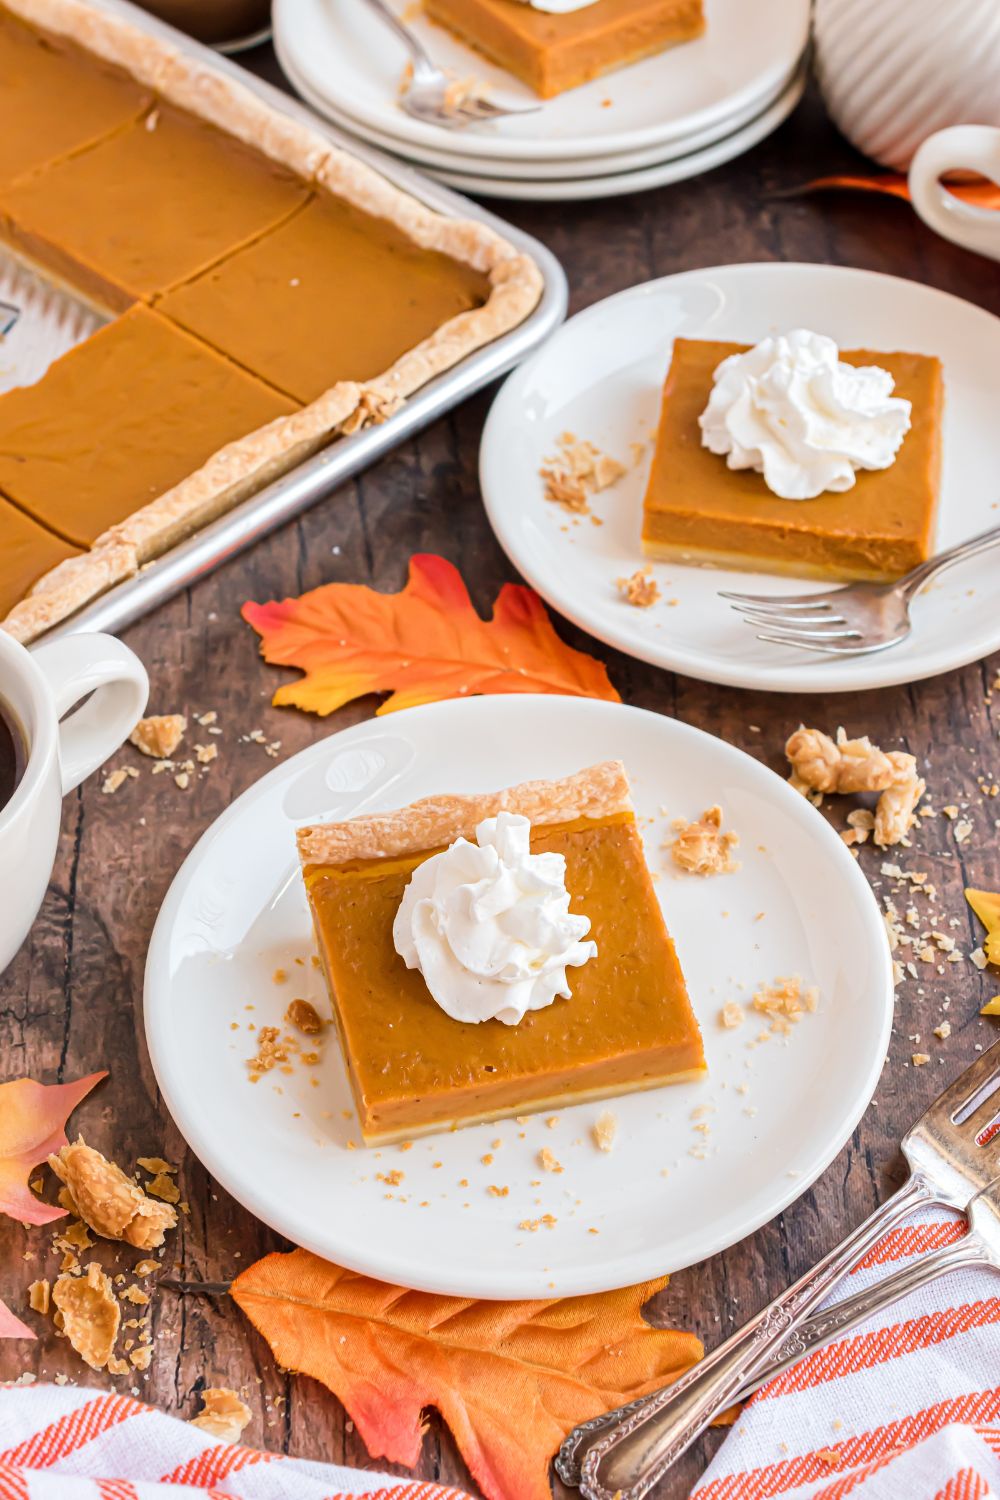
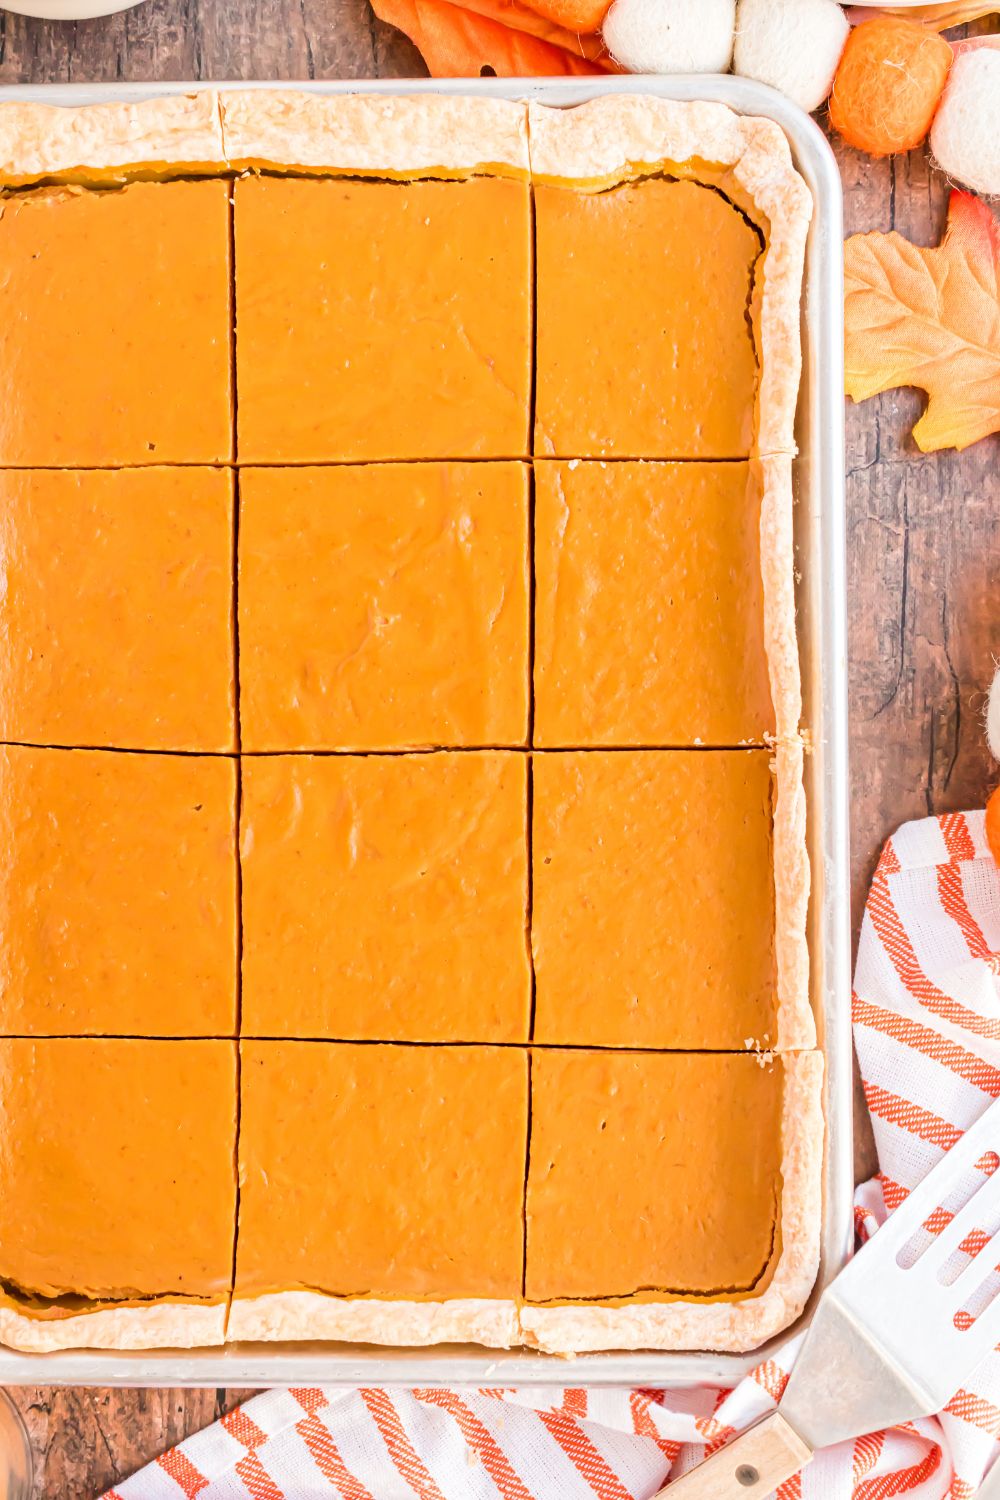
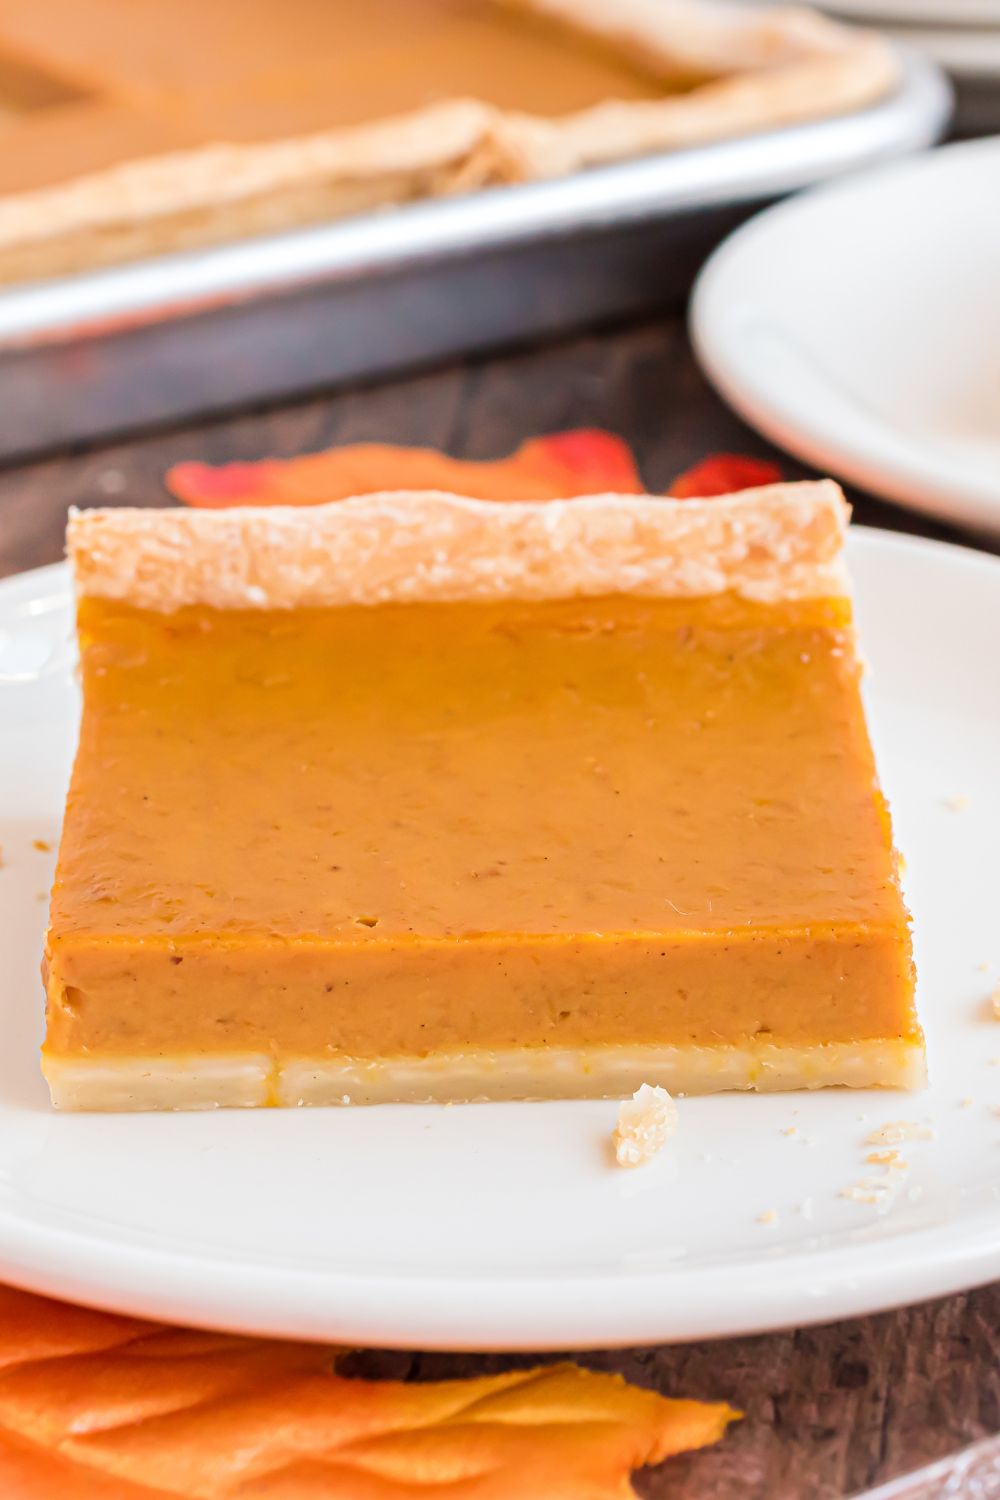
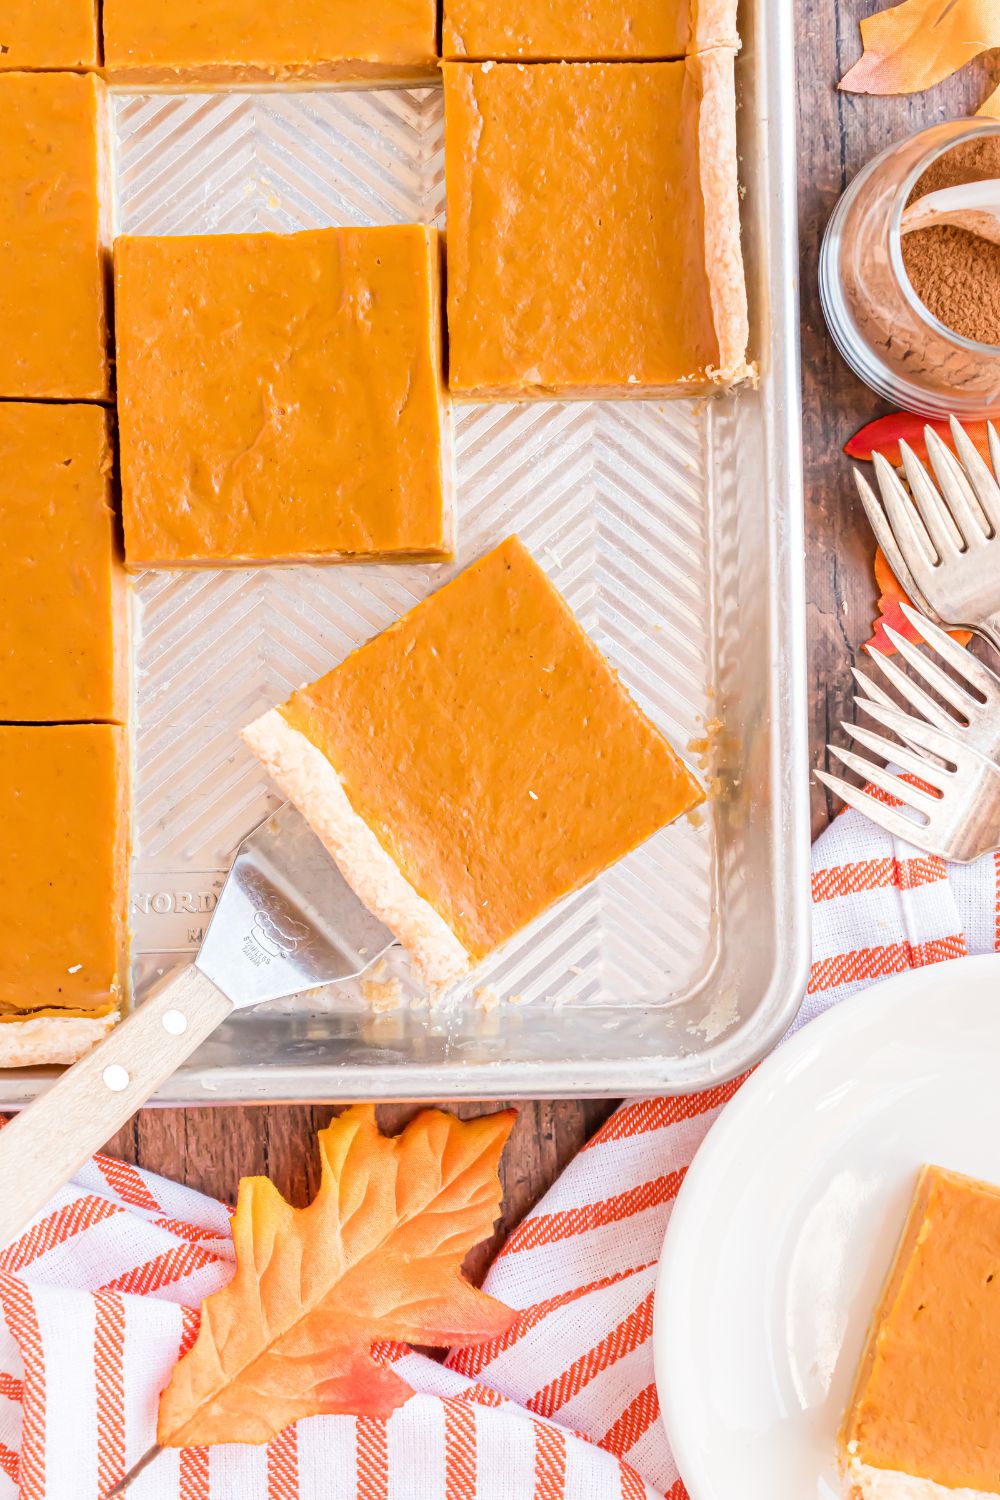
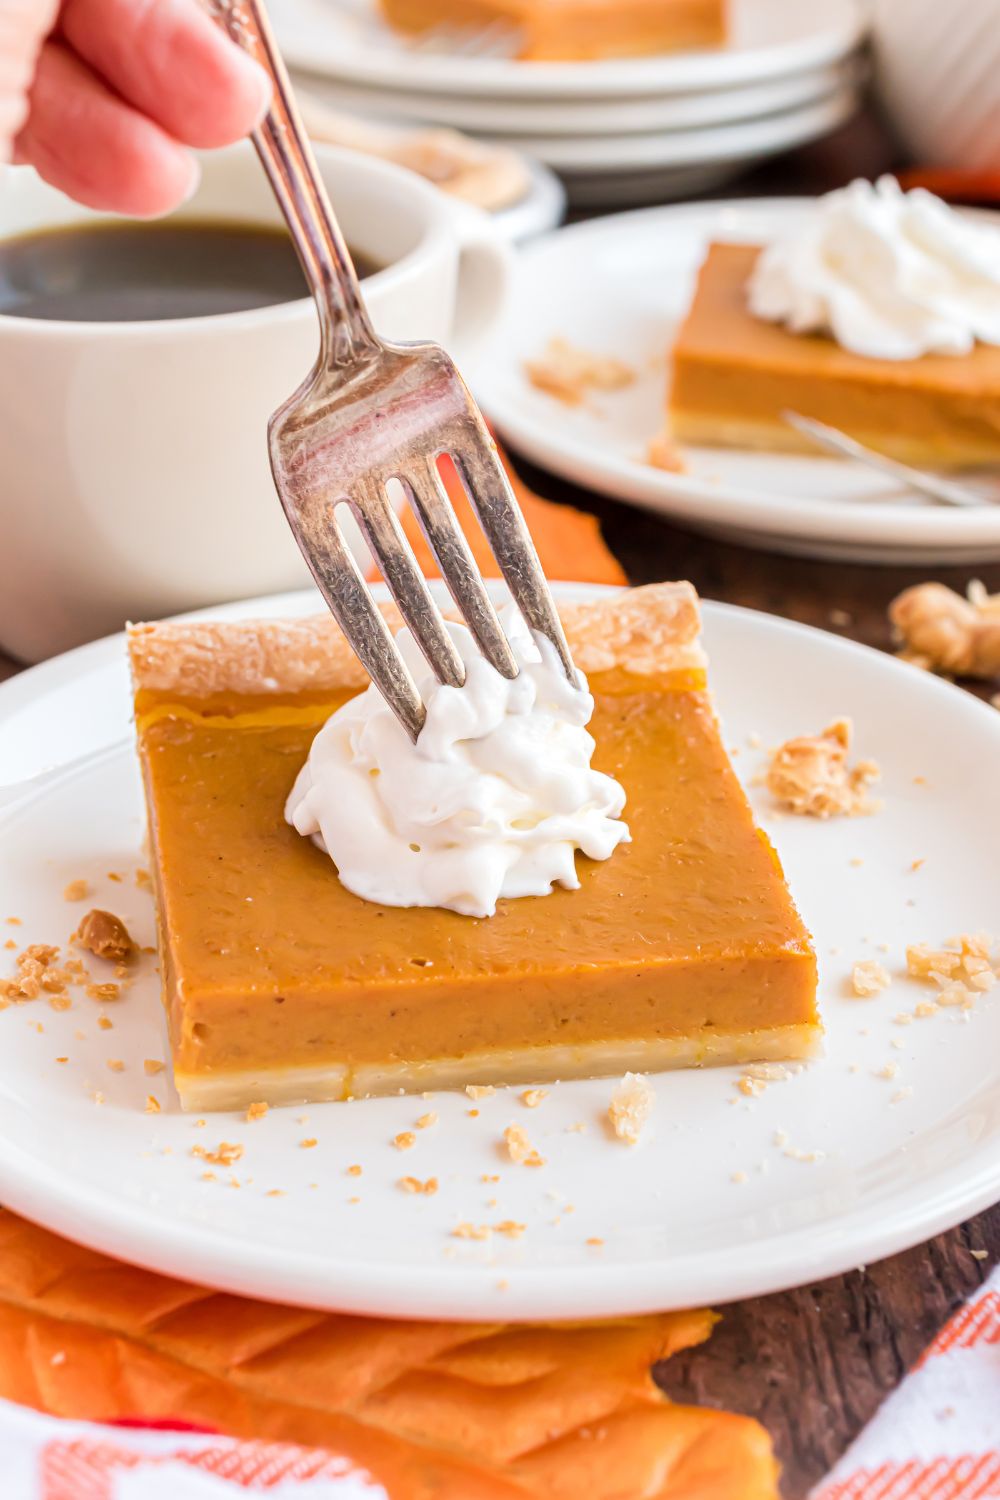
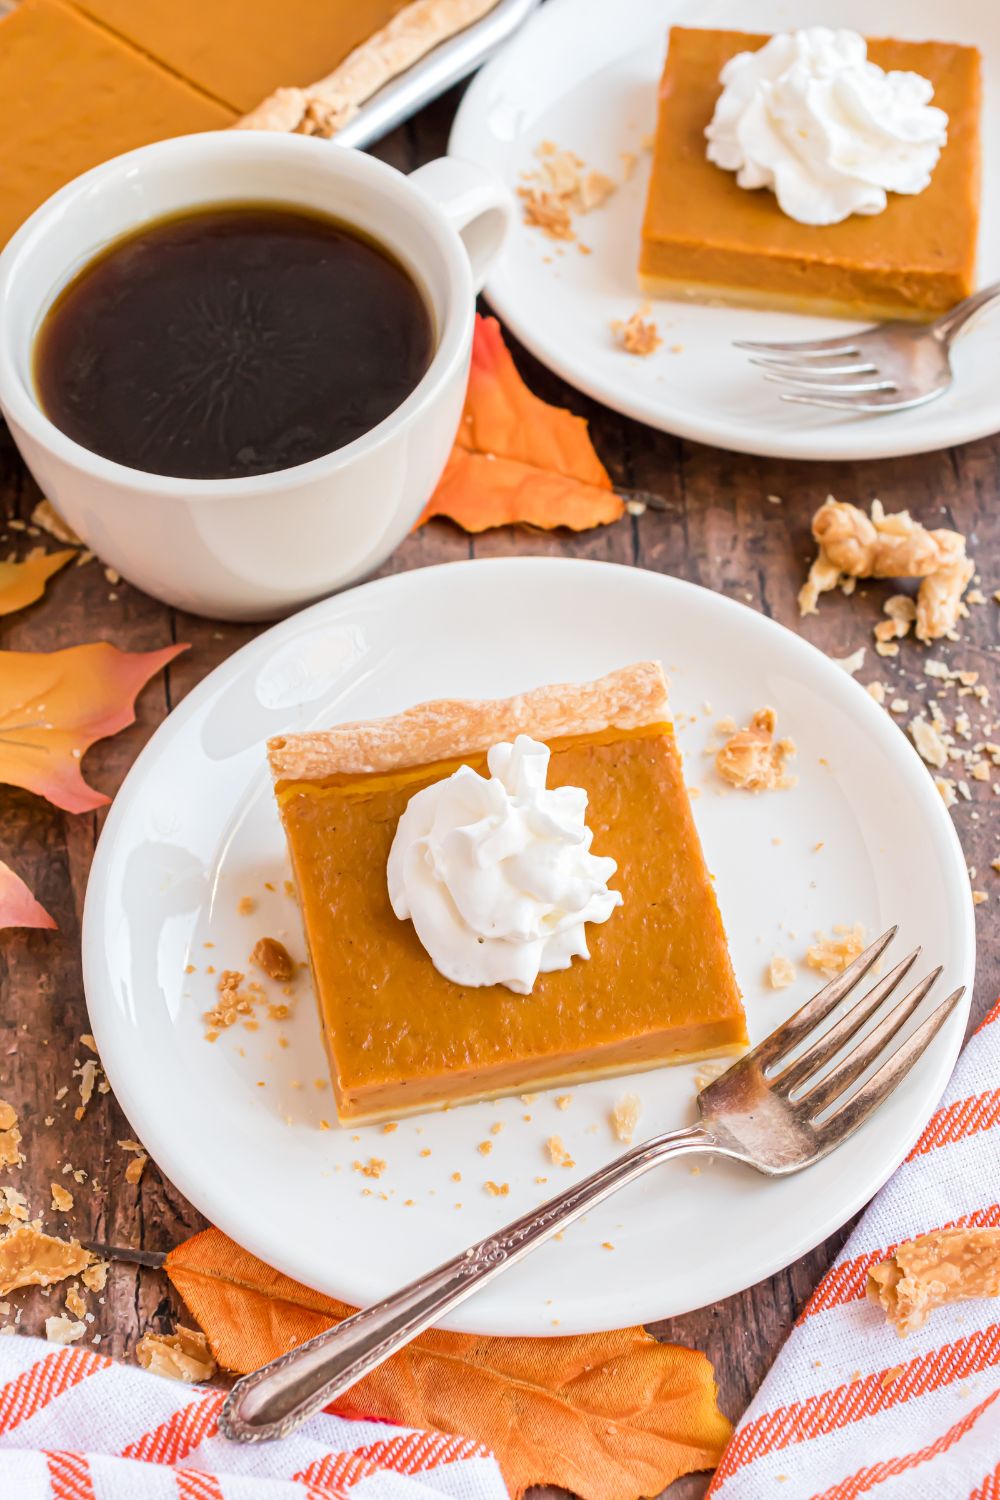
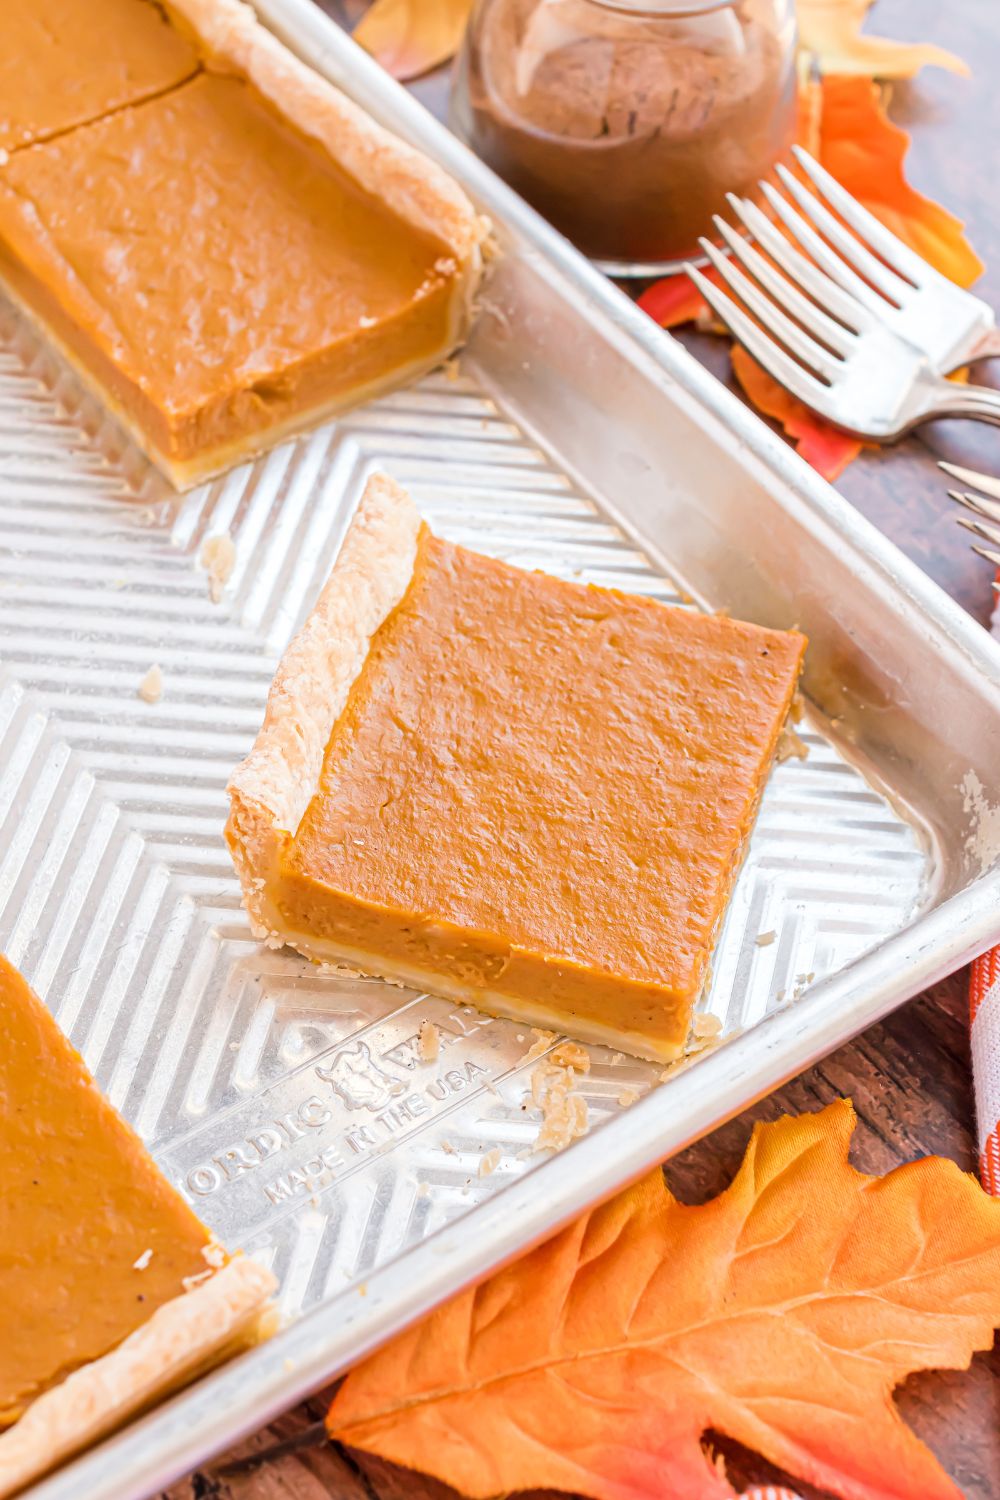
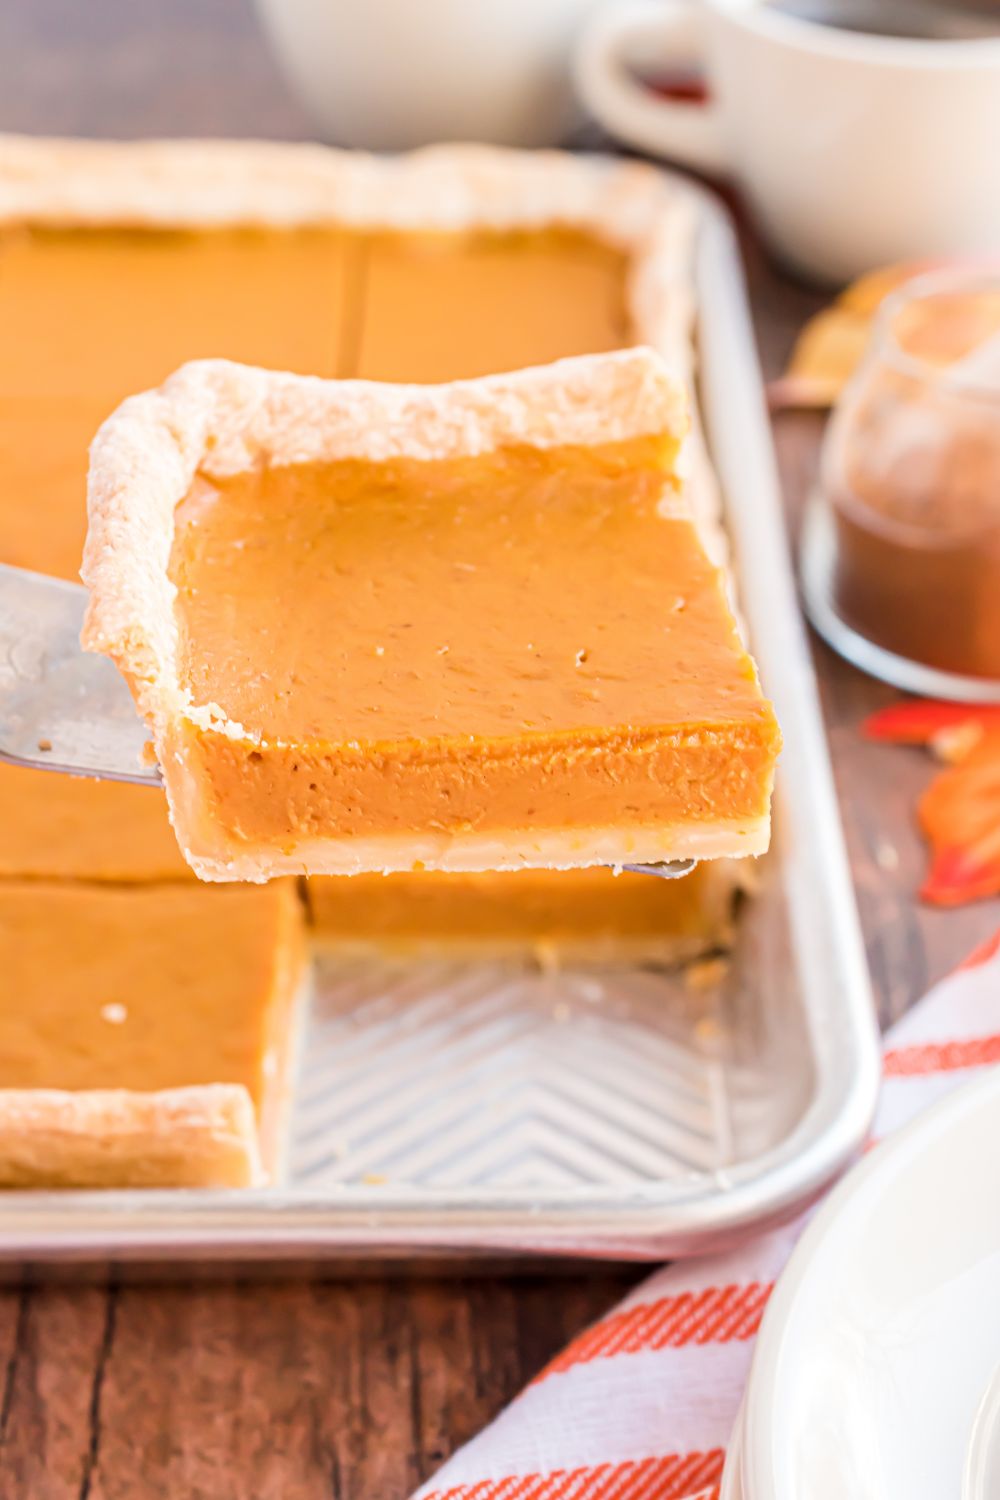
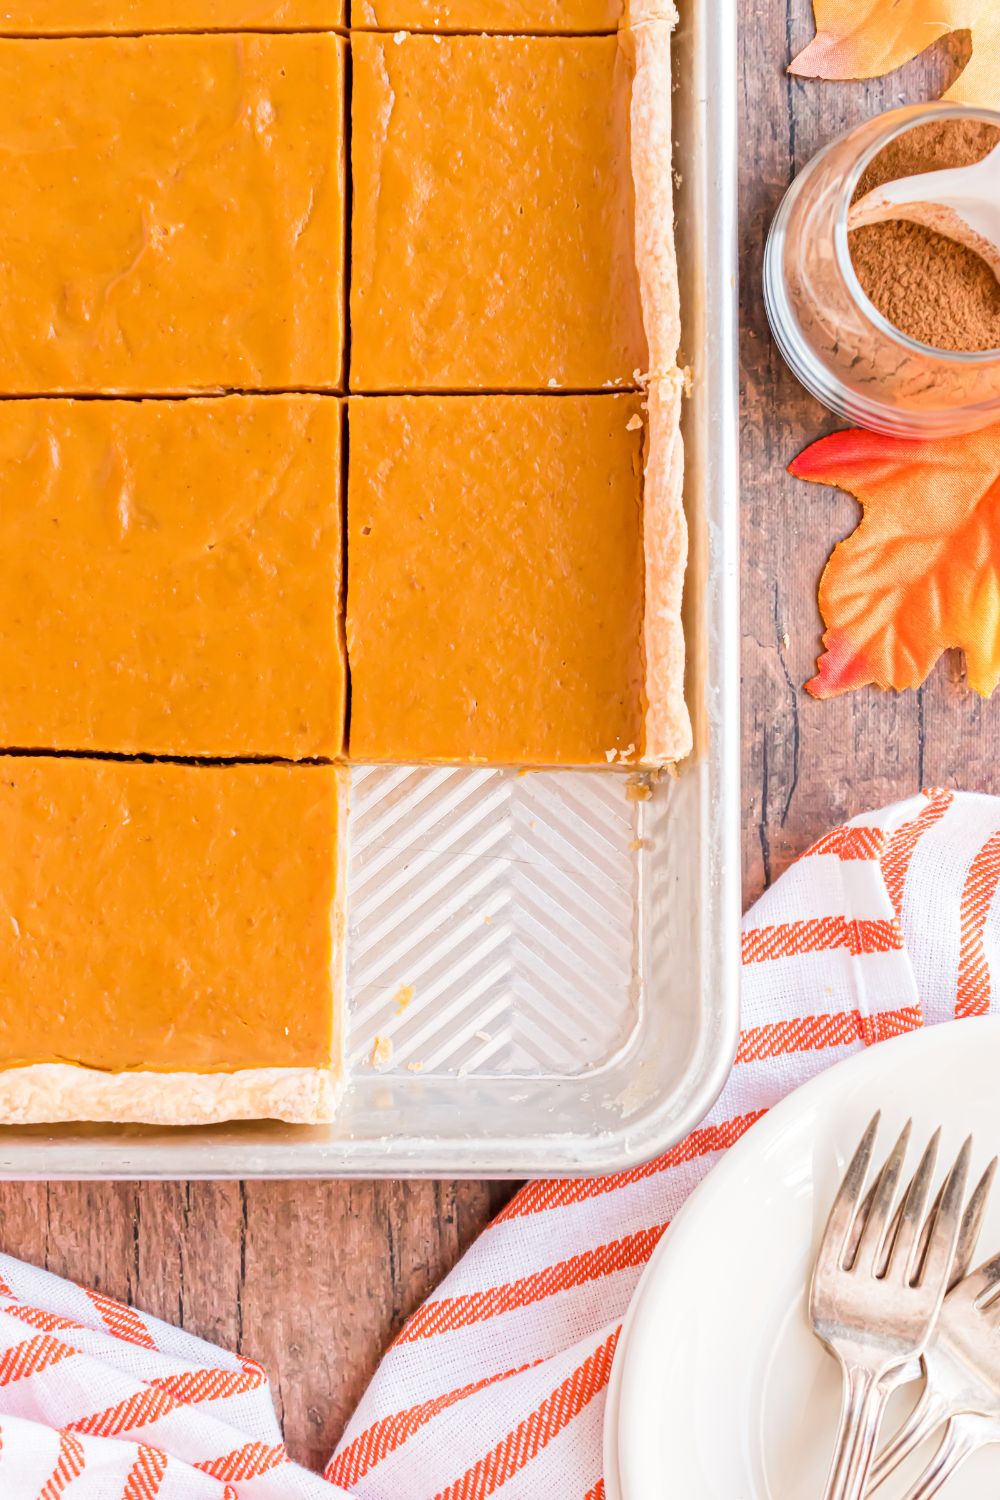
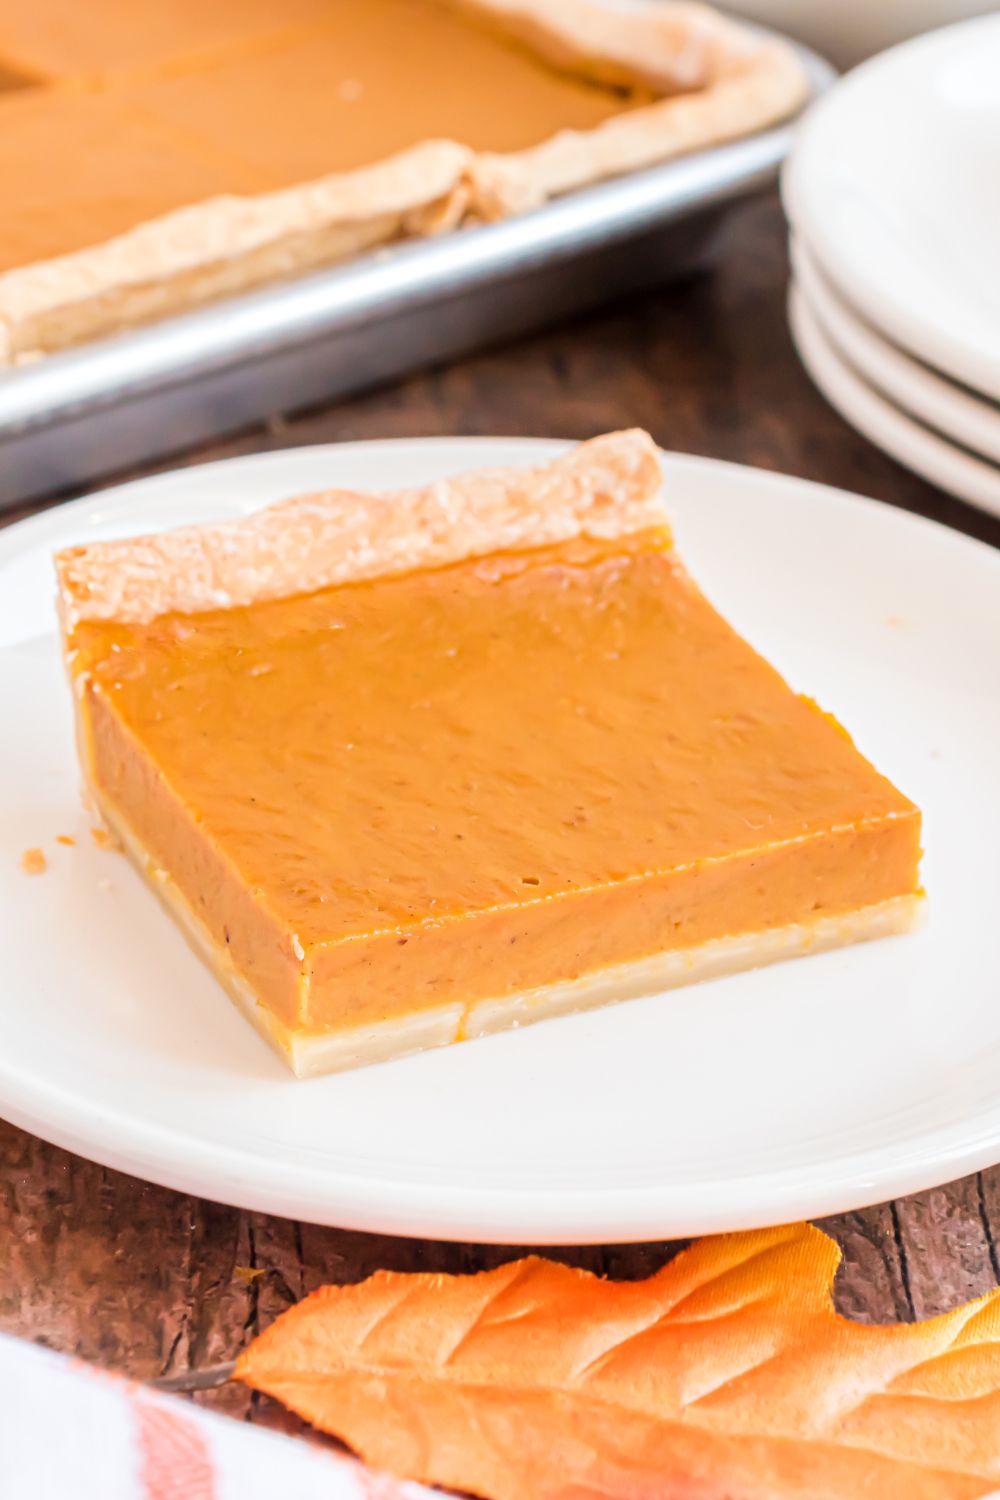
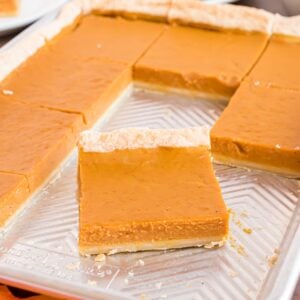
Sheet Pan Pumpkin Pie is a clever twist on the classic pumpkin pie we all know and love. Instead of fussing with a traditional pie dish, this recipe uses a quarter sheet pan (about 9×13 inches). The crust is rolled out to fit the pan, the filling is poured in, and the result is a thinner, slab-style pumpkin pie that cuts into 12–16 squares.
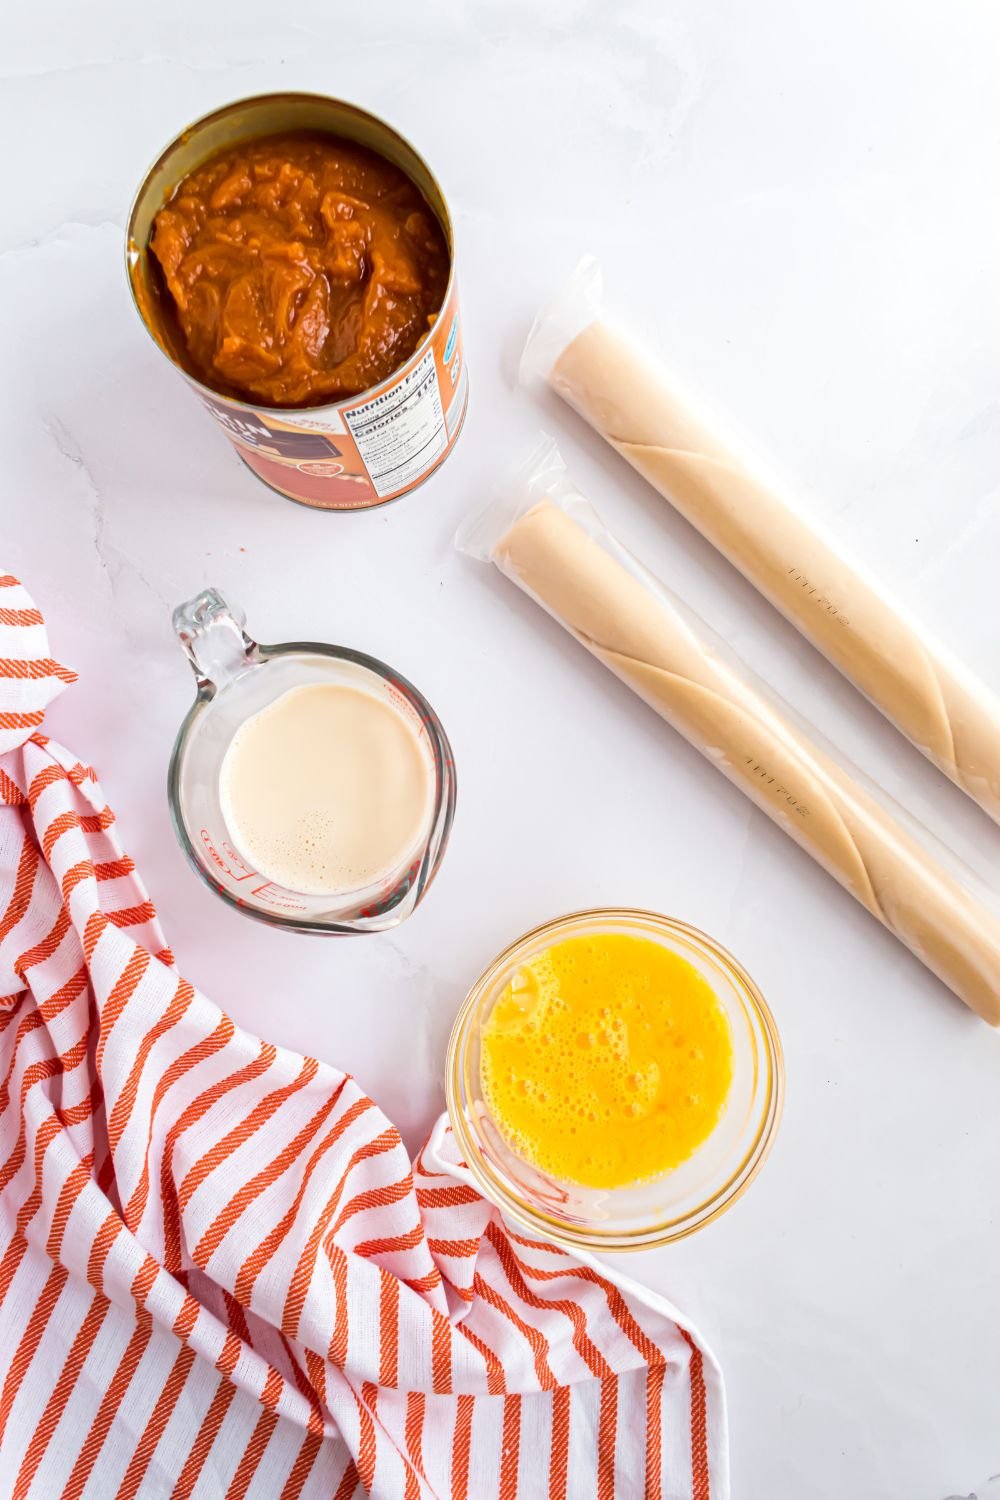
What makes this recipe extra special is its simplicity: we use refrigerated pie crusts and canned pumpkin pie mix, which already has the sugar and spices added in. All you need to do is mix in eggs and evaporated milk, pour, and bake. It’s the kind of dessert that looks impressive on a Thanksgiving table but takes minimal effort—exactly what a busy home cook needs when holiday madness hits.

Why This Recipe Works
This recipe works because it strips pumpkin pie down to its essentials:
- Pumpkin pie mix, not puree – already flavored and sweetened, which eliminates measuring sugar, cinnamon, nutmeg, and cloves separately.
- Sheet pan format – no fiddly pie dish, no uneven slicing, and plenty to go around.
- Refrigerated crusts – easy to roll and fit into the pan. You still get the flaky texture without homemade effort.
- Even baking and faster cooling – the thinner pie layer bakes through evenly and sets up quickly.
For me, it’s also a sanity-saver. I can roll the crusts while Ariya “helps” with her little rolling pin and still get everything into the oven before Cameron decides to dump his toy bin across the kitchen floor lol.
Ingredient Breakdown: What They Do
- Refrigerated Pie Crusts (2) – These give you structure and that buttery, flaky bite. Using two stacked and rolled together ensures the crust is strong enough to hold the filling without getting soggy.
- Pumpkin Pie Mix (30 oz) – Don’t confuse this with pumpkin puree. The mix already contains sugar and warm spices like cinnamon, nutmeg, and cloves, so you don’t have to fuss with measuring.
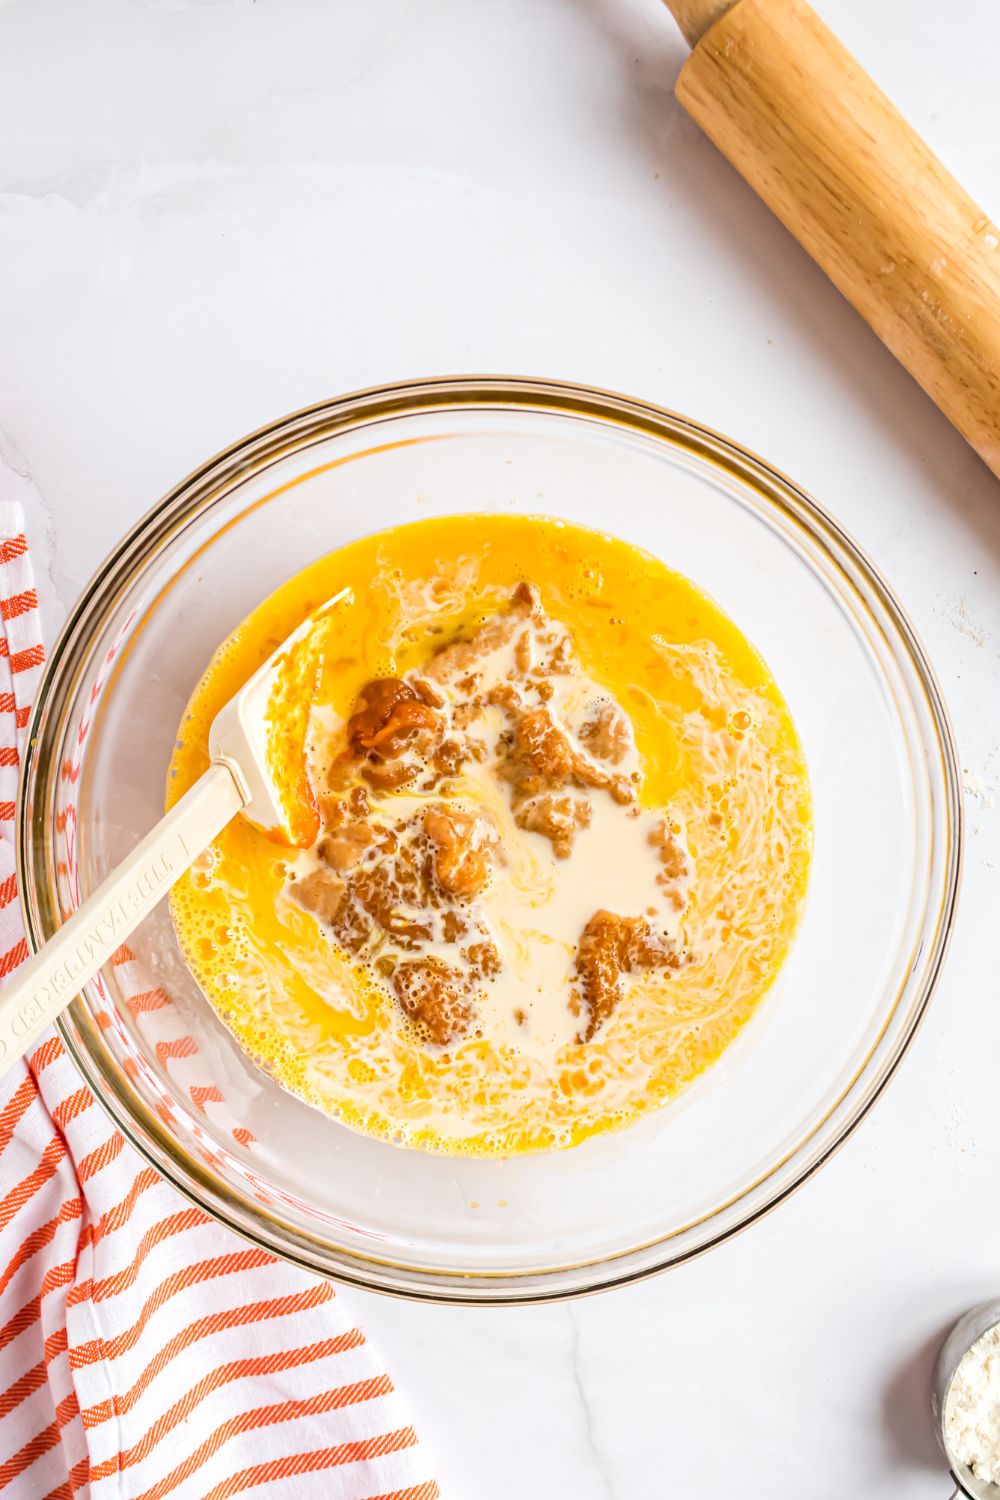
- Eggs (2, lightly beaten) – Provide stability and help set the custard filling, giving it structure as it bakes.
- Evaporated Milk (⅔ cup) – Adds richness and creaminess without overpowering the pumpkin. Evaporated milk is concentrated, so it creates that silky, custardy texture without being too heavy.
When to Serve (Serving Ideas)
This dessert is tailor-made for Thanksgiving, but it’s also perfect for:
- Friendsgiving dinners – Bring it when you don’t have time to make a from-scratch pie.
- Office parties or potlucks – Easy to transport and slice.
- Sunday dinner in the fall – When James asks for “something sweet after football,” this pie does the trick.
- School events – Ariya’s teachers love when I send a tray of these cut into squares. They’re easier to serve than wedges.
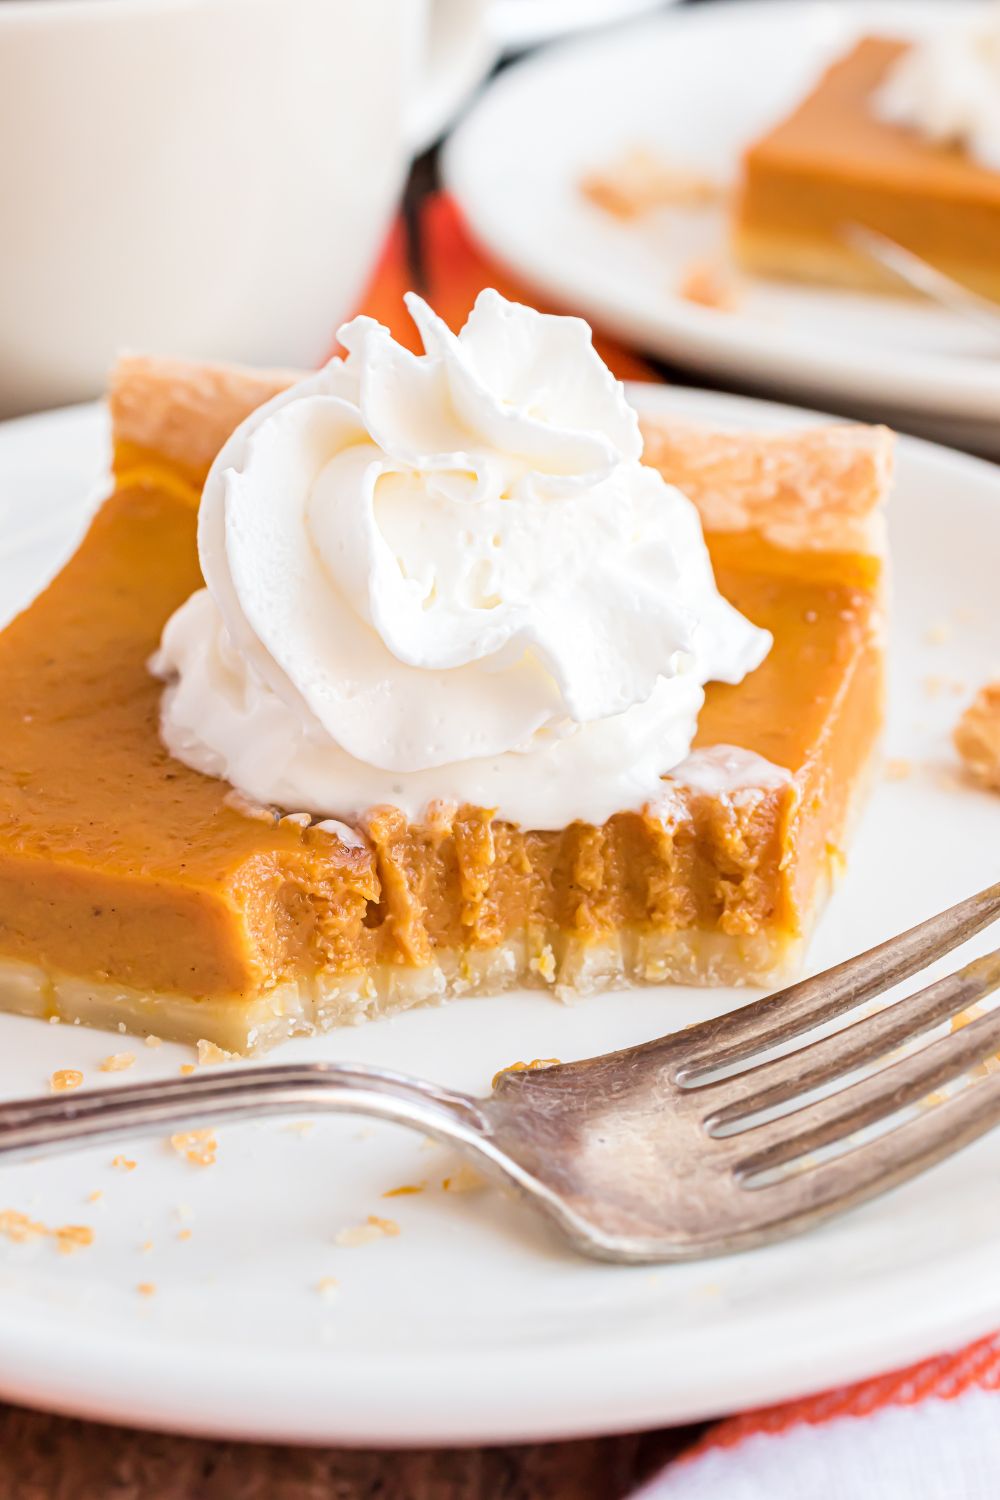
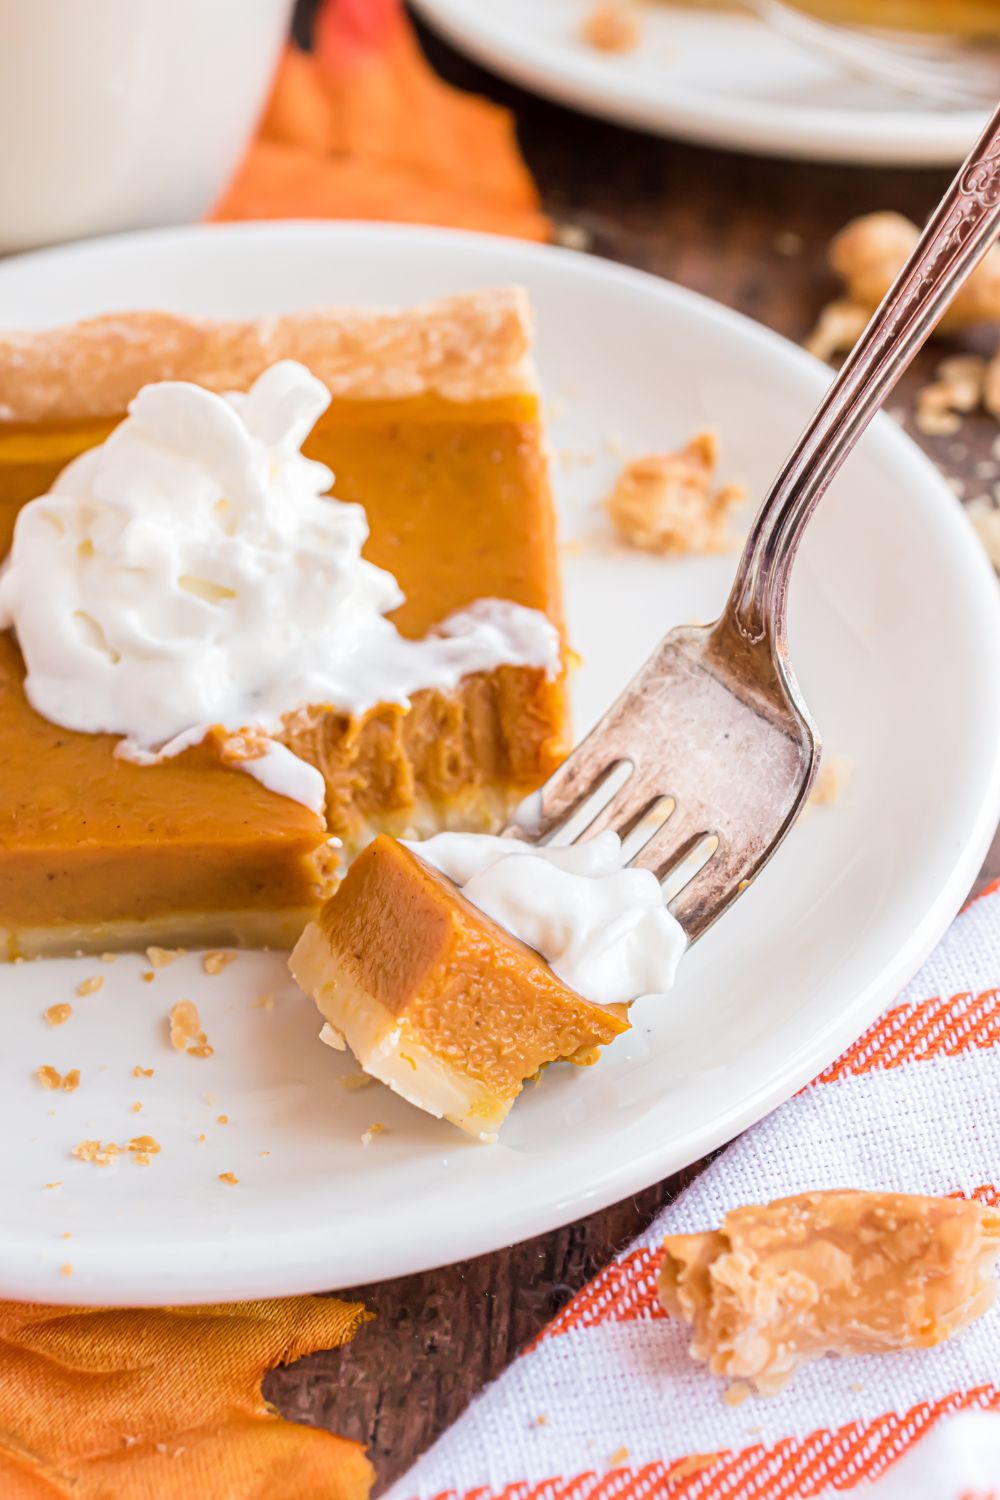
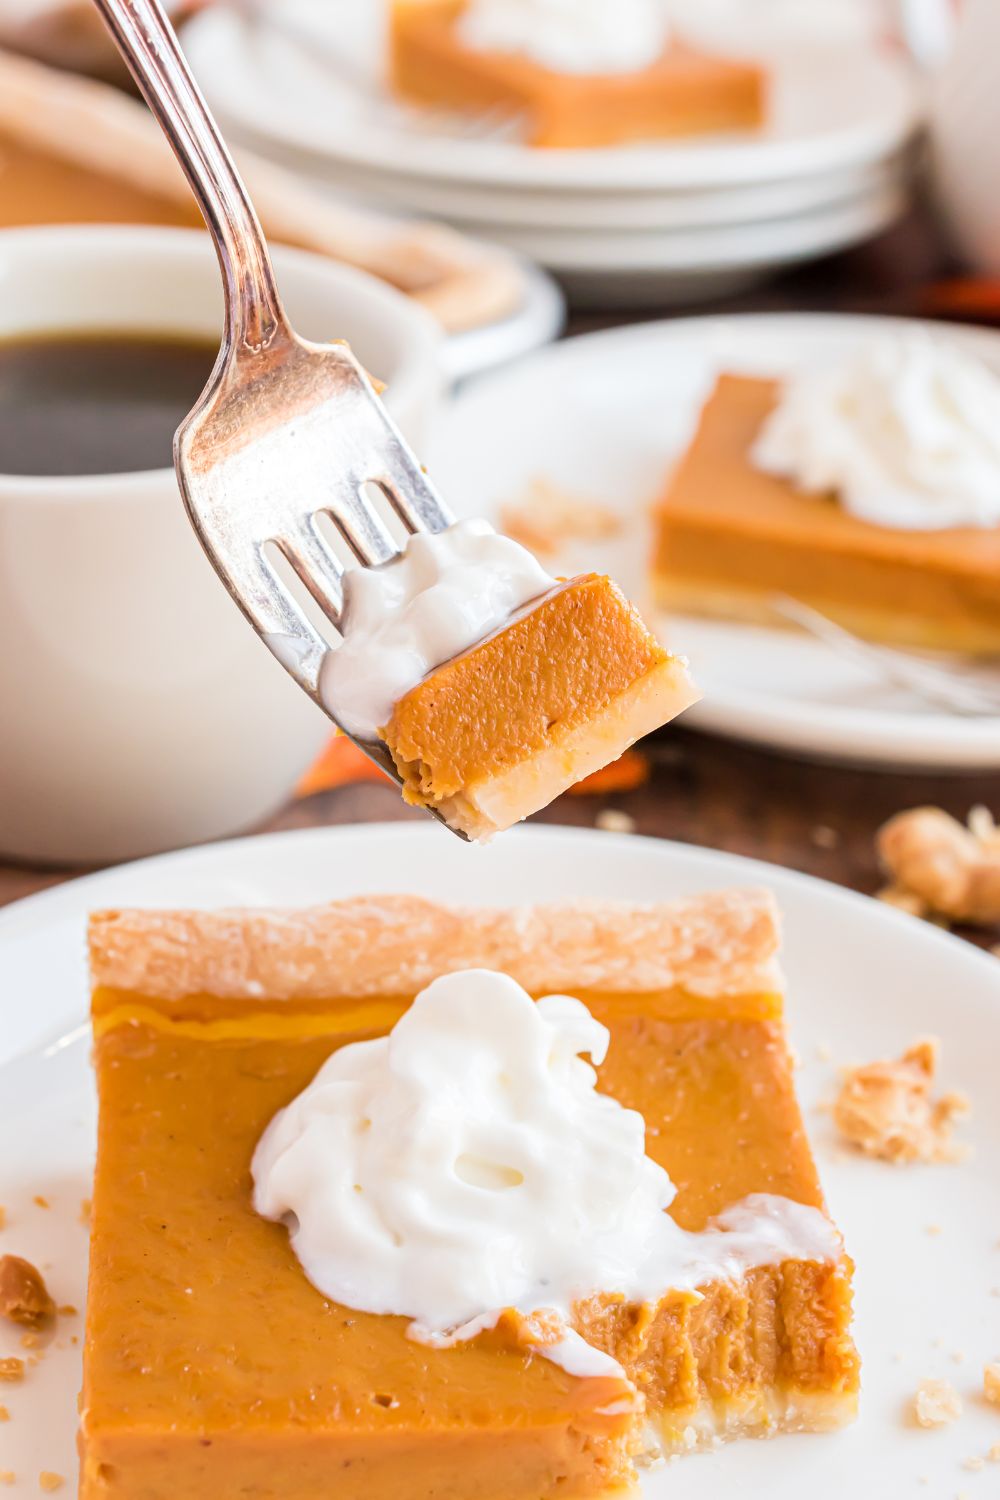
Serving tip: always finish each square with a swirl of whipped cream. If you want to get fancy, sprinkle a pinch of cinnamon or crushed graham crackers on top.
Make Ahead & Storage Tips
- Make Ahead: You can bake the pie the day before Thanksgiving, chill overnight, and bring it to room temp before serving. The flavor actually deepens as it rests.
- Fridge Storage: Cover loosely with foil or plastic wrap. Best eaten within 2 days (after that, the crust softens).
- Freezing: Wrap tightly in plastic wrap, then foil, and freeze for up to 3 months. Thaw in the fridge overnight. Pro tip: freeze slices individually for easy grab-and-serve portions.
Why You’ll Love This Recipe
- Minimal ingredients (just 4!) but maximum flavor.
- Kid-approved: Ariya gobbles hers with extra whipped cream, while Cameron just points and says “pie!”
- Crowd-friendly: One pan serves up to 16 if you cut smaller pieces.
- Flexible: Add a dollop of cream cheese frosting, a drizzle of caramel, or even chopped candied pecans if you want to dress it up.
FAQ: Sheet Pan Pumpkin Pie
What’s the difference between pumpkin puree and pumpkin pie mix?
Pumpkin puree is 100% cooked, mashed pumpkin with no added sugar or spices. Pumpkin pie mix, which we use in this recipe, already includes sugar and warm spices like cinnamon, nutmeg, and cloves. That’s why this recipe only needs eggs and evaporated milk to complete the filling.
Can I use pumpkin puree instead of pumpkin pie mix?
Yes, but you’ll need to make adjustments. Pumpkin puree is just cooked, mashed pumpkin with no sweeteners or spices added. If you use puree, you’ll need to add sugar, cinnamon, nutmeg, ginger, and cloves yourself. A good starting point is 1 cup of sugar, 1 teaspoon cinnamon, ½ teaspoon ginger, ¼ teaspoon nutmeg, and ¼ teaspoon cloves for every 30 ounces of puree. This essentially turns it back into a pumpkin pie mix. Using puree does give you more control over sweetness and spice, but it adds extra steps and measuring.
Why do you use evaporated milk instead of sweetened condensed milk?
Evaporated milk is unsweetened and helps create a creamy custard texture without adding extra sugar. Sweetened condensed milk, on the other hand, is thick and very sweet, which would throw off the balance of the recipe since the pumpkin pie mix already contains sugar. If you were to use condensed milk, you’d end up with a pie that’s far too sweet and possibly too dense. Stick with evaporated milk for the best results.
Can I use homemade pie crust?
Definitely. If you love making pie dough from scratch, go for it. Just make sure it’s rolled thin enough to cover the sheet pan. Refrigerated crust is a time-saver, but homemade always adds a little extra love.
Can I make this pie ahead of time?
Yes! In fact, this pie is even better the next day because the flavors have time to meld. You can make it a day before Thanksgiving, refrigerate it overnight, and serve it the next day. Just be sure to let it come to room temperature before serving for the best flavor and texture. If you’re really pressed for time, you can bake and freeze the pie weeks ahead—just thaw in the fridge overnight before serving.
How do I know when pumpkin pie is done?
The center should jiggle slightly but not look wet. If the edges puff up slightly and the crust is golden brown, it’s ready. It will continue setting as it cools.
How do I prevent the crust from getting soggy?
One of the most common issues with pumpkin pie is a soggy crust. To prevent this, make sure to chill the rolled crust in the pan before baking. Chilling helps the butter in the dough firm up so it doesn’t melt too quickly when it hits the hot oven. If you want extra insurance, you can blind bake the crust for about 10 minutes before adding the filling. Just line it with parchment paper, add pie weights or dried beans, and bake. This sets the crust and keeps it crisp even after the custard filling is added.
Why did my pumpkin pie crack?
Overbaking is the most common culprit. Pumpkin pie is custard-based, so it needs a gentle bake. This recipe reduces the oven temp compared to a standard pie to help avoid cracks.
What makes this recipe different from traditional pumpkin pie?
The biggest difference is that this pie is baked in a quarter sheet pan instead of a round pie dish. That means you get a thinner layer of pumpkin custard, a nice ratio of crust to filling, and more servings with less fuss. Traditional pumpkin pies are round, take longer to cool, and can be tricky to slice evenly. With this version, you get uniform squares that are perfect for serving at Thanksgiving gatherings or holiday potlucks. It also uses pumpkin pie mix instead of puree, which saves you time because the sugar and spices are already blended into the filling.
How do I know when sheet pan pumpkin pie is fully baked?
The edges should be set, the crust should be golden brown, and the center should jiggle slightly like gelatin when you gently shake the pan. If the center looks wet or sloshy, it needs more time. The pie will continue to set as it cools, so don’t wait for the center to be completely firm in the oven. Overbaking can cause cracks in the filling and make the texture rubbery.
Can I cut this pie into more than 12 servings?
Absolutely. This pie is baked in a 9×13 pan, so you can easily cut it into 16 smaller squares if you’re serving a big crowd with lots of dessert options. The smaller squares are still a satisfying serving size, especially when topped with whipped cream or served alongside another dessert.
Why is baking in a sheet pan better for Thanksgiving?
A sheet pan pie is easier to transport, cuts into more servings, and cools faster. Traditional pumpkin pies can take hours to set, but a slab pie in a sheet pan sets much more quickly. Plus, when you have a crowded dessert table, neat squares are easier to serve than wedges that tend to collapse or crack. It’s the perfect solution when you’re juggling multiple holiday dishes.
Variations & Substitutions
- Dairy-Free: Use coconut milk instead of evaporated milk.
- Gluten-Free: Use a gluten-free crust or make a crustless version by baking the filling in a greased pan.
- Toppings: Whipped cream, candied pecans, caramel drizzle, or crushed gingersnaps.
- Mini Pies: Use muffin tins instead of a sheet pan for individual servings.
Leftover Ideas
- Pumpkin Pie Parfaits: Layer pie squares with whipped cream and crushed cookies.
- Pumpkin Milkshakes: Blend pie filling with vanilla ice cream and milk.
- Pumpkin Pie Breakfast: James actually crumbles leftovers into his morning oatmeal.
Budget Breakdown
- Refrigerated Pie Crusts (2) – $4.00
- Pumpkin Pie Mix (1 can) – $3.50
- Eggs (2) – $0.60
- Evaporated Milk (⅔ cup) – $0.80
Total: $8.90 for 12 servings
Cost Per Serving: ~$0.75
Compared to store-bought bakery pie (usually $12–15), this is a steal!
Lightened-Up Version
- Use low-fat evaporated milk.
- Replace half the crust with a nut-and-oat crumble topping.
- Cut sugar by making your own pumpkin puree filling with less added sweetener.
Can I reduce the sugar in this recipe?
Since we’re using pumpkin pie mix, the sugar is already added. If you want less sweetness, you’ll need to use plain pumpkin puree and add your own sugar in smaller amounts. This lets you control sweetness more precisely, but it also means measuring out the spices separately.
Reader Favorite Tips
- “Chill overnight for best slices.”
- “Use parchment paper for easier removal.”
- “Add a teaspoon of vanilla to the filling for extra depth.”
Troubleshooting Tips
- Soggy crust? Blind-bake for 10 minutes before adding filling.
- Overbaked filling? Reduce oven temp slightly; remember it sets while cooling.
- Cracks? Don’t stress—cover with whipped cream!
My Personal Kitchen Notes
Every year, this pie saves me time during the holidays. James always wants a traditional pumpkin pie, but with Ariya and Cameron needing my attention, I just don’t have time for complicated recipes. This one delivers the same cozy flavor but in a format that’s practical for our busy family table.
My Final Thoughts
Pumpkin pie will always be a Thanksgiving classic, but this Sheet Pan Pumpkin Pie with just 4 Ingredients is my new go-to. It’s simple, reliable, and family-friendly. If your holiday table is as hectic as mine, trust me—this pie will be the easiest win you’ll have all season.
Pumpkin Recipes
- Mini Pumpkin Pies
- No Bake 5 Minute Pumpkin Fudge!
- Pumpkin Earthquake Cake
- Pumpkin Cake with Cream Cheese Frosting
Sheet Pan Pumpkin Pie
Ingredients
- 2 refrigerated ready-made pie crusts
- 1 30- ounce can pumpkin pie mix
- 2 large eggs lightly beaten
- ⅔ cup evaporated milk
Instructions
- Take the refrigerated pie crusts out of the refrigerator, but keep them in the plastic sleeve. Thaw according to package directions.
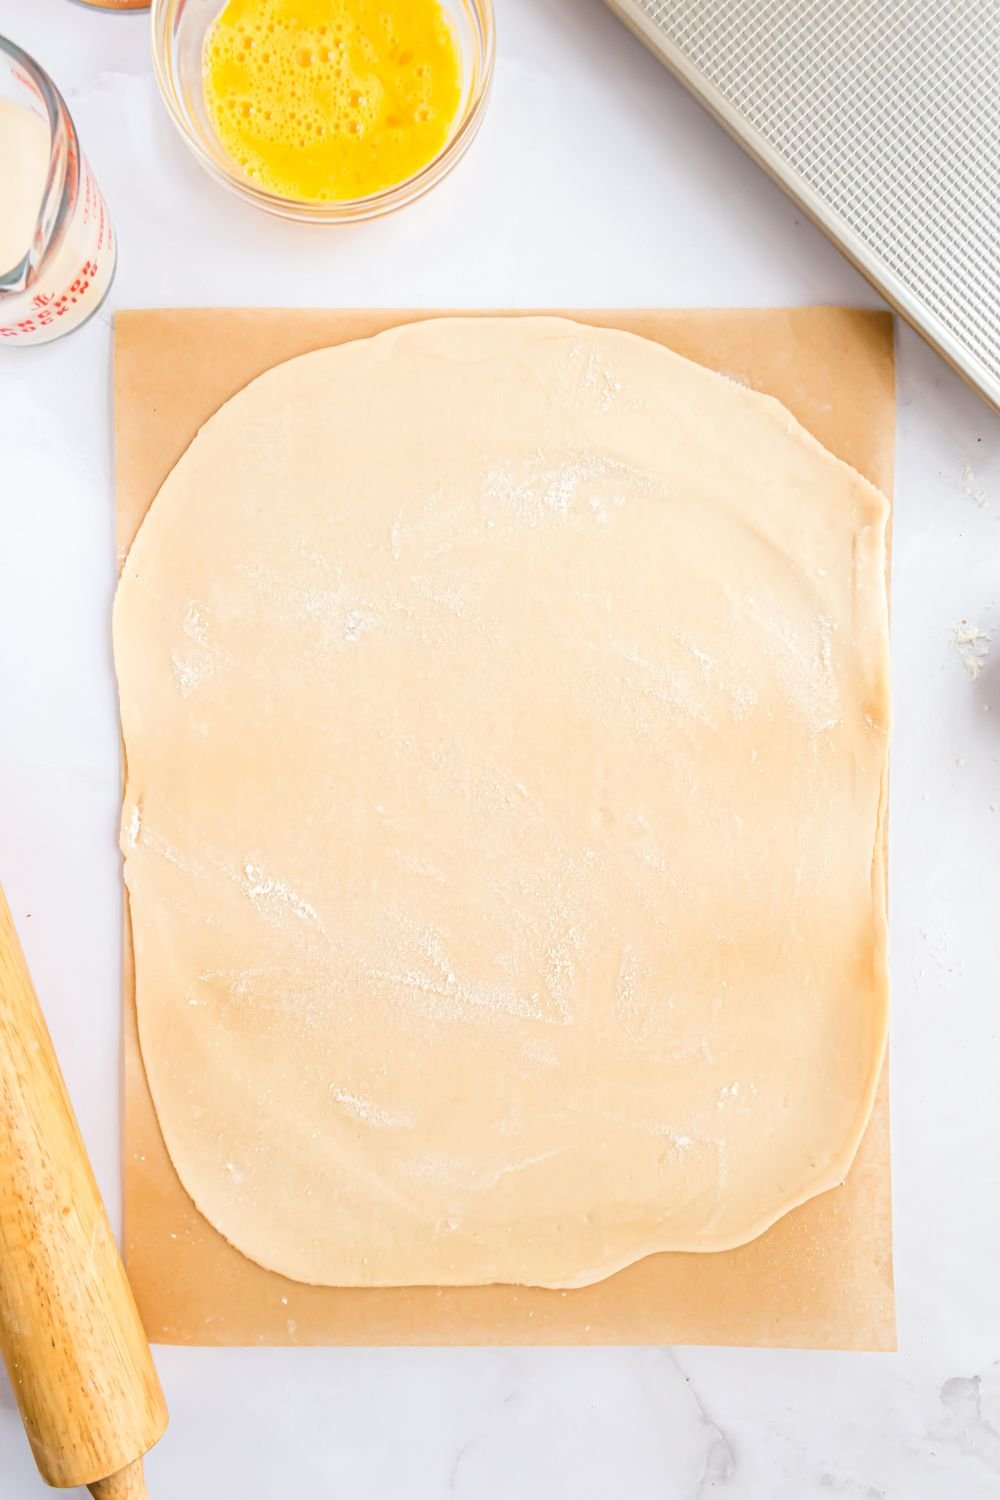
- Lightly flour a work surface. Unroll pie crusts and stack them on top of each other.
- Roll the dough to a 17”x14” rectangle using a large rolling pin.
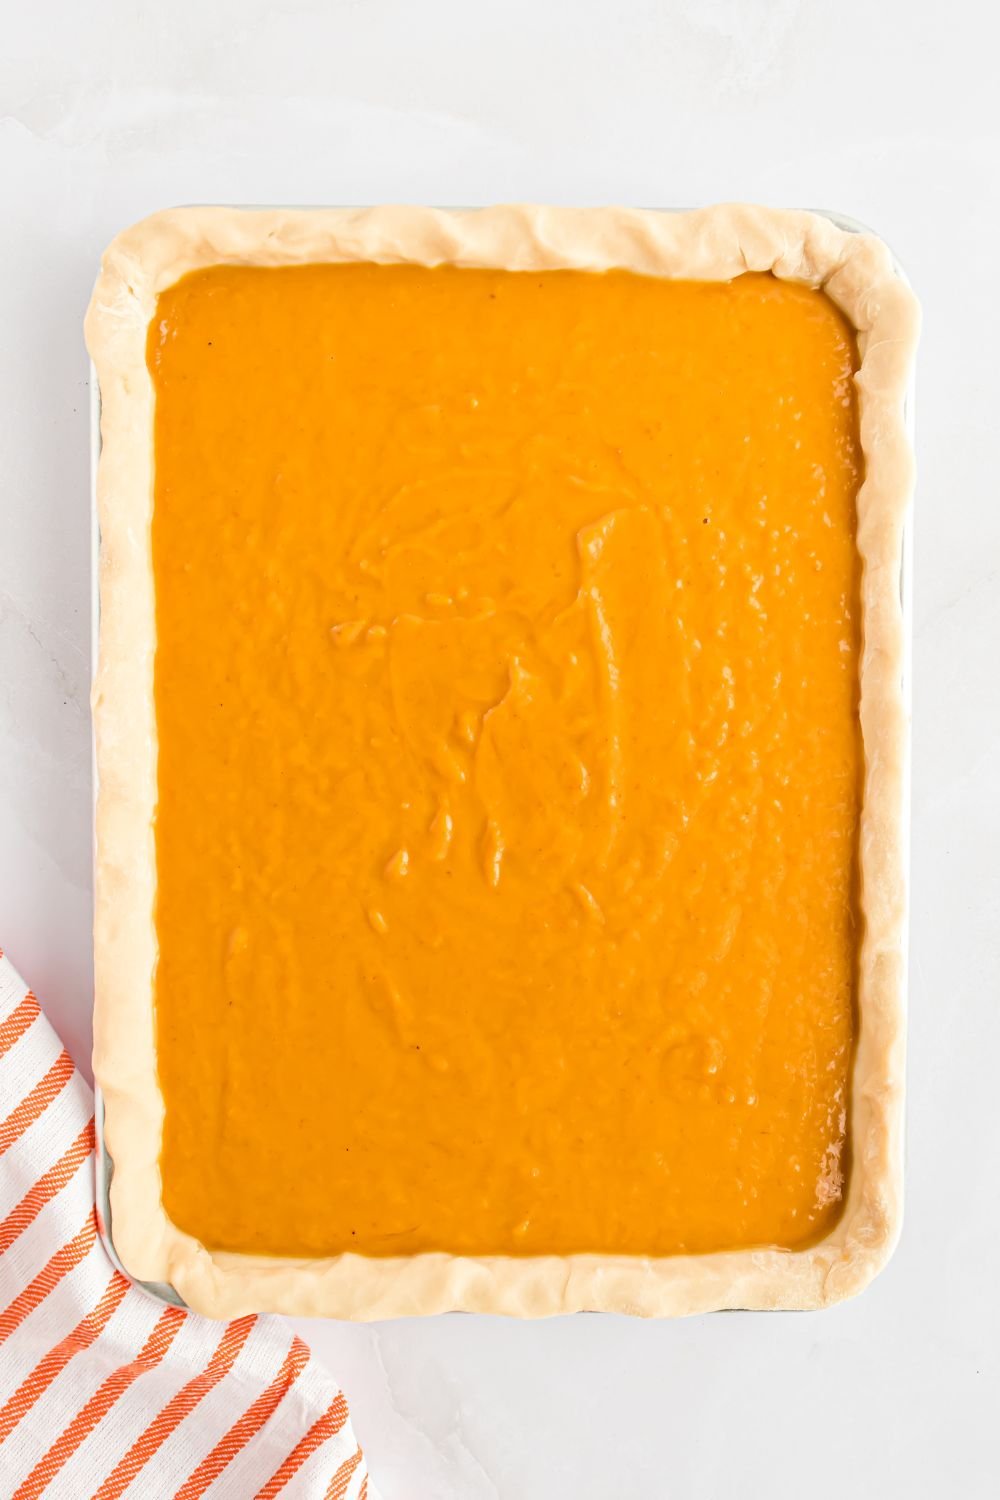
- Transfer the dough to a quarter sheet pan and press the crust into the corners of the pan, allowing the excess dough to hang over the edges.
- Roll the crust edges toward the center of the pan, forming an even edge. Cover and chill for 1 hour.
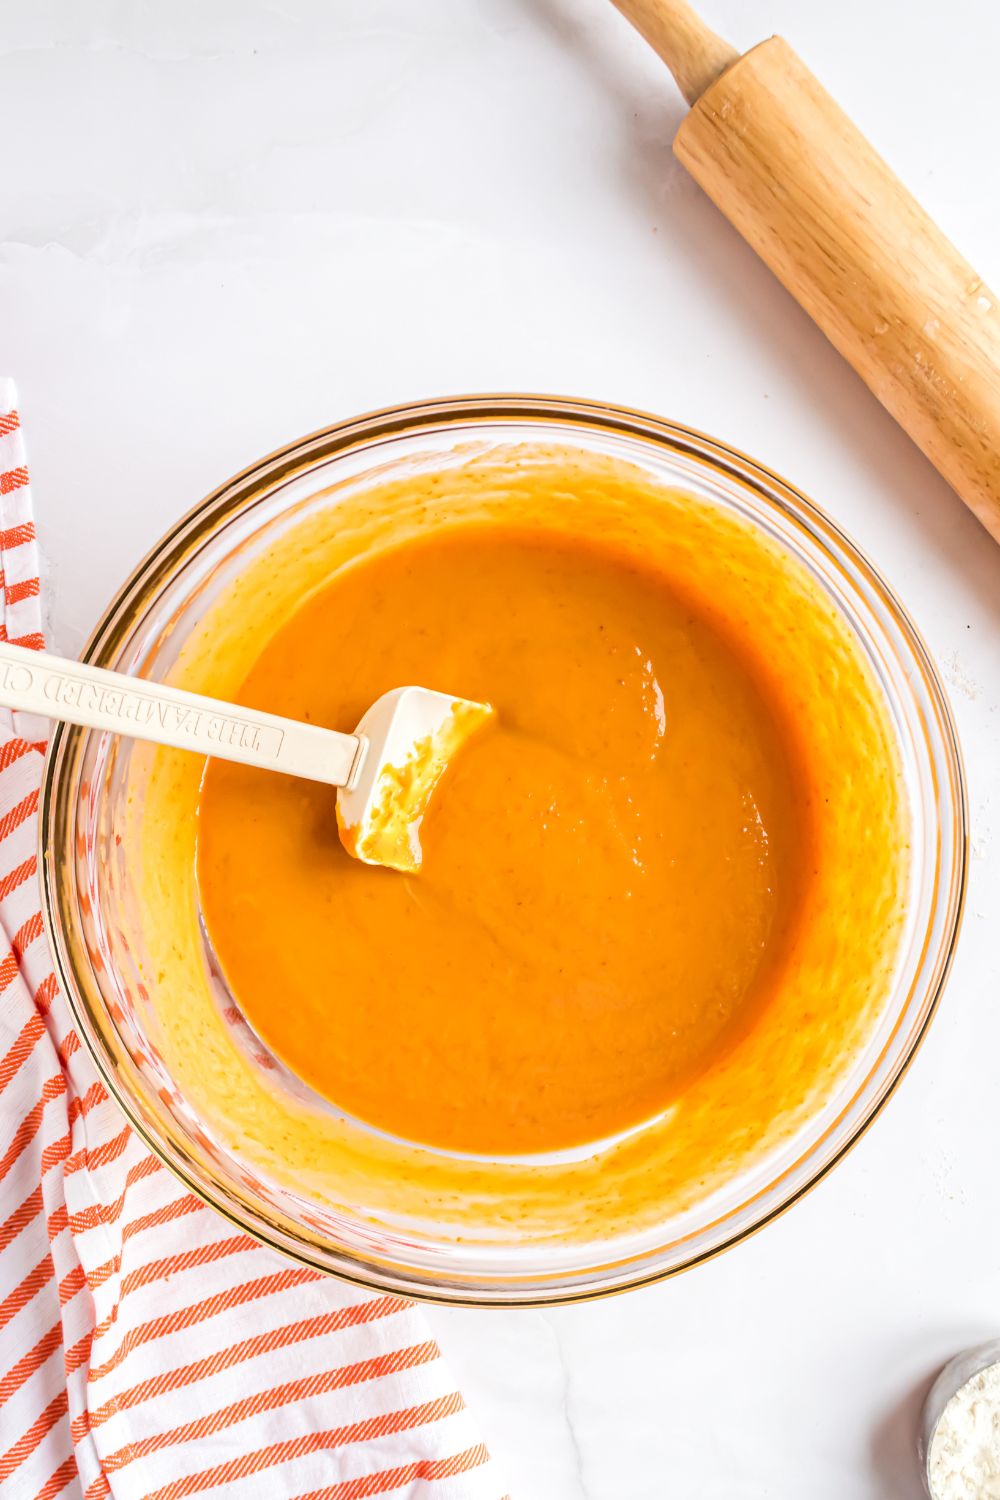
- In a large mixing bowl, combine pumpkin pie filling, eggs, and evaporated milk by hand. After the crust has chilled for one hour, remove it from the refrigerator and pour the mixture into the prepared pan.
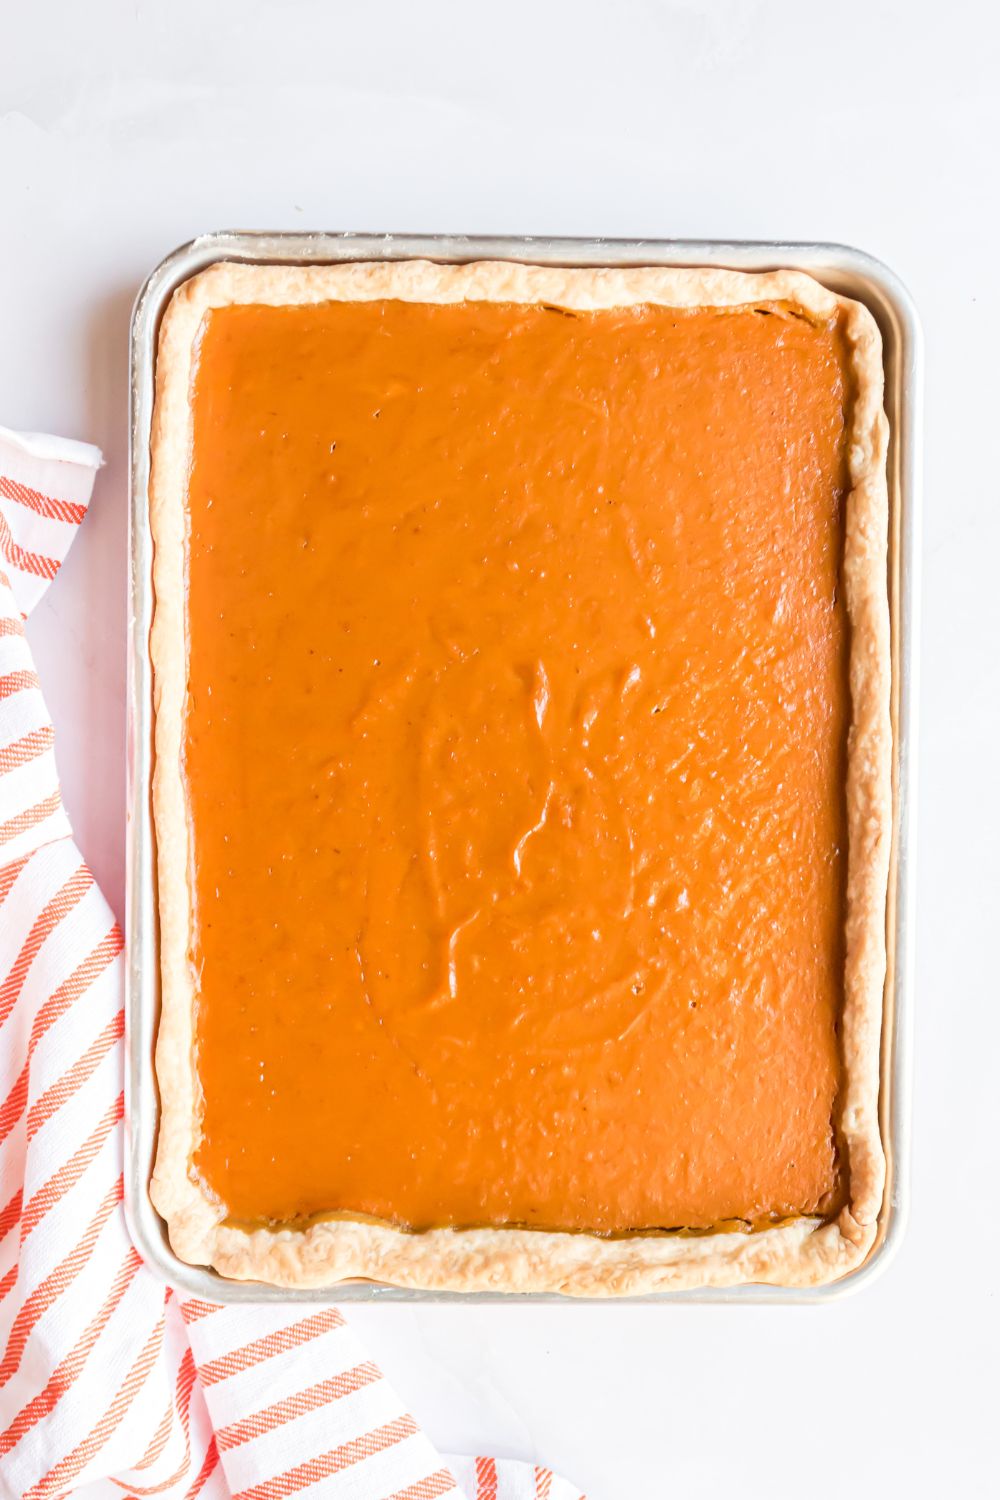
- Bake for 50-60 minutes or until the crust is brown and the pumpkin filling jiggles slightly in the middle.
- Turn the oven off and allow the pie to remain in the oven, with the door cracked, for an additional 15 minutes.
- Cool on a wire rack for 4 hours. Refrigerate if not serving the same day. Serve the pie at room temperature or chilled.
Did you make this recipe?
Make sure to follow on Pinterest for more recipes!

Leave A Reply!