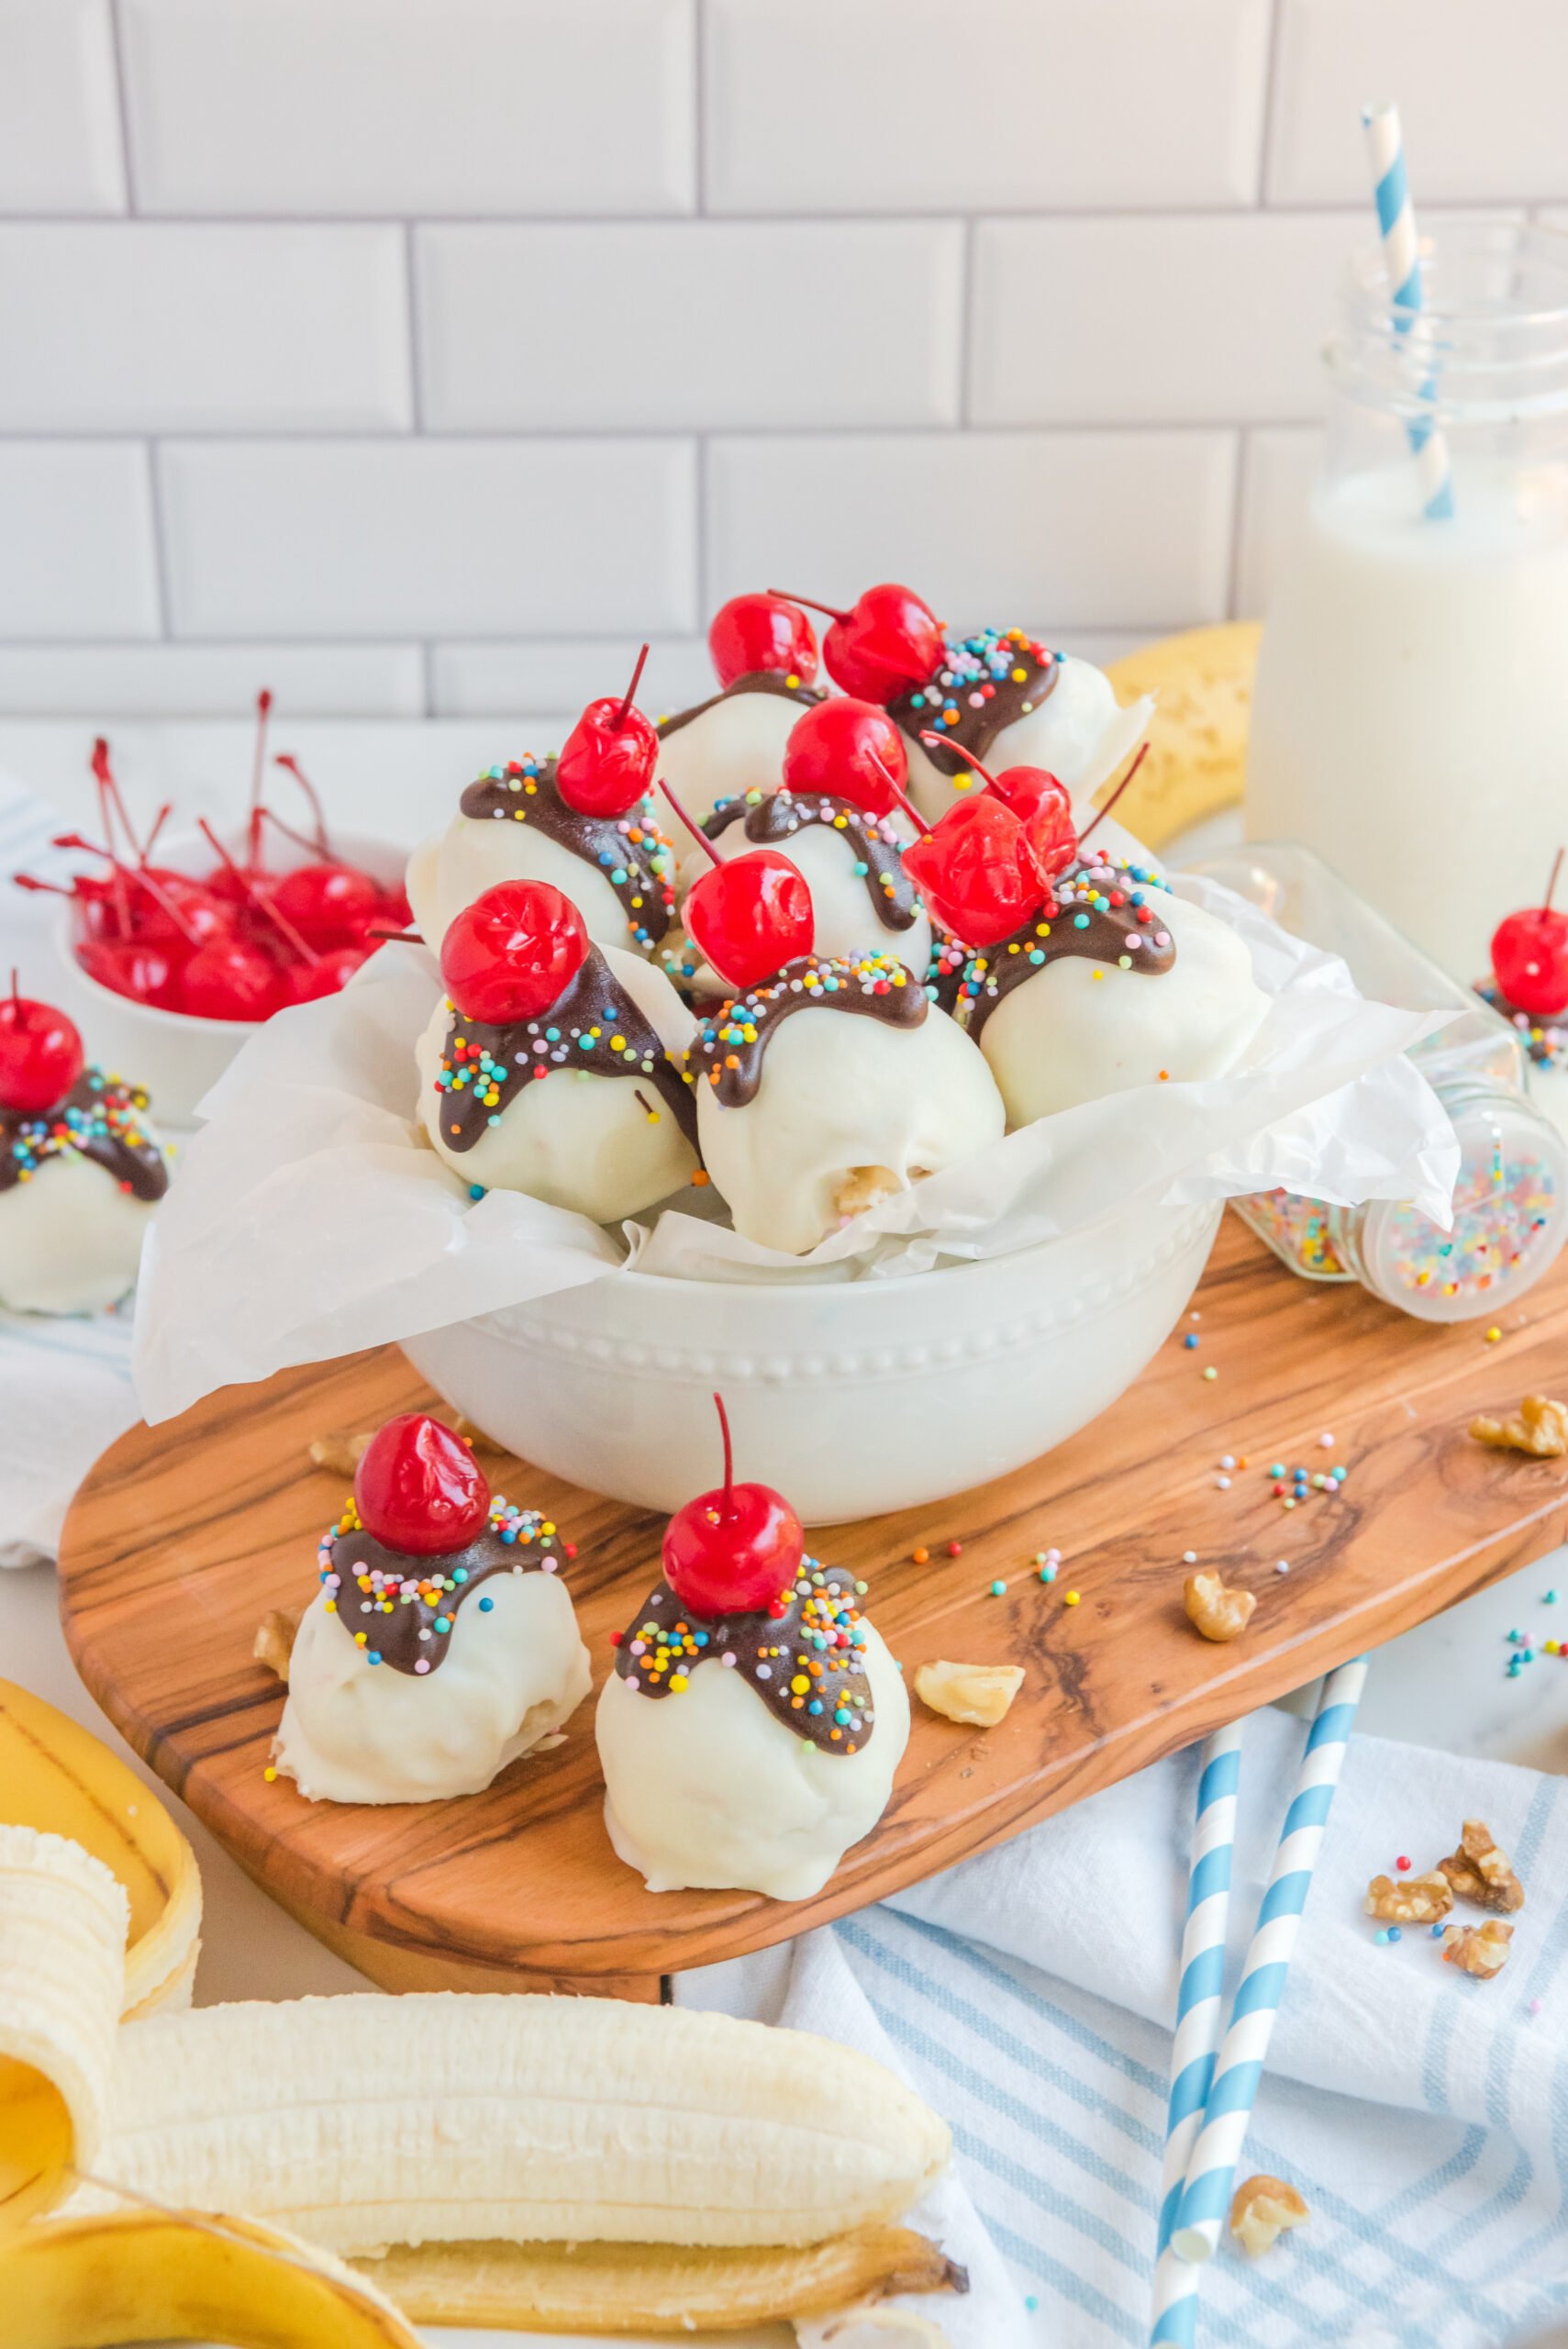
These Banana Split Truffles are what dreams are made of! Imagine the classic flavors of a banana split transformed into a bite-sized truffle that will make your taste buds dance with joy. These delightful truffles bring together the perfect balance of indulgence and freshness.

These Banana Split Truffles are always the lift of the party. The truffles are always a hit because they are simple to make and full of delicious ingredients. They have a velvety smooth exterior that gives way to a luscious banana center. Each bite is a harmonious blend of fruity sweetness and decadent chocolate, making it hard to resist reaching for just one more.

Banana Split Truffles are the perfect dessert for any occasion. With their creamy goodness and beautiful presentation, they are sure to impress your friends and family. They’re also simple to make, requiring only a few ingredients and a short amount of time.

What are truffles?
The term “truffle” is most commonly used to describe a type of candy made with chocolate and cream. However, the word has also been used to refer to savory dishes made with truffles or specific kinds of fungi that are popular in European cuisine. As a dessert, truffles can be served chilled or at room temperature, and they are often decorated with colorful chocolate sprinkles or other toppings.

Ingredients Needed for Making Banana Truffles
Please check out the recipe card for all of the ingredients needed and the directions.
- Cream cheese – The secret to making delicious, rich truffles is to use high-quality cream cheese in the recipe. This ingredient should be soft and creamy, without any lumps or signs of separation.
- Box white cake mix – See notes below about heat treating the cake mix.
- Crushed pineapple – Crushed pineapple, either from a can or fresh, is an important ingredient in this recipe. Not only does it add sweetness and flavor to the truffles, but it also helps them set up properly after they have been chilled.
- White candy coating – White candy coating, also known as white confectionery coating or wafers, is an essential ingredient for making chocolate truffles. This type of chocolate melts easily and sets up firm once it has been chilled.
- Chocolate melting wafers – Chocolate melting wafers, also known as chocolate chips or discs, are used to coat the outside of the truffles. These wafers should be melted in a double boiler or microwave until they are smooth and pourable.

Heat Treating Cake
Using the microwave for heat treating the cake: To heat treat the cake mix, microwave the cake mix in a microwave-safe bowl for (2) 30-second intervals stirring in between. Allow the cake mix to come to room temperature before use.
Using the oven for heat treating: place cake mix on a large cookie sheet prepared with parchment paper. Evenly spread your cake mix out to cover the entire sheet. Cook cake mix at 350 degrees for 5 minutes and allow it to come to room temperature before use.


Tips for Making Banana Split Truffles
- Start with high-quality chocolate for the base of your truffles. Choose one that has a deep, rich flavor, as this will make all the difference in your finished product.
- For the filling, use cream cheese that has been softened and combined with sugar to create a sweet and creamy texture.
- Roll the truffles in shredded coconut, chocolate sprinkles, crushed nuts, or any other toppings that you prefer.
- To serve your truffles at room temperature, allow them to sit out on the counter for at least an hour before serving.
- Store them in the refrigerator for a chilled treat until you are ready to enjoy them. They will keep for several days if stored properly.
- Tips to ensure your truffle balls are round and smooth, remove them from the fridge about halfway through their first chilling time to round them again in between the balls of your hand. Doing this while they are semi-chilled will help give them a smoother finish and a more round shape.

While the truffles are chilling, it’s time to bring out the toppings. Get creative and set up a toppings bar with crushed peanuts, rainbow sprinkles, or even some diced maraschino cherries. The options are almost endless!

Indulge that first bite of these delectable banana split truffles and let the flavors carry you away to a sunny summer day at your favorite ice cream parlor. The creamy and fruity banana center, with hints of chocolate and a satisfying crunch, will leave you craving for more.

You can also make these for the upcoming holidays! I love have cute truffles on my cookie tray and these are guaranteed to be a huge hit! They are the perfect combination of flavors!

There are several reasons why you will love banana split truffles:
- Unique flavors: Banana split truffles combine the classic flavors of a banana split dessert, including banana, chocolate, and vanilla cake. The combination of these flavors creates a delicious and unique taste experience.
- Creamy texture: Truffles are known for their melt-in-your-mouth texture. Banana split truffles are no exception, with a creamy and smooth texture that adds to their overall indulgence.
- Nostalgic appeal: Banana splits are a classic dessert that many people have fond childhood memories of. Banana split truffles can evoke a sense of nostalgia and bring back those happy memories, making them a comforting and enjoyable treat.

Perfect for holiday parties, special gatherings, or to surprise your family with a decadent homemade dessert, these truffles never fail to delight. Enjoy them plain or dressed up with elaborate decorations that make them stand out from the crowd. These truffles are easy enough for anyone to make, so whip up a batch today for an unforgettable treat.

If you’re looking for a decadent treat that will satisfy your sweet tooth then look no further than these mouthwatering truffles! These delectable bites combine the goodness of creamy bananas with the richness white cake and topped with chocolate, creating a dessert that is both heavenly and addictive.

How to Store Banana Split Truffles
Banana Split Truffles should be stored in an airtight container in the refrigerator. This will help keep them from getting too soft or melting as they sit at room temperature.
You can also freeze them for up to 2 months, which is a great option if you want to make these ahead of time and store them for future use. To thaw the peanut butter balls, simply let them sit at room temperature for a few hours until they are fully defrosted and ready to eat.
More Recipes You Will Love!
Strawberry Cheesecake Truffles

Banana Truffles
Ingredients
- 15.25 oz box white cake mix heat treated (See notes)
- 8 oz block of cream cheese softened to room temperature
- 1 teaspoon vanilla
- ½ cup crushed pineapple very well drained
- ¾ cup chopped walnuts
- 1 banana sliced
- 8 oz of white candy coating
- ½ cup chocolate melting wafers
- Rainbow sprinkles and stemmed maraschino cherries for garnishing
Instructions
- Prepare a large cookie sheet with parchment paper and set aside.
- In a medium mixing bowl cream together the cake mix, cream cheese, and vanilla extract until fully combined and “dough-like”.
- Add in crushed pineapple, chopped walnuts and banana slices. Mix until equally distributed.
- Using a 1-2 inch cookie scoop, scoop the mixture and roll into 1 – 1-½ inch balls. Use the palms of your hands to smooth and round each ball. Do this until the mixture is completely used. See notes for additional tips.
- Place each truffle ball on the sheet of parchment paper and place inside the refrigerator for 1 hour.
- About 5-10 minutes before the chilling time is complete, begin to prepare your candy coating by first adding them to a microwave safe bowl. Heat candy coating on 50% powder for 1 minute and stir when completed. Return to the microwave for 30 second intervals on 50% power, stirring in between each turn. Do this until the candy coating is silky smooth and fully melted.
- Using two forks or dipping tools, dip each truffle ball into the melted chocolate, covering it completely. Roll the ball, working it into the chocolate to cover it completely.
- Place each chocolate covered truffle on parchment paper and repeat the process for all truffles.
- Place inside the refrigerator and allow to cool for an additional 30 minutes.
- When the truffles have almost finished chilling, repeat step 5 for the chocolate melting wafers until they are silky smooth.
- Using a small spoon, spoon a small dollop of the melted chocolate over top of the truffle to make the “chocolate syrup”. See notes for additional tips.
- Place a stemmed cherry immediately in the melted chocolate and hold for a few seconds until firmed. Top with sprinkles and repeat for each truffle, working one at a time.
- Return the baking sheet to the refrigerator and allow truffles to chill for an additional 30 minutes before serving.
Notes
OVEN INSTRUCTIONS for heat treating cake mix: place cake mix on a large cookie sheet prepared with parchment paper. Evenly spread your cake mix out to cover the entire sheet. Cook cake mix at 350 degrees for 5 minutes and allow it to come to room temperature before use.
Did you make this recipe?
Make sure to follow on Pinterest for more recipes!

Leave A Reply!