Make any occasion special with these Red Velvet Cake Balls. They’re easy to make, no bake and the flavor combination is superior.
Red Velvet Cake Balls are delicious and indulgent treats that will satisfy all your dessert Valentines Day cravings! If you’re looking for a unique spin on the classic red velvet cake, these bite-sized creations are sure to surprise and delight.

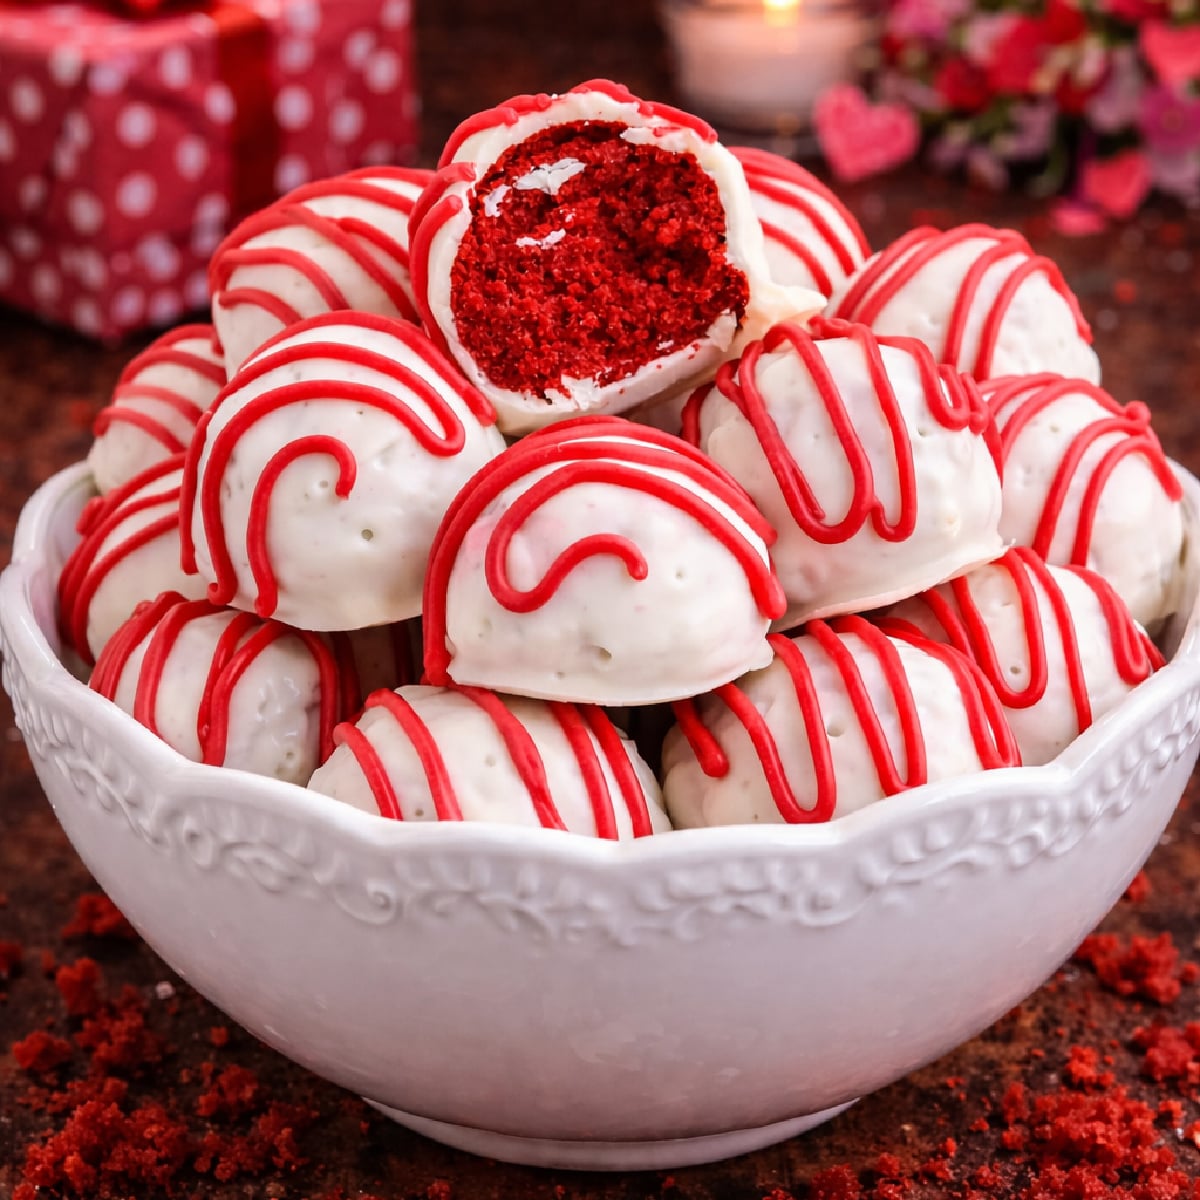
These sweet treats are moist and light, with a flavor combination of smooth chocolate, tangy cream cheese, and a hint of vanilla. They can be served as a decadent snack or dessert, no occasion necessary! Go ahead and give Red Velvet Cake Balls a try, they are sure to be a treat your guests won’t soon forget. These cheesecake bites are very moist, which makes them even more amazing.

What are cake balls?
These are small, bite-sized balls of cake that have been dipped in chocolate or a chocolate-like substance. These are pretty easy to make and can be done using just a few simple ingredients. The key to making great cake balls is to use good quality ingredients so that the flavor really shines through.

Ingredients Needed to Make Cake Balls with Cream Cheese
- Box red velvet cake mix – The cake mix should be heat treated.
- Block of cream cheese – The cream cheese should be softened at room temperature.
- White chocolate melting wafers – For making the cake balls.
- Red candy melting wafers – The red candy melts are for decorating.
- Optional: sprinkles, nuts, or other toppings to add flavor and texture.
- Crisco shortening – The Crisco in this recipe allows the chocolate to thin slightly, making it easier to coat the cheesecake bite and easier to work with. Be sure not to use too much Crisco, as the chocolate will grow too thin, making it more translucent than need be.

How to Store Red Velvet Cake Balls Recipe
Cake balls are best stored in an airtight container in the refrigerator. They will keep for several days if stored properly, making them a great option for entertaining or hosting. If you plan to serve cake balls at room temperature, it is recommended that you freeze them first, as this will help prevent them from melting and ensure that they are still firm and delicious when served.
You can also freeze cake balls for later use, simply wrap them tightly in plastic wrap or place them in an airtight container and store them in the freezer for up to 3 months. To defrost, simply remove from the freezer and thaw at room temperature for a few hours before serving.

Common Questions for Red Velvet Balls
What is heat-treating cake?
- MICROWAVE INSTRUCTIONS for heat treating cake mix: To heat treat the cake mix, microwave the cake mix in a microwave-safe bowl for (2) 30-second intervals stirring in between. Allow the cake mix to come to room temperature before using.
- OVEN INSTRUCTIONS for heat treating cake mix: place cake mix on a large cookie sheet prepared with parchment paper. Evenly spread your cake mix out to cover the entire sheet. Cook cake mix at 350 degrees for 5 minutes and allow it to come to room temperature before use.

Can you use homemade frosting in red velvet cake balls?
Yes, you can use homemade frosting in red velvet cake balls if you prefer. If you want to use a homemade cream cheese frosting, we recommend thinning it out slightly by adding a bit of milk to help it hold together.
Can I use a red velvet cake made from scratch?
Yes, you can use red velvet cake made from scratch for your cake balls. To get the best results with homemade red velvet cake, be sure to use a light hand when mixing the batter, as too much mixing can cause the cake to become tough.

How do I decorate my red velvet cake balls?
There are many different ways to decorate your red velvet cake balls. Some popular options include rolling the finished balls in sprinkles, chopped nuts, or other toppings of your choice.

Does cream cheese work well in cake balls?
Yes, cream cheese is a great option for making cake balls. The creaminess and tanginess of the cream cheese add flavor and texture that really complements the rich chocolate coating of these treats. Using softened block-style cream cheese makes it easy to work with and forms into bite-sized pieces.

More Recipes You Will Love!
White Chocolate Peanut Butter Snowballs

Red Velvet Cake Balls
Ingredients
- 1 box red velvet cake mix heat treated (see notes below)
- 8 oz block of cream cheese softened at room temperature
- 2 cups white chocolate melting wafers
- ¾ cup red candy melting wafers
- 2 tablespoons of Crisco shortening divided
Instructions
- Prepare a large cookie sheet with parchment paper and set aside.
- In a small mixing bowl mix together cake mix and cream cheese until smooth.
- Using a 1 inch cookie scoop, scoop the mixture and roll into 1 – 1-½ inch balls. Use the palms of your hands to smooth and round each ball. Do this until the mixture is completely used.
- Place each truffle ball on the sheet of parchment paper and place inside the refrigerator for 1 hour.
- About 5-10 minutes before the chilling time is complete, begin to prepare your melting chocolate by first adding the white wafers to a large bowl.
- Next, place that bowl over a stovetop pot containing 3-4 inches of water. Bring water to a boil, creating a double boiler.
- Stir the wafers frequently using a rubber spatula as the chocolate melts. Add 1-1-½ tablespoons of the crisco and continue to stir until the chocolate is smooth, silky and fully melted. When done, remove from heat.
- Using two forks or dipping tools, dip each truffle ball into the melted chocolate, covering it completely. Roll the ball, working it into the chocolate to cover it completely.
- Place each cheesecake bite in the parchment paper and repeat for all bites.
- Place inside the refrigerator and allow to cool for an additional 20 minutes.
- When the cheesecake bites have almost finished chilling, repeat the double boiler process for the red melting wafers. Melt down the chocolate, adding the remaining crisco and mix until silky smooth. When done, remove from heat.
- Using a piping bag or small plastic Ziploc bag, pipe red chocolate lines over each cheesecake bite by moving the bag side to side.
- Repeat this process for all bites one at a time before placing the cookie sheet back in the refrigerator to chill for an additional 20 minutes before serving.
Did you make this recipe?
Make sure to follow on Pinterest for more recipes!

Leave A Reply!