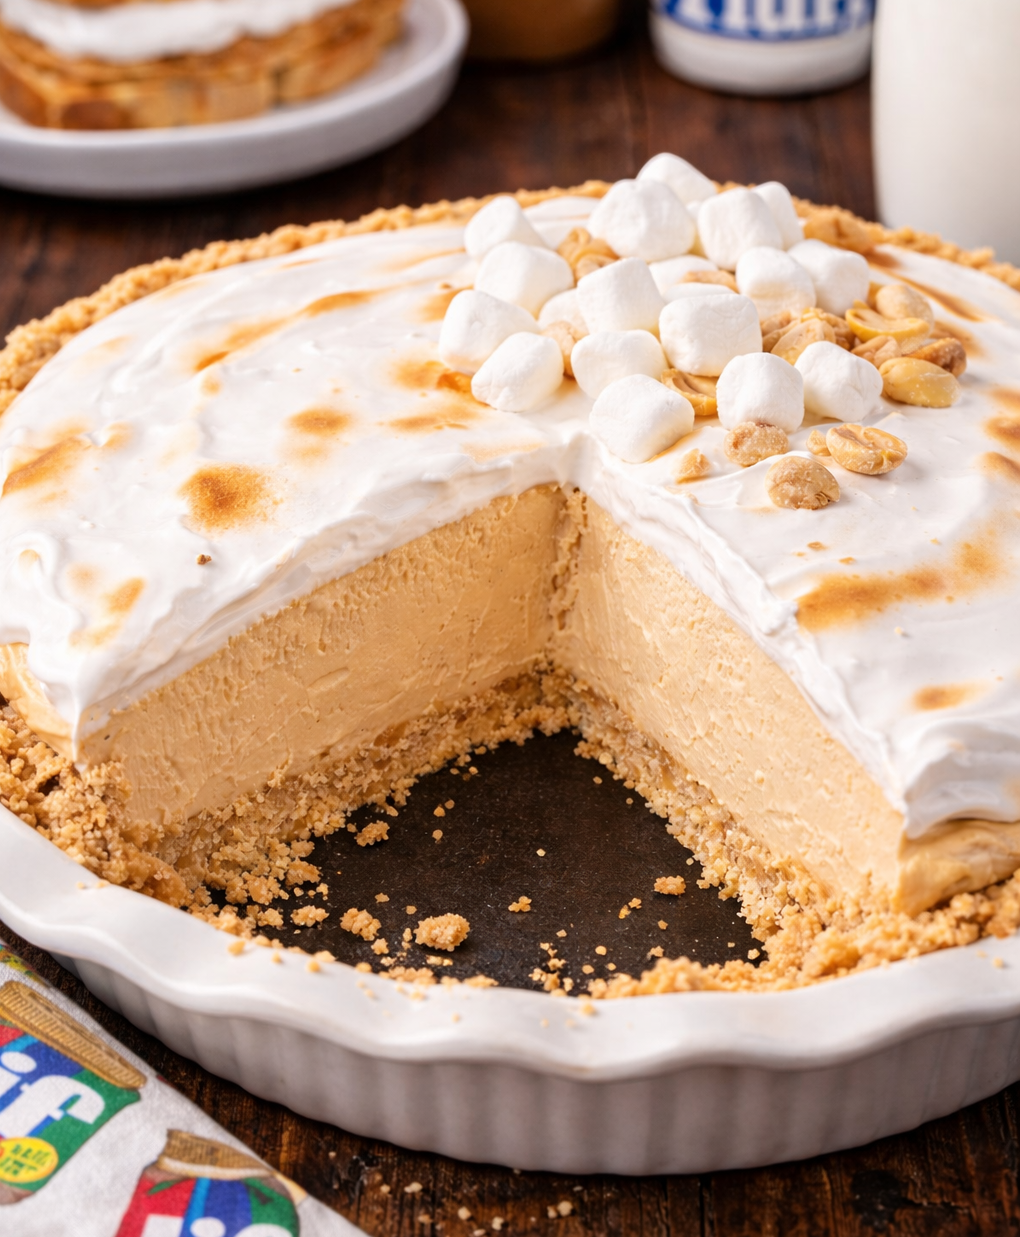
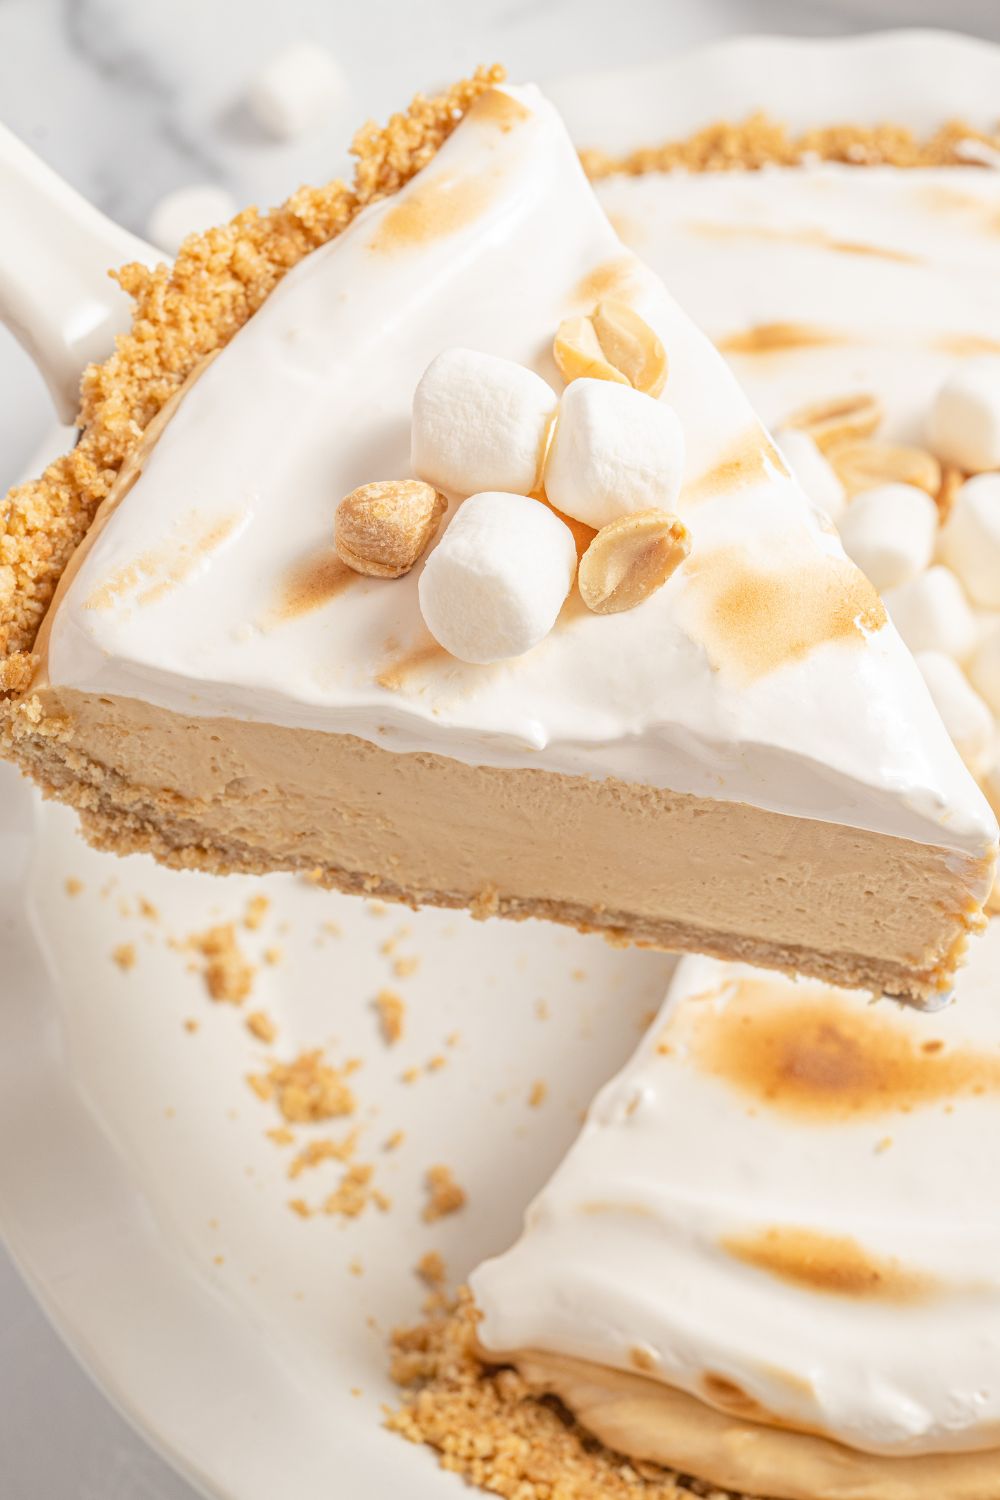
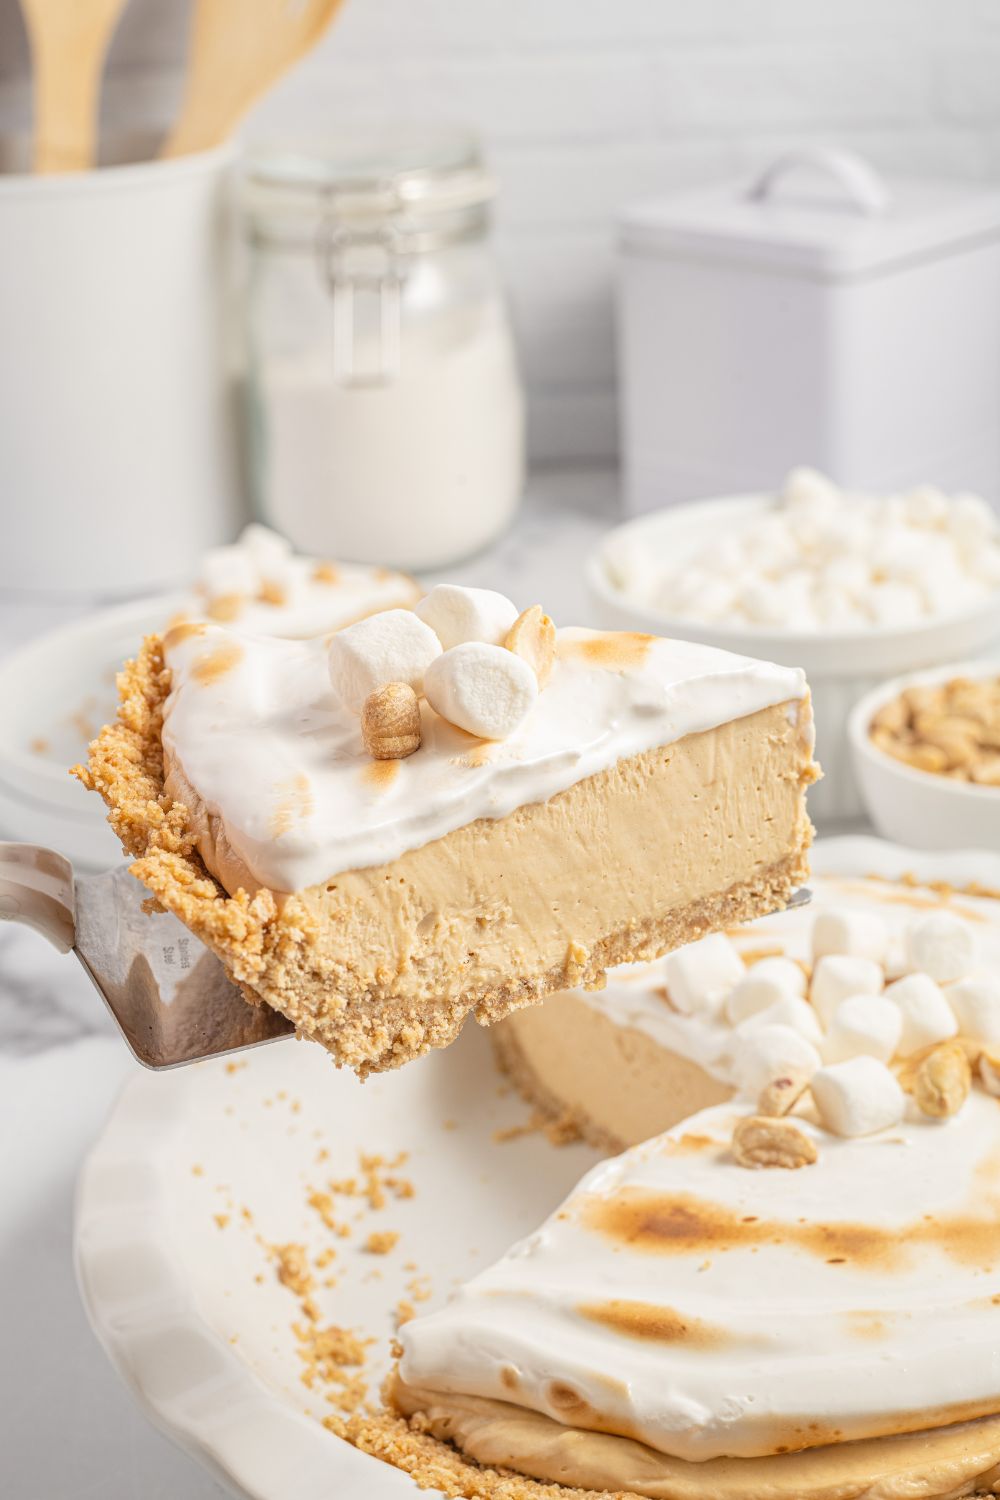
Fluffernutter Pie is an absolutely creamy and dreamy no bake pie. A buttery graham cracker crust, cream cheese, peanut butter, whipped cream, meringue, and more come together in this out-of-this-world pie. If you want a no bake dessert, consider this peanut butter pie.
The Fluffernutter Pie That Will Make You the Star of Any Gathering (Even If It’s Just Tuesday Night) Let’s get one thing straight: this is not a pie for the faint of heart. This is the pie you make when you’ve had a long week, or when you’re hosting friends.

If you grew up eating fluffernutter sandwiches, you already know where this is going. If you didn’t, don’t worry. You’re about to have a moment. This pie is like if your childhood lunchbox and a fancy diner dessert had a love child—and then that child went to therapy, healed, and came out living its best life.

Fluffernutter is a peanut butter and marshmallow cream blend on a sandwich. This is a nostalgic pairing that has been around for ages. So I wanted to create this no-bake pie with the inspiration of the classic fluffer nut flavors but with a twist.
Now, if you are a fan of no bake pies, you gotta try a few of these pies. Try my classic peanut butter pie, strawberry Kool-Aid pie, or this lemon cheesecake pie.

Reasons Why You Will Love This Fluffernut Pie
- Simple ingredients that offer a rich flavor in each bite.
- Great dessert for peanut butter lovers.
- Easy no bake pie that is perfect for any occasion.
- Make ahead friendly if you want a dessert you can make it in advance.
- If you have kids they will love to help make this pie.

Ingredients
Graham Crackers – You will take crushed graham crackers to make it into a pie crust.
Butter – Unsalted butter is what I use for this dessert. Melt it to create the perfect texture for the pie crust.
Brown Sugar – Light brown sugar is preferred as it will enhance the flavor but it won’t overpower like dark brown sugar.
Cream Cheese – Ensure you soften your cream cheese before you use it. If the cream cheese is chilled it will not mix well.
Powdered Sugar – Powdered sugar is going to sweeten the pie but also create a velvety texture.
Peanut Butter – Peanut butter is the stand-out flavor. I recommend using any brand of peanut butter you like.
Whipped Cream – Cool Whip is great for this pie as you can fold it in, and it will elevate the pie to a very light and fluffy texture.
Egg Whites – Room temperature egg whites are needed to create the meringue. Make sure there is no egg yolk.
Cream of Tartar – Cream of tartar is used for creating that perfect cloud-like texture of the meringue.
Vanilla – A little vanilla creates sweetness in the meringue.


Variations To Recipe
- Buy a store-bought crust instead of making your own crust.
- Swap the classic crust with Oreo cookie crust.
- Fold in some peanuts for a crunchy twist to the pie.
- Mix in mini marshmallows for a more flufffernut flavor to the pie.
- Drizzle on melted chocolate or even chocolate syrup.
- Caramel sauce would be delicious drizzled on top of the peanut butter filling.
- Top with whipped cream instead of meringue.
Tips For Pie
Food Processor
I recommend using a food processor for crushing the graham cracker crumbs. If you don’t own one you can use a Ziploc bag and a rolling pin to crush the graham crackers.
Hand Mixer or Stand Mixer
To create the best velvety smooth filling a mixer is going to really transform the texture of the pie. You can mix it with a spoon or whisk but it will not be as creamy.
Meringue
Make sure that when you remove the egg yolk from the whites there is no yolk left. The yolk will affect the amount of the whites being whipped up and the stiffness.
Cream of Tartar
The tartar in the recipe is going to stabilize the meringue and help create that glossy appearance to the finished product.
Slicing Pie
Use a sharp knife that has been dipped in hot water. Wipe the knife clean and then create a clean slice. Then dip a knife, wipe, and repeat for ultra-clean slices for your pie. I use this trick for that bakery-style look.

The Vibe
This isn’t some delicate, lace-doily, plated-at-a-fancy-bistro kind of dessert. This is comfort food, straight-up. The kind you cut yourself a “tiny sliver” of at midnight and then come back 10 minutes later with a fork and no shame. It’s rich and creamy with that perfect hit of peanut butter, sweet without being cloying, and has a graham cracker crust that knows what it’s doing. It’s casual but impressive.

Let’s Talk About the Layers
You’ve got the graham cracker crust, first of all. Simple, sturdy, just sweet enough. You press it into the pie dish, freeze it to lock it in, and boom—your base is set. From there, things start getting real. The filling is where this pie shows off. Cream cheese and peanut butter get whipped together until they’re smooth and dreamy, and then you hit it with powdered sugar and fold in whipped topping until it’s all one big, glorious peanut butter cloud. It’s rich, sure, but somehow still light enough that you can justify a second piece.

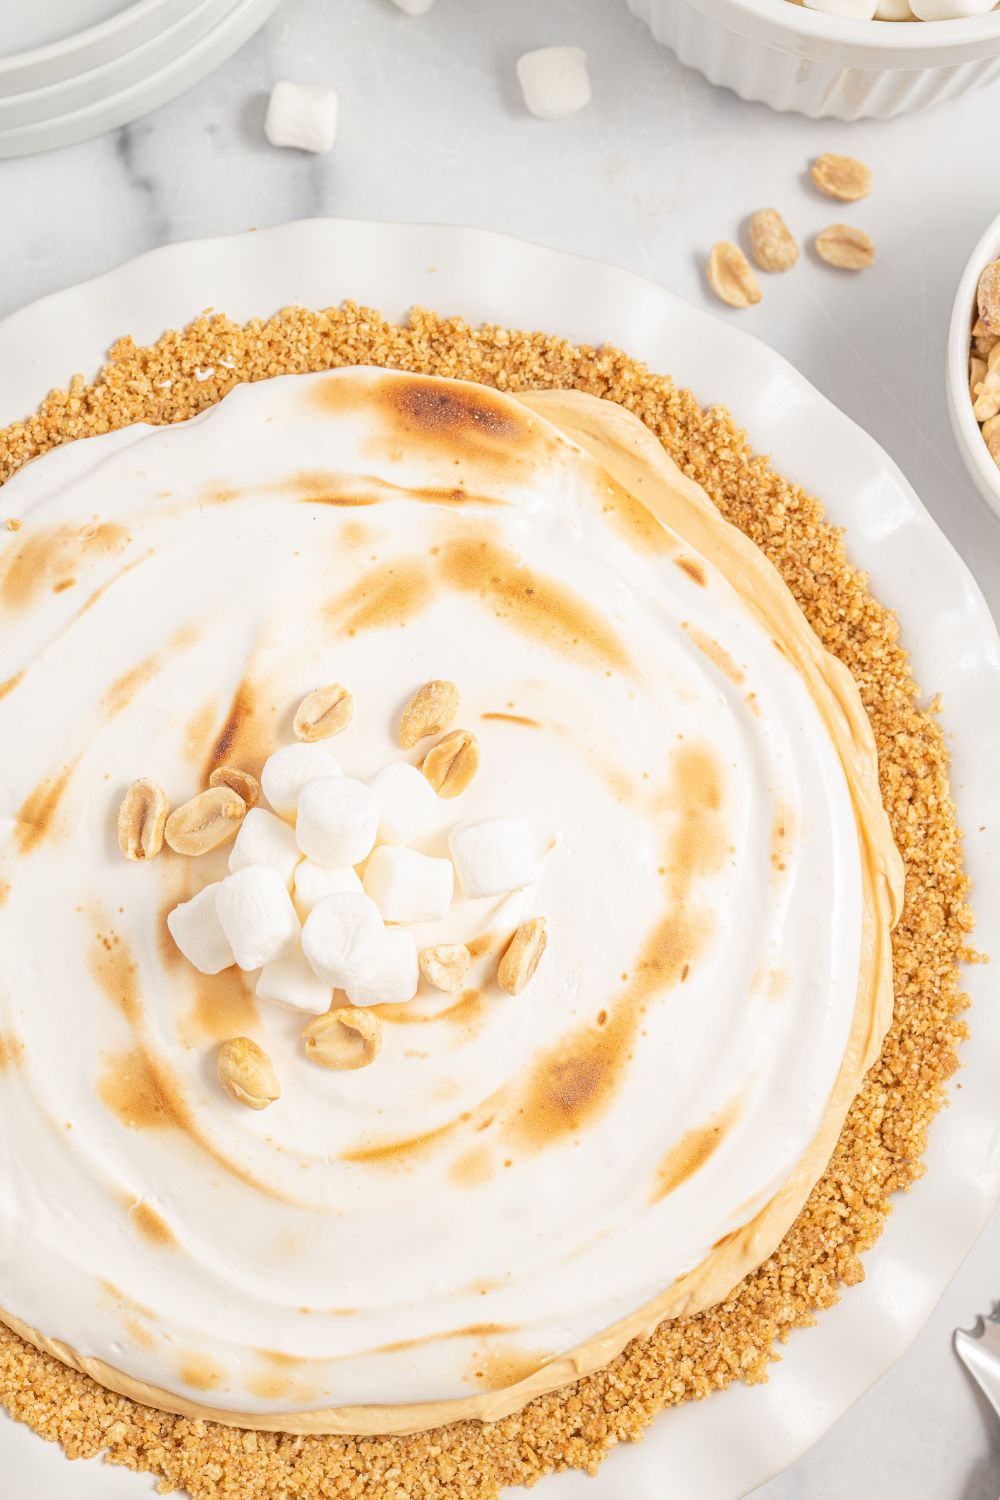
The Meringue
Look, if you’ve never made meringue before, don’t panic. This one’s simple. You’re heating egg whites and sugar over a makeshift double boiler (read: a bowl over a pot of simmering water, no need to get fancy), then whipping it until it’s glossy, stiff, and holds its shape like it’s auditioning for a baking show.

And here’s the fun part—torch that meringue. Get a little toasty on it. You’ll feel like a magician. It adds that perfect hint of campfire-y marshmallow nostalgia, like the best part of a s’more just landed on your pie.
Optional but highly encouraged: top the whole thing with mini marshmallows. Because why not? You came this far.

The Chill (Literally)
Here’s the hard part: waiting. This pie needs to chill for at least four hours, which is honestly rude, but worth it. It needs that time to set up properly so you can get nice, clean(ish) slices. But don’t be surprised if your “test slice” turns into, well…not just a test slice. You’re only human.

When to Make This Pie
Short answer? Whenever you want. Long answer? It’s perfect for potlucks, birthdays, summer BBQs, random Wednesdays when you need a win, or those nights when you want to channel your inner Ina Garten and whisper, “store-bought is fine” as you fold in that whipped topping like a boss.
It’s nostalgic and modern, indulgent and chill, sweet but not too sweet. It hits every single craving you didn’t even know you had.

Storing
Refrigerate – Keep the pie refrigerated until you are ready to eat it. Place in an airtight container and store for around 3-5 days.
Freezing – This peanut butter fluffernut pie can be frozen for later as well. Place in a freezer container for 2-3 months. Then thaw in the fridge the night before you want to eat it.

FAQs
Can I toast the meringue with a torch?
Yes. A kitchen torch will create that golden brown toasted meringue on top of the pie. Do circular motions to create that nice and even brown on top.
Can I add chocolate to the pie?
Hot fudge, chocolate syrup or even melted chocolate can be used. Drizzle over the peanut butter layer before you add on the meringue.
Can I use a different type of crust?
Yes. Any flavor of crust works. Golden Oreos, Oreo cookie crust, or even bake and cool a traditional pie crust. I prefer graham crackers but you can use any crust you want.
Can I make the pie ahead of time?
You can make this peanut butter pie a day ahead of time. Just make sure that you add the meringue right before serving up the pie. If you add the meringue on early and refrigerate it will become watery.
How do I prevent the meringue from weeping or shrinking?
Make sure to add the meringue all over the top of the pie sealing the edges. Using a kitchen torch to toast the meringue will help prevent the weeping and shrinking.

What I Tell Myself When I Eat a Slice for Breakfast
This pie isn’t trying to be perfect. It’s trying to be delicious. And honestly, it’s succeeding wildly.
It’s got that “holy crap, who made this?!” energy, but it’s made with pantry staples and no-fuss ingredients. It’s the kind of dessert that feels like an inside joke between you and your childhood memories. A little bit retro, a little bit extra, and a whole lotta love.

More Recipe Ideas
I love this Fluffernut Pie, but if you are on the hunt for a few more easy pie recipes check these out.

Fluffernutter Pie
Ingredients
- 2 1/2 cups graham cracker crumbs
- 2 tablespoons light brown sugar
- 8 tablespoons unsalted butter melted
- 8 ounces of cream cheese softened
- 1/2 cup powdered sugar
- 1 cup creamy peanut butter
- 8 ounces whipped topping thawed
- 4 large egg whites room temperature
- 1/2 teaspoon cream of tartar
- 1 cup granulated sugar
- 1 teaspoon vanilla extract
Instructions
- In a medium bowl you will add graham crackers that are crushed, brown sugar and butter in a bowl. Mix to combine.
- Press the mixture into the pie pan, pressing firmly. Then place the crust in the freezer for 20 minutes.
- While the pie crust is chilling grab a small saucepan. Add an inch of water and place on high heat. Whisk in the egg whites, cream of tartar and granulated sugar in a medium heat proof bowl, that is sat on top of the saucepan. IT will mimic a double boiler.
- Whisk the mixture for around 10 minutes, making sure it reaches 160 degrees. The egg whites will get foamy and the sugar needs to be dissolved fully.
- Remove the mixture from the heat, and use a mixer to whip in the vanilla. Whip on high speed until the meringue is stiff and a little stretchy when you lift the beaters out of the mixture.
- In a new bowl add the cream cheese and peanut butter. Whip until nice and creamy.
- Slowly add in the powdered sugar until it is fully mixed and creamy.
- Then fold in the whipped cream mixture.
- Pour the peanut butter filling into the chilled pie crust. Then refrigerate the pie for at least 4 hours to set up.
- Then top with the meringue topping. Use a kitchen torch to lightly toast the merignue. Top with mini marshmallows if you want and then serve and enjoy.
Did you make this recipe?
Make sure to follow on Pinterest for more recipes!

Leave A Reply!