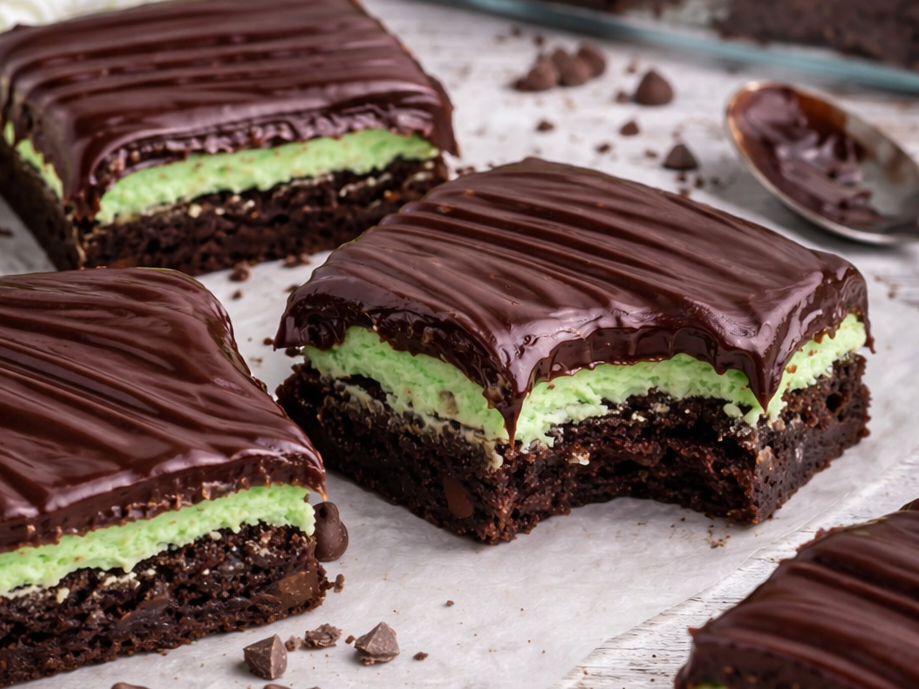
These Mint Chocolate Brownies are so fudgy and full of chocolate. Of course, they also have the perfect amount of mint to make them Mint Chocolate! They are not only beautiful, they are incredibly delicious!

Looking for a delicious yet unique dessert? If you’re a chocolate lover, then you’ve got to try Mint Chocolate Brownies. This classic treat is the perfect combination of chocolate and mint flavors that will have you wanting more. Here’s a quick guide on how to make these thick and fudgy brownies that are just so good.

What’s considered mint chocolate?
Mint chocolate can be defined as a combination of two flavors, mint and chocolate. This typically takes the form of mint-flavored candy bars or Andes Mints, which feature a layer of dark chocolate with mint filling inside. However, you can also add peppermint extract to your favorite brownie recipe to create that classic flavor combination.

Ingredients Needed
Make sure you check out the recipe card for a full list of ingredients and directions.
For the brownies:
- Salted butter – This is used to help balance the flavors so that the chocolate and mint flavors aren’t overpowering.
- Semi-sweet chocolate chips – These are used for the chocolate flavor.
- Granulated sugar – This is added to help balance the sweetness from the chocolate and mint flavors.
- Vanilla extract– This adds a subtle sweetness to complement the chocolate and mint flavors.
- All-purpose flour – Flour is used to help bind the ingredients together and also to provide structure for the brownies.
- Eggs help bind the ingredients together and add moisture to the brownies.
Mint frosting:
To make the mint frosting, you’re going to need salted butter, powdered sugar, heavy whipping cream, peppermint extract, and food coloring.
Ganache:
The ganache is simply chocolate chips, butter, and heavy whipping crea

How to Store Mint Chocolate Brownies
Once your brownies have cooled and are set, you can store them in an airtight container for several days. You can also freeze the brownies for longer-term storage. Just be sure to thaw them before serving.
To do this, simply remove them from the freezer and place in the refrigerator overnight to defrost. Be sure to store the brownies in a single layer, as stacking them can cause them to stick together.

How to Serve Mint Desserts
Mint desserts are a great addition to any party or special occasion. They’re perfect for serving at holiday celebrations, birthday parties, and other festive occasions. You can pair your brownies with ice cream or whipped cream or simply serve them plain as an after-dinner treat.

You are going to want to grab a tall glass of cold milk while you’re at it. They’re delightfully rich.

Common Questions
What can I add to the top of my mint brownies?
Depending on your preferences, you can add many different toppings to your mint brownies.
Some popular options include whipped cream, vanilla ice cream, sprinkles, chocolate shavings, or fresh berries. You can also opt for a simple dusting of powdered sugar or cocoa powder for a more classic look.

What is the secret to moist brownies?
There is no one “secret” to making moist brownies. Different factors, such as the type of ingredients used, the temperature of the oven when baking, and the cooking time, will all impact how moist your brownies are.
A few key tips that can help you achieve moist brownies include using higher-quality chocolate in your recipe, reducing the amount of flour to help prevent the brownies from being dry, and measuring your ingredients carefully.

What to add to brownies to make them better?
The best way to make brownies better is to add chocolate chips. Adding the chocolate chips will not only make the brownies moister, but it will also give them a richer flavor. Another option that you can try is adding nuts to your brownie batter.
Depending on your preference, nuts can be added either with or without the chocolate chips. If you want to add even more flavor to your brownies, try mixing in a little bit of coffee or espresso powder.
Budget Breakdown
Here’s a realistic cost estimate based on average grocery prices. Of course, this can vary depending on sales and store brand swaps.
Brownie mix
Approximately $2.50
Cream cheese
Approximately $2.00
Powdered sugar
Approximately $0.50 worth
Peppermint extract
Approximately $0.30 worth
Whipped topping
Approximately $1.50
Andes Mint Baking Chips
Approximately $4.00
Chocolate pudding mix
Approximately $2.50 for two boxes
Milk
Approximately $1.00 worth
Estimated total cost
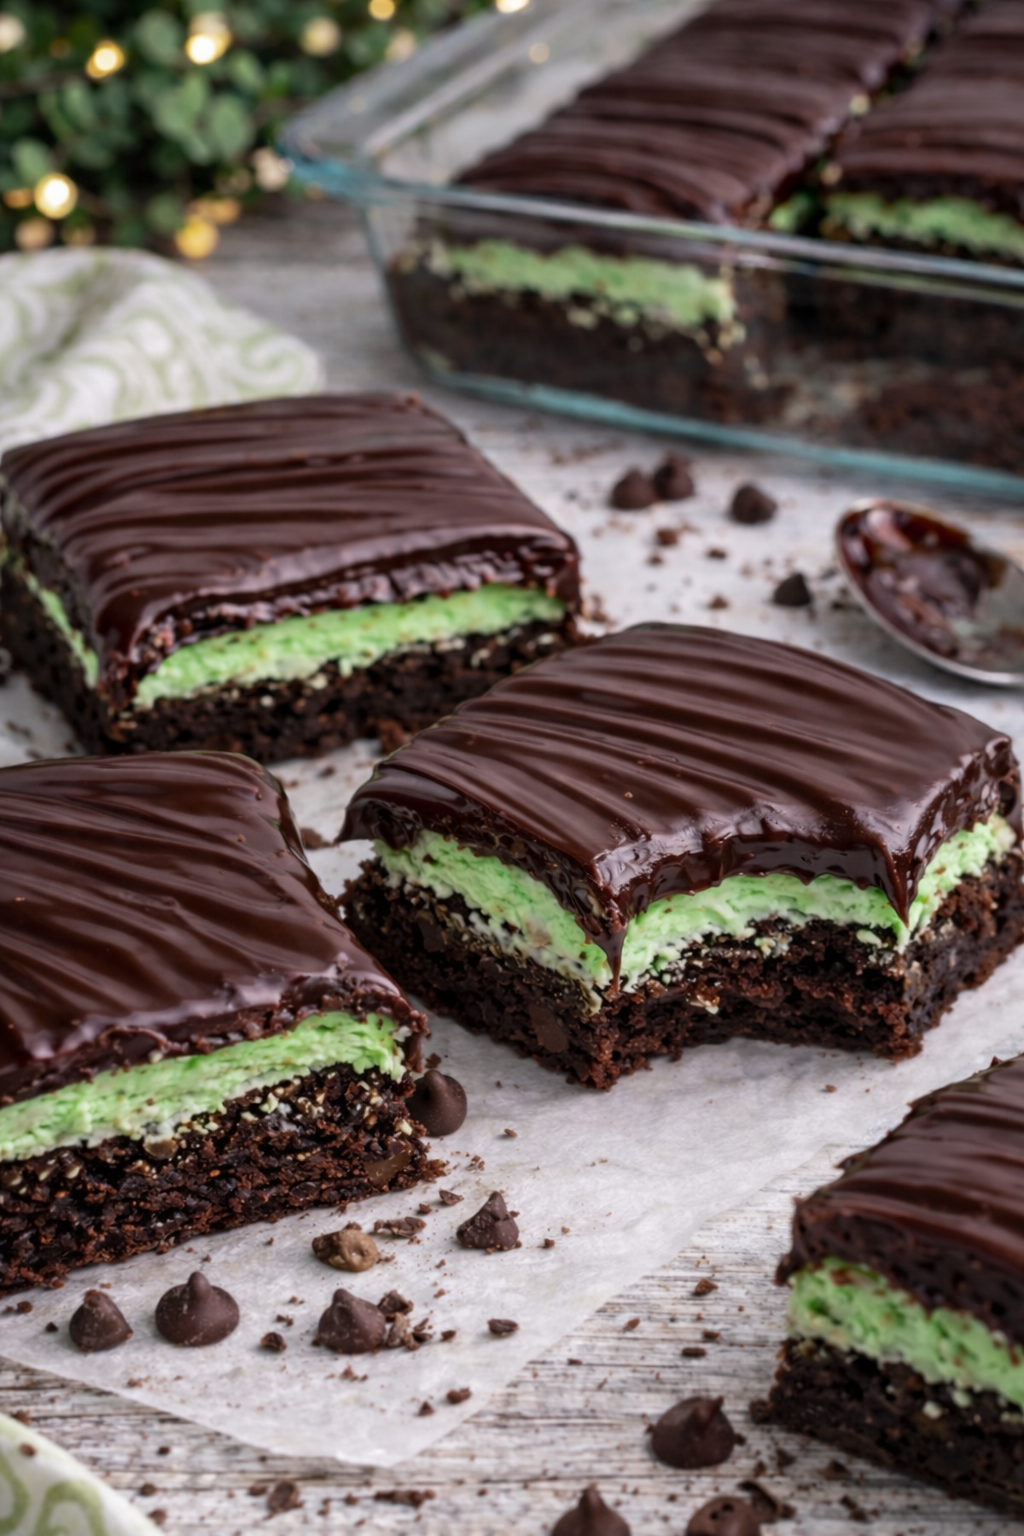
Approximately $14.30 for a full 9×13 pan
That breaks down to well under $1.25 per generous slice, which is way cheaper than buying anything comparable from a bakery.

No matter what occasion you choose to serve these scrumptious brownies at, everyone is sure to go wild for them!
Personal Kitchen Notes
This is one of those desserts that feels nostalgic but elevated at the same time. The first time I made these mint chocolate brownies, the kids immediately zeroed in on that bright green layer. Cameron just kept pointing and saying “more” while James claimed he was “just trimming the edges” and somehow half the pan disappeared. Typical.
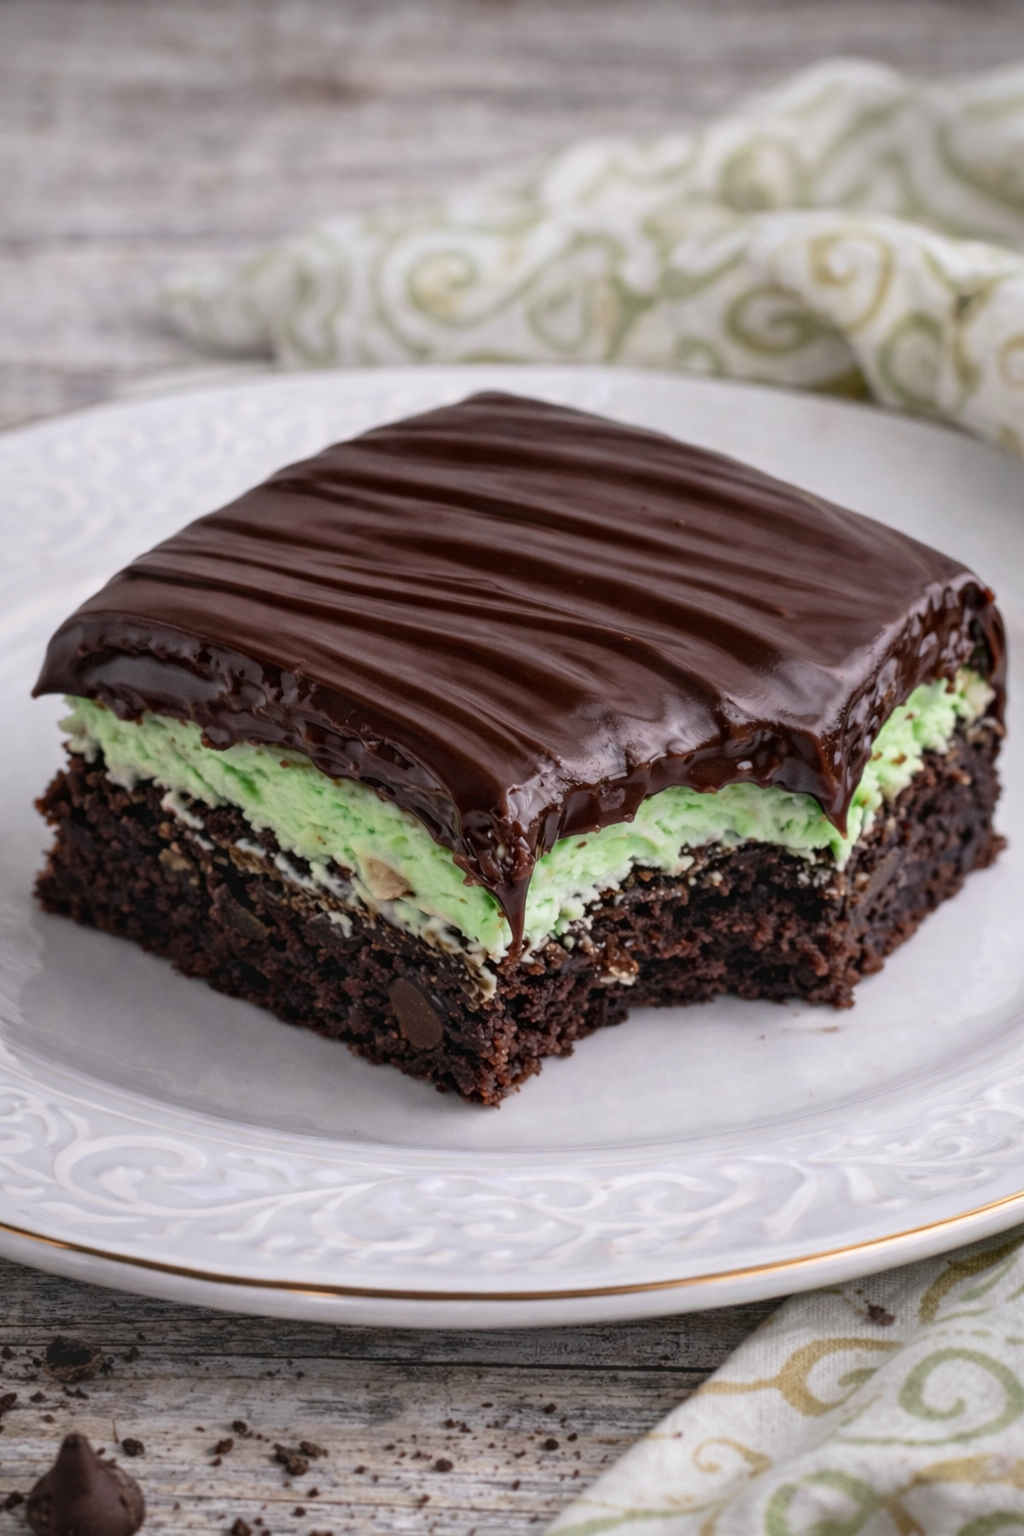
If you love that classic chocolate and mint combo, this hits every note. Rich brownie base. Cool peppermint cream layer. Thick, glossy ganache on top. It slices beautifully after chilling, and it honestly looks bakery worthy with almost no extra effort. I always recommend letting it chill overnight if you can stand the wait. The layers set up firmer and the flavor gets even better.
Also, do not overdo the peppermint extract. A little goes a long way. You want refreshing, not toothpaste.

Final Thoughts
If you love chocolate and mint together, these Mint Chocolate Brownies are going to be one of those desserts you make on repeat. They are rich without being heavy, refreshing without being overpowering, and impressive enough for holidays, potlucks, or just because it’s Tuesday and you need something chocolatey in your life. The layers are simple, the flavor is bold, and once you slice into that glossy ganache top and see that vibrant mint center, you’ll understand why this recipe disappears so fast in my kitchen every single time.
More Recipes You Will Love!
Lemon Brownies with Lemon Glaze
Reese’s Peanut Butter Cup Brownies

Mint Chocolate Brownies
Ingredients
Brownies
- 1 cup salted butter
- 4 oz. semi-sweet chocolate chips
- 2 cups granulated sugar
- 2 teaspoons vanilla extract
- 1 ½ cups all-purpose flour
- 4 large eggs
Mint Frosting
- ¾ cup salted butter softened
- 3 cups powdered sugar
- 1 tablespoon heavy whipping cream
- 1 teaspoon peppermint extract
- 10 drops food coloring
Ganache
- 3 cups semi-sweet chocolate chips
- 2 tablespoons butter
- ½ cup heavy whipping cream
Instructions
Brownies
- Preheat your oven to 350 degrees F. and prepare a 9×13 baking dish by spraying generously with non-stick spray and line with parchment paper. Set aside.
- In a large saucepan, melt the butter and chocolate over medium heat, stirring consistently until smooth.
- Add the sugar and vanilla and whisk until combined and smooth.
- Sift in the flour and mix until combined and there are no dry spots remaining.
- Add in the eggs last, mix until just combined.
- Pour the batter into the prepared pan and smooth. Bake 23-25 minutes or until a toothpick inserted in the center comes out clean.
- Remove from the oven and allow the brownies to cool completely on a wire rack.
Frosting
- In the bowl of a stand mixer equipped with a paddle attachment, cream the butter on high speed for 3-4 minutes until smooth and fluffy.
- Add the powdered sugar, one cup at a time, fully combining after each addition. Scrape the sides and bottom of the bowl often.
- Add in the whipping cream, peppermint extract, and food coloring. Mix on low speed until combined.
- Increase the speed to high for 3-4 minutes until fluffy.
- Spread the frosting evenly over the cooled brownies
Ganache
- Add the cream into a microwave safe bowl and heat for about 1 minute until hot but not boiling.
- Add the chocolate and butter into a medium bowl. Pour the hot cream over the chocolate and let set for 3-4 minutes. Whisk until smooth. (If needed heat for an additional 20-30 seconds until completely melted and smooth).
- Allow the ganache to cool then smooth evenly over the mint frosting layer.
- Refrigerate for at least 30 minutes or until the ganache is set.
- Store in an airtight container in the refrigerator for up to three days.
Did you make this recipe?
Make sure to follow on Pinterest for more recipes!

Comments & Reviews
David Hughes says
These taste incredible! Like big Andes candies.
Since they are a little stiff coming out of the refrigerator, just give a piece a quick 5-8 seconds in the microwave for a delicious dessert.