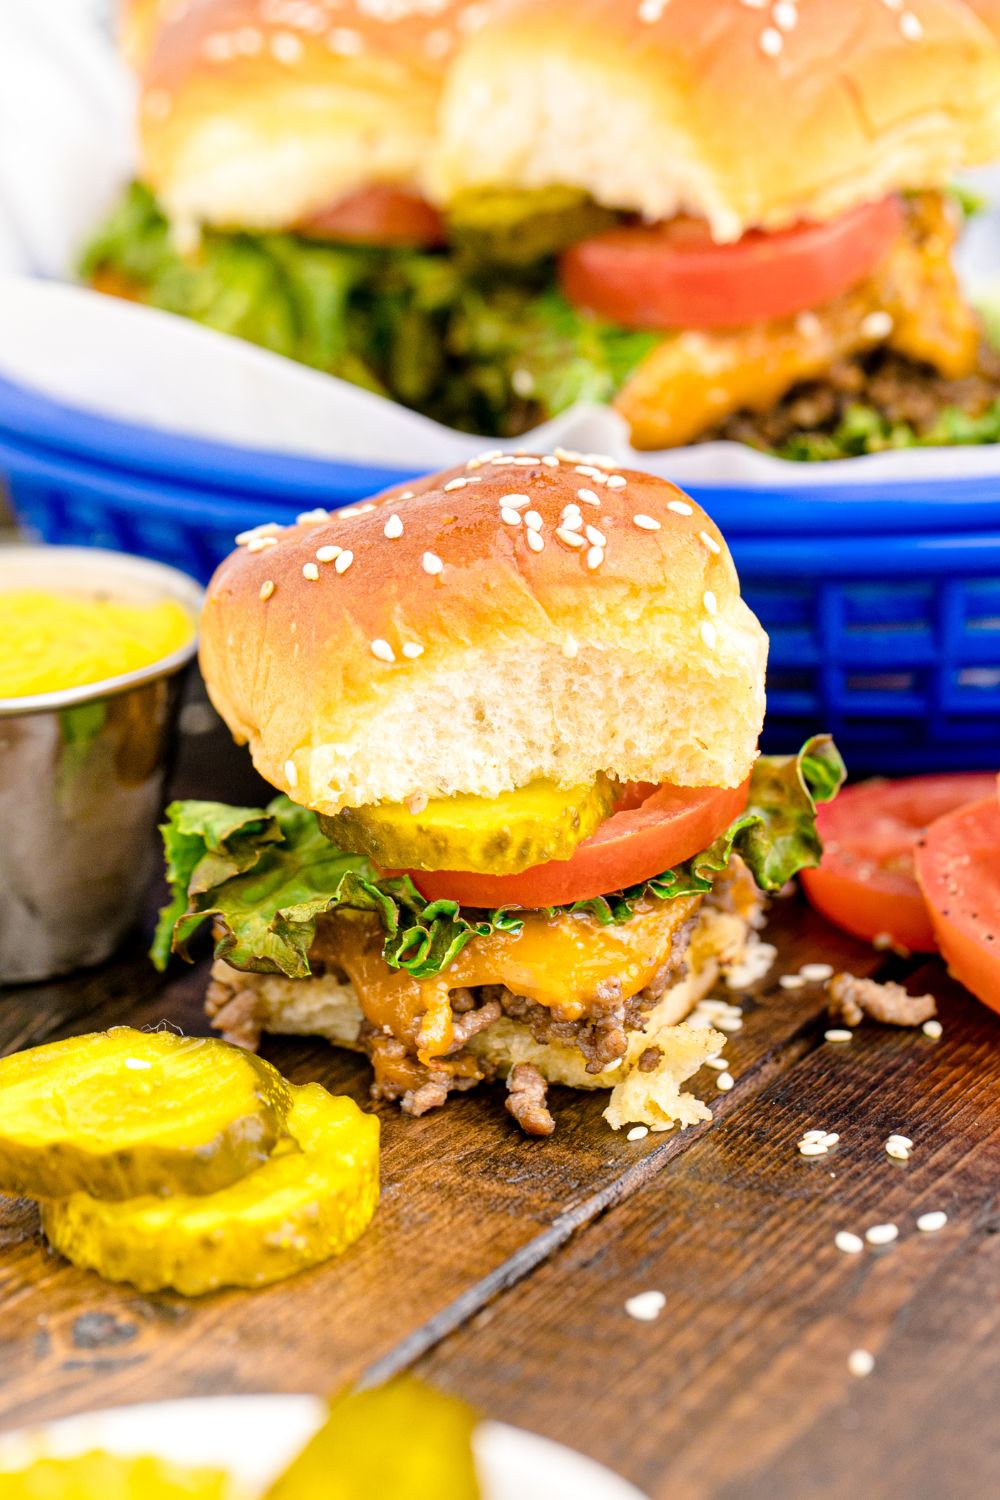
Nothing beats a good cheeseburger, but let’s be honest—flipping a dozen patties while trying to entertain guests is not the vibe. That’s where these Classic Cheeseburger Sliders come in. They’re everything you love about a juicy cheeseburger, baked all at once in a buttery, cheesy, perfectly golden pull-apart tray of deliciousness. They’re easy, satisfying, and guaranteed to disappear faster than anything else on the party table.
I started making these for weeknight dinners when I needed something quick but hearty, and now they’ve become a staple for birthday parties, game days, and backyard cookouts. My husband devours them two at a time, and even my picky kiddo will eat an entire slider without asking what’s inside. That’s saying something.

What Are These Exactly?
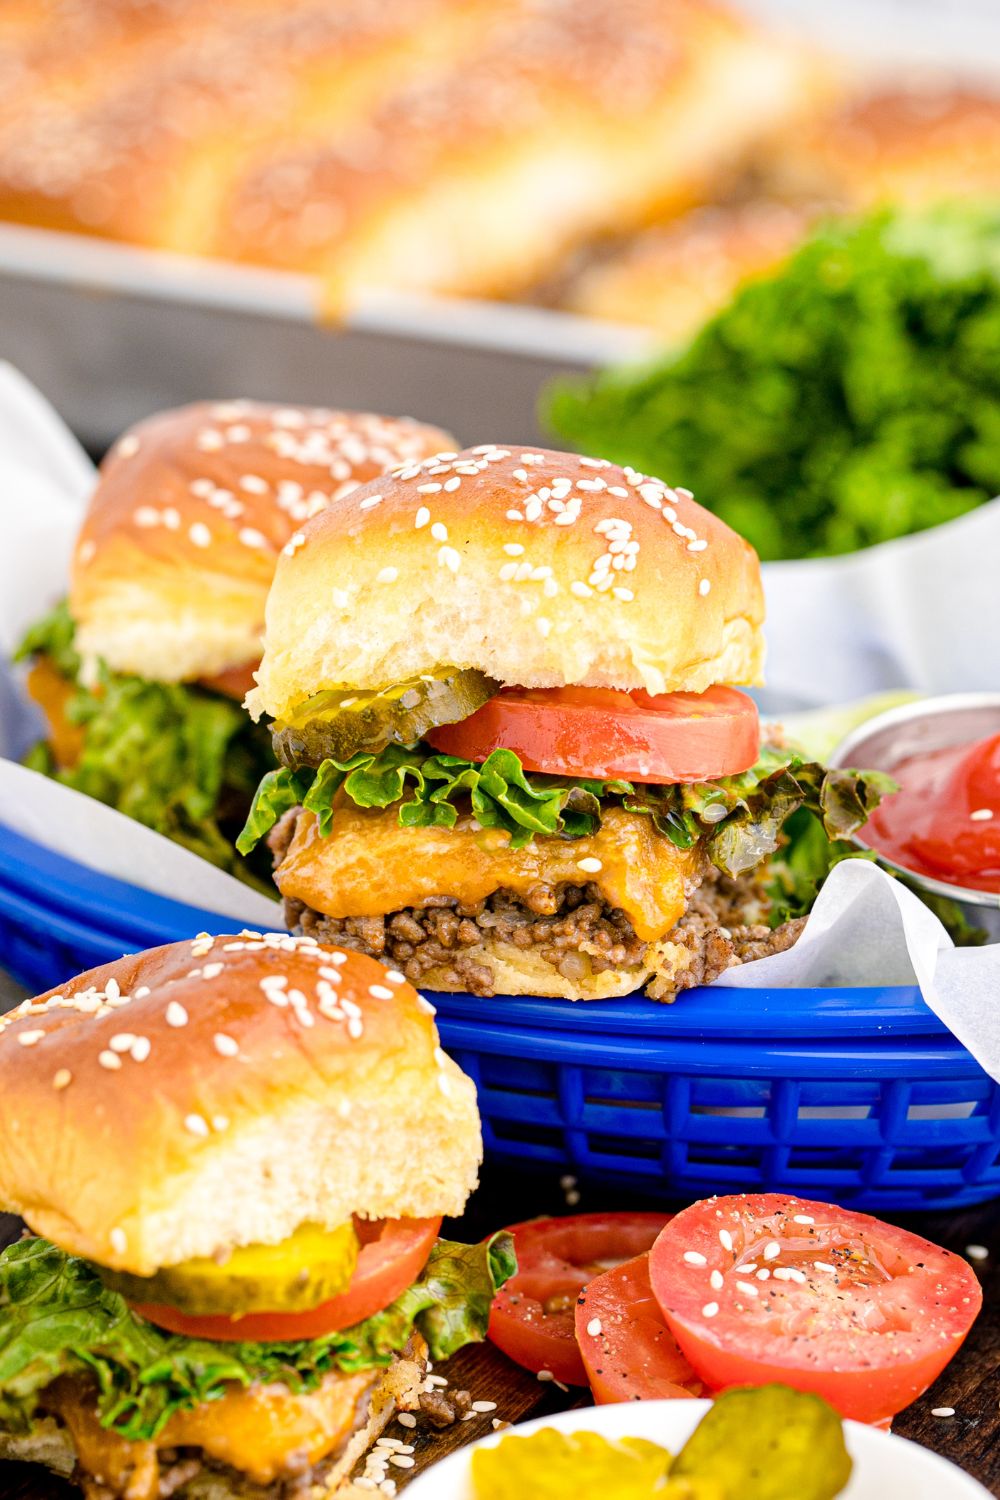
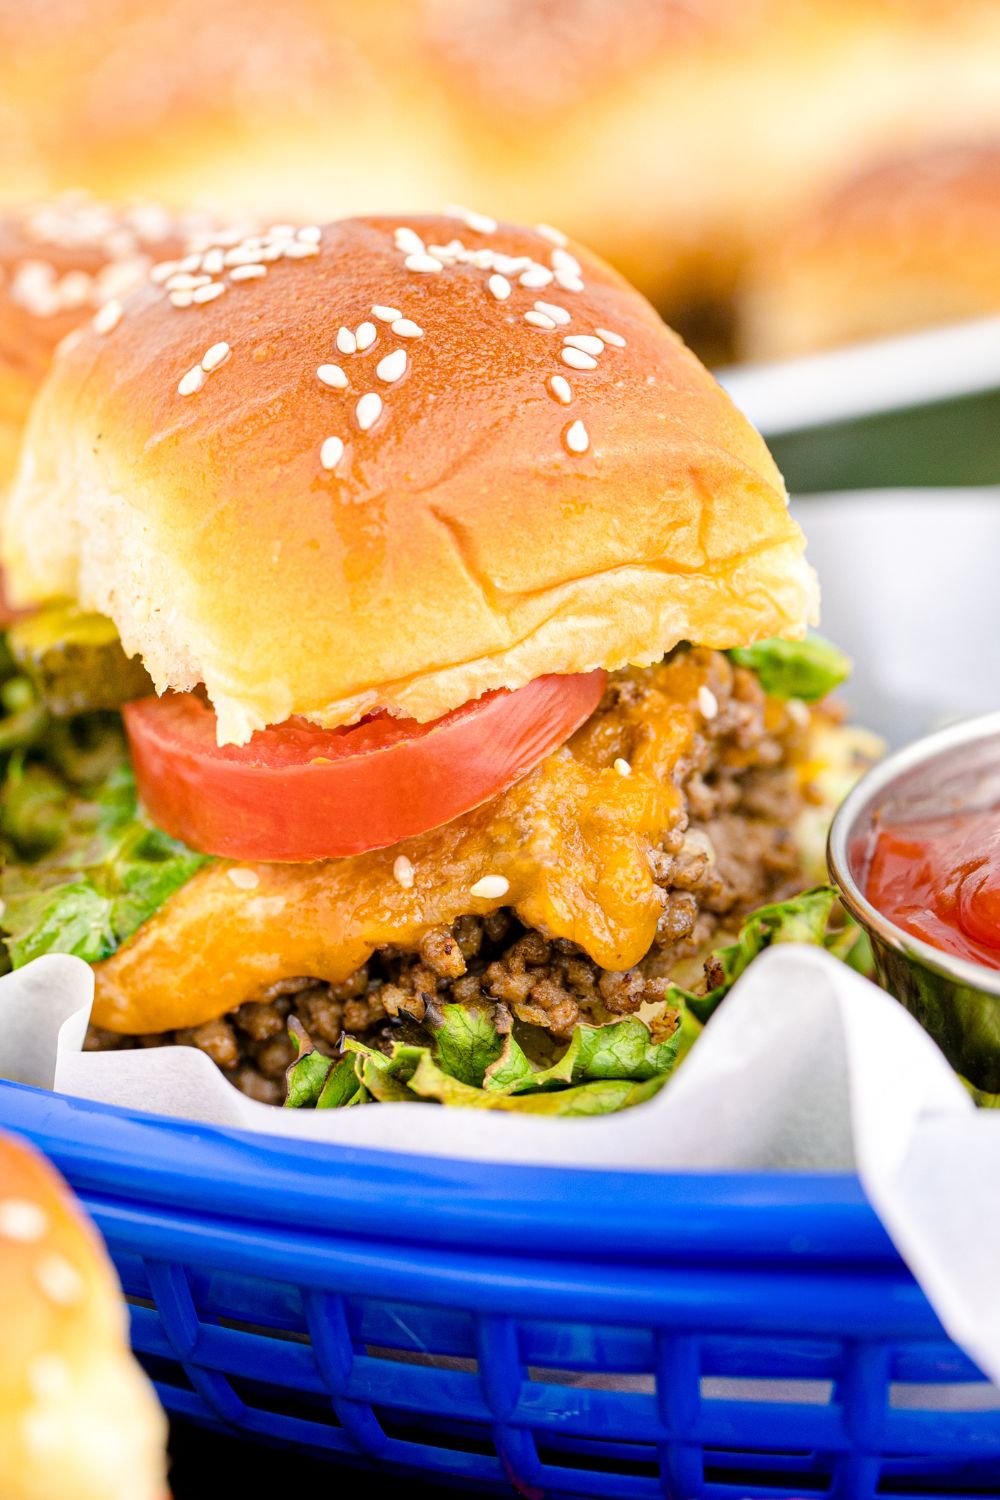
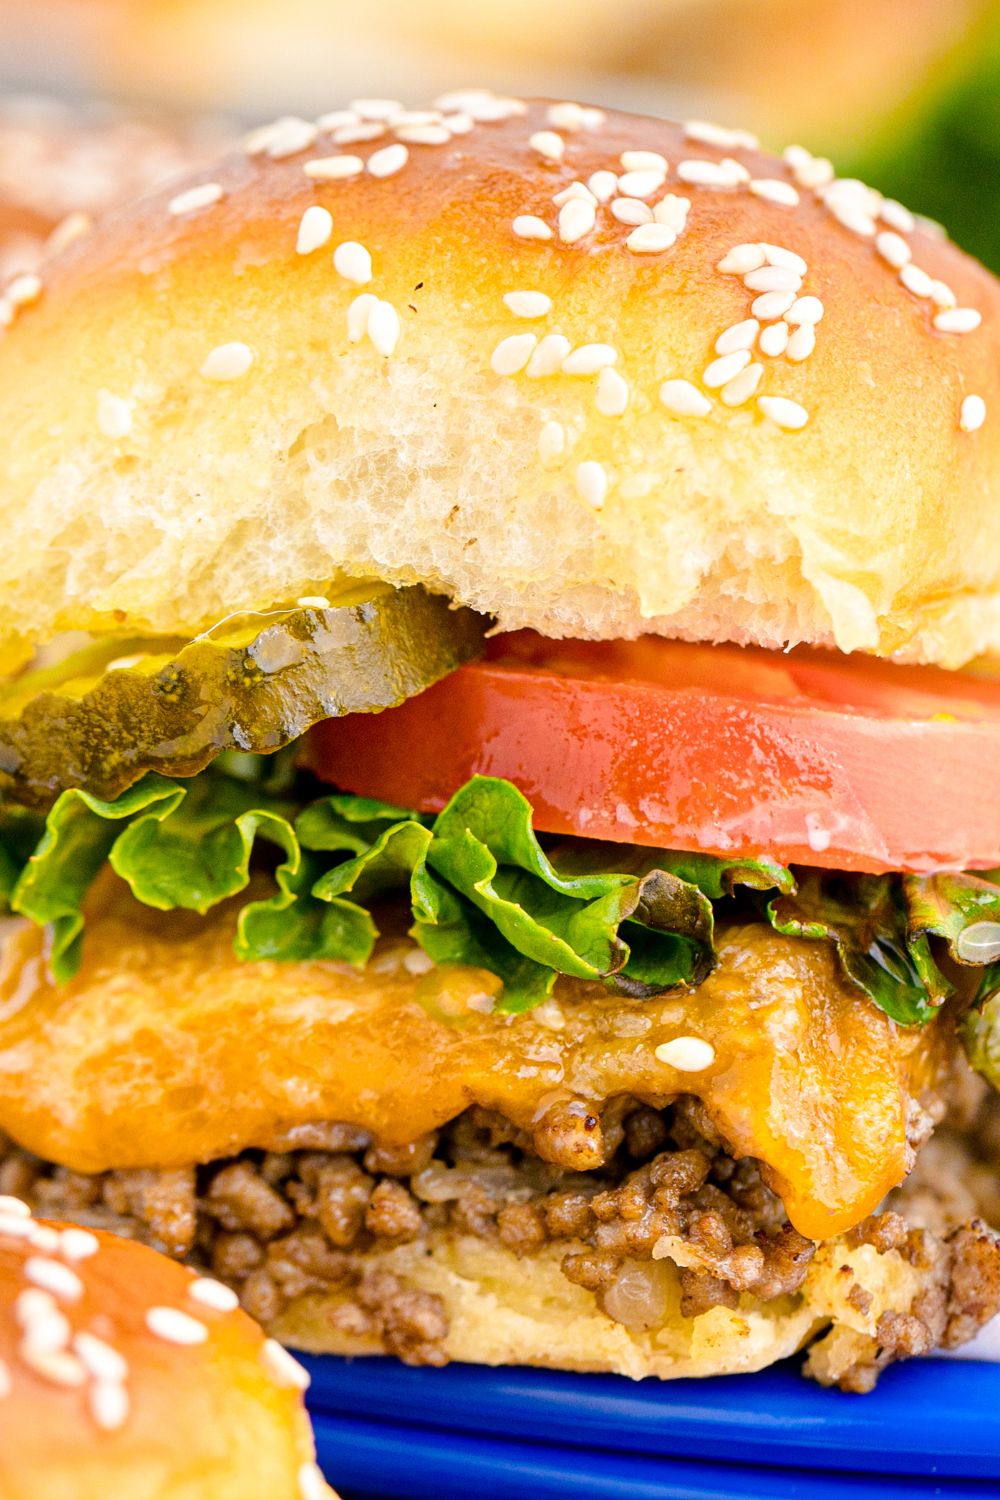
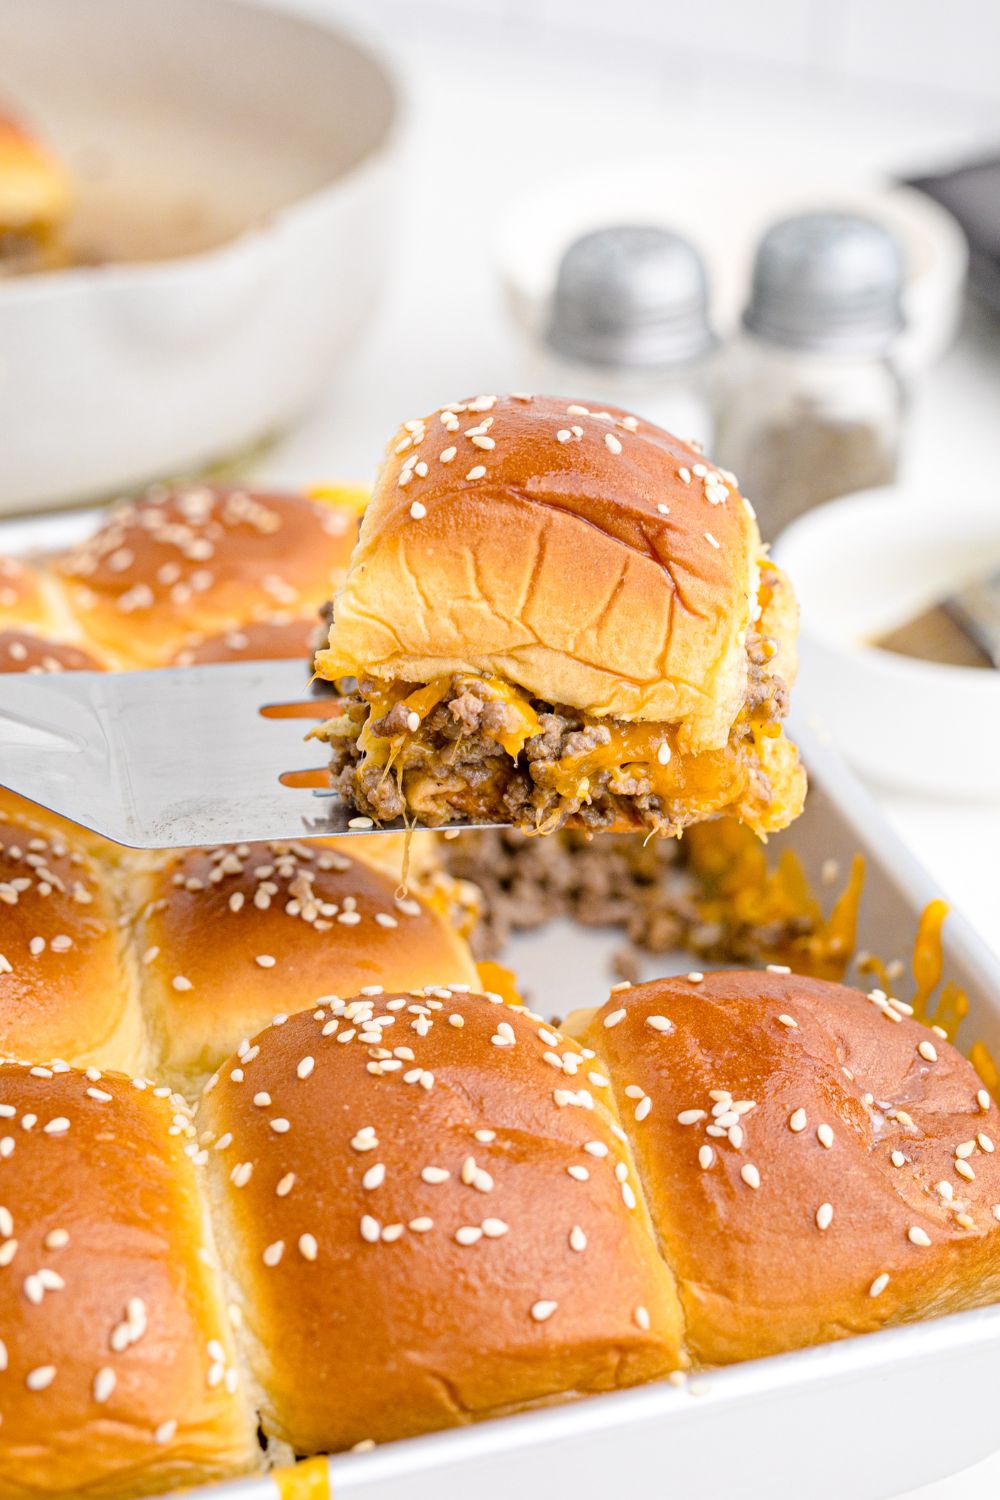
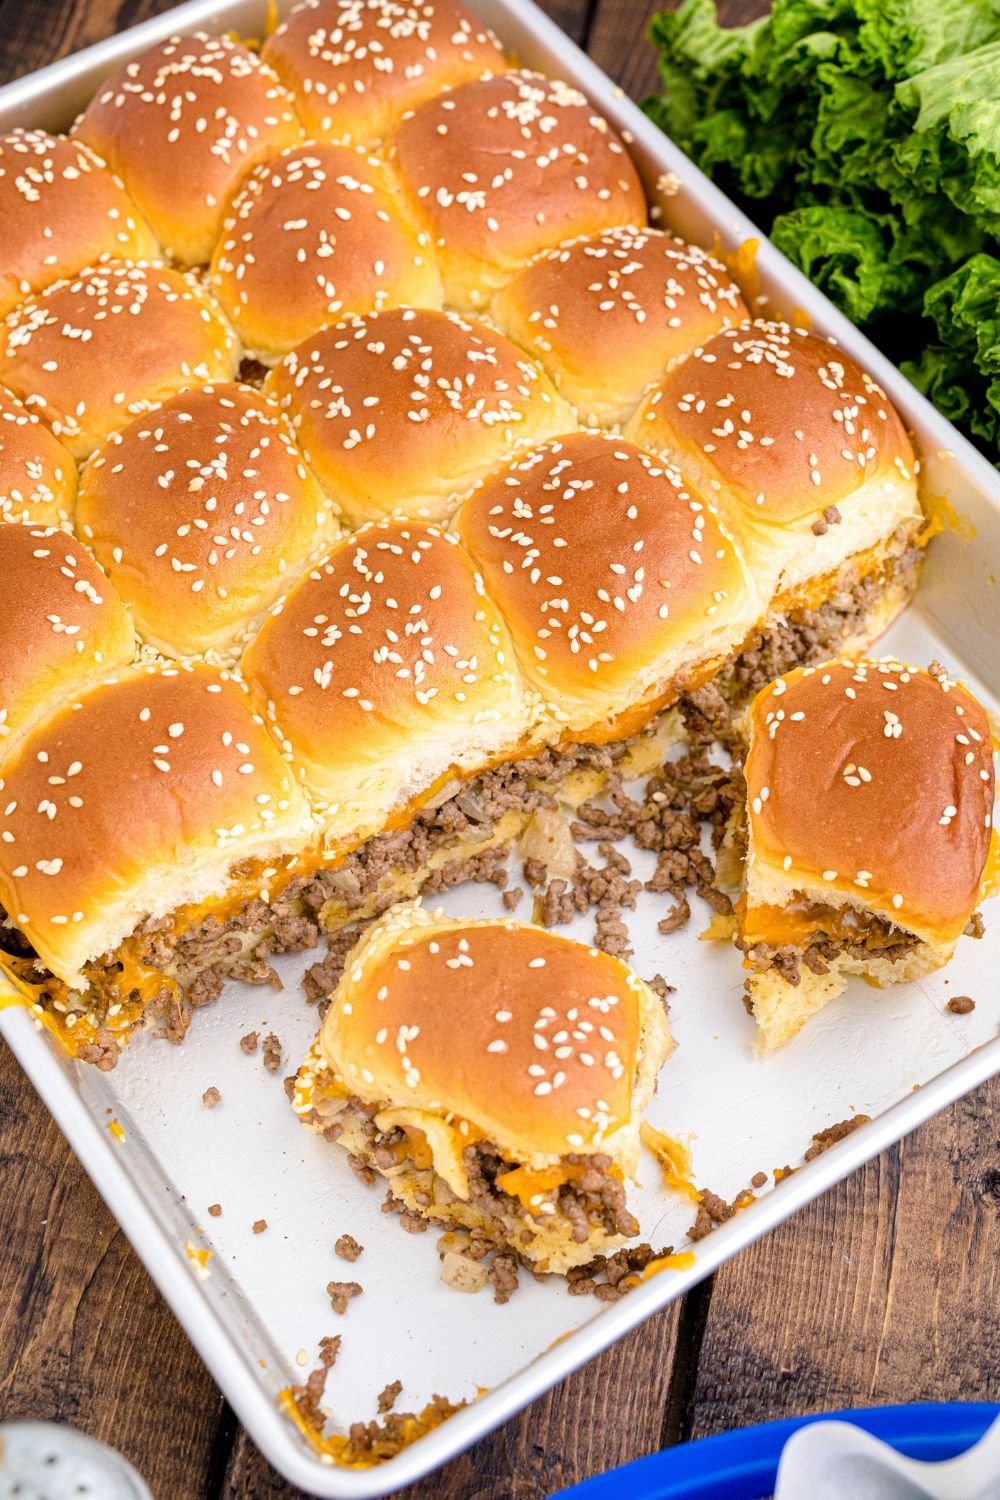
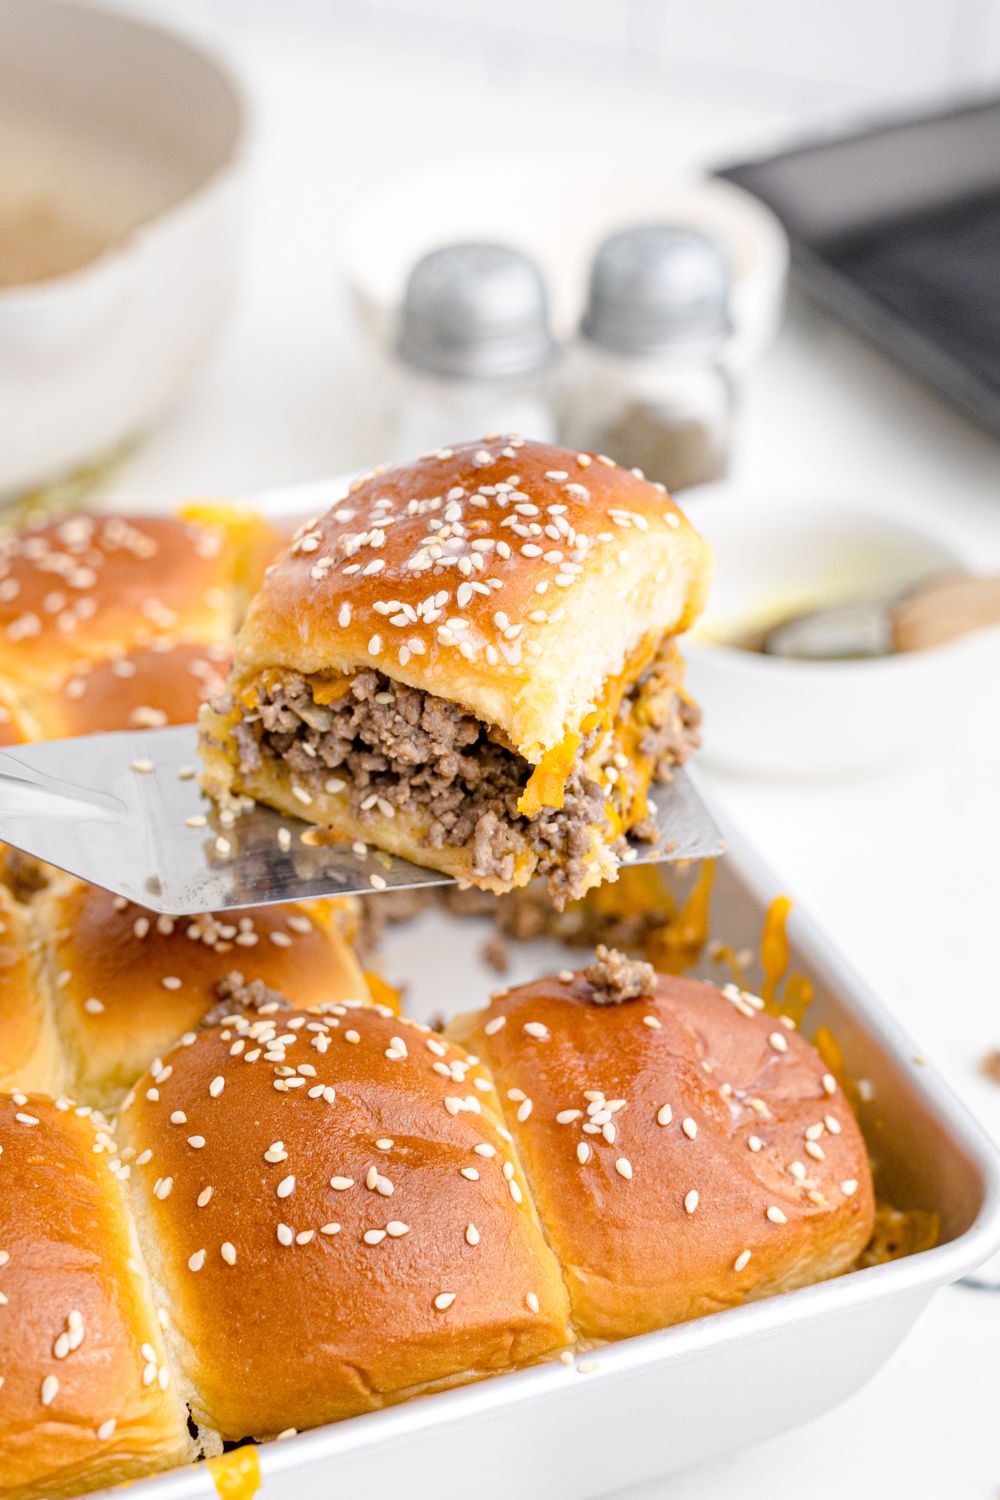
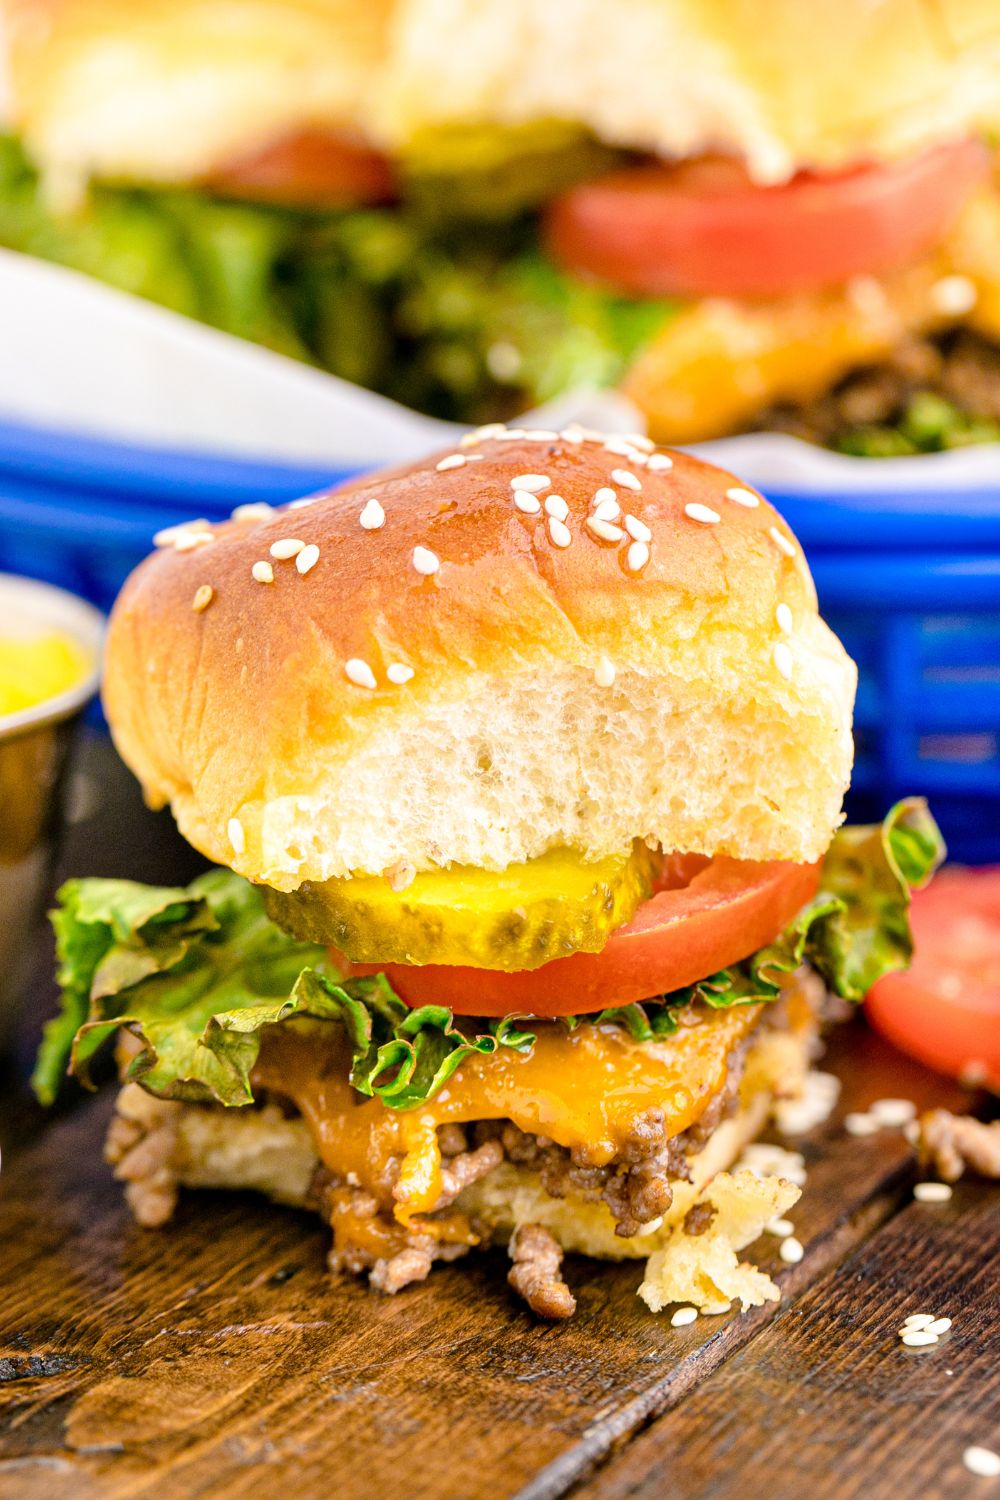
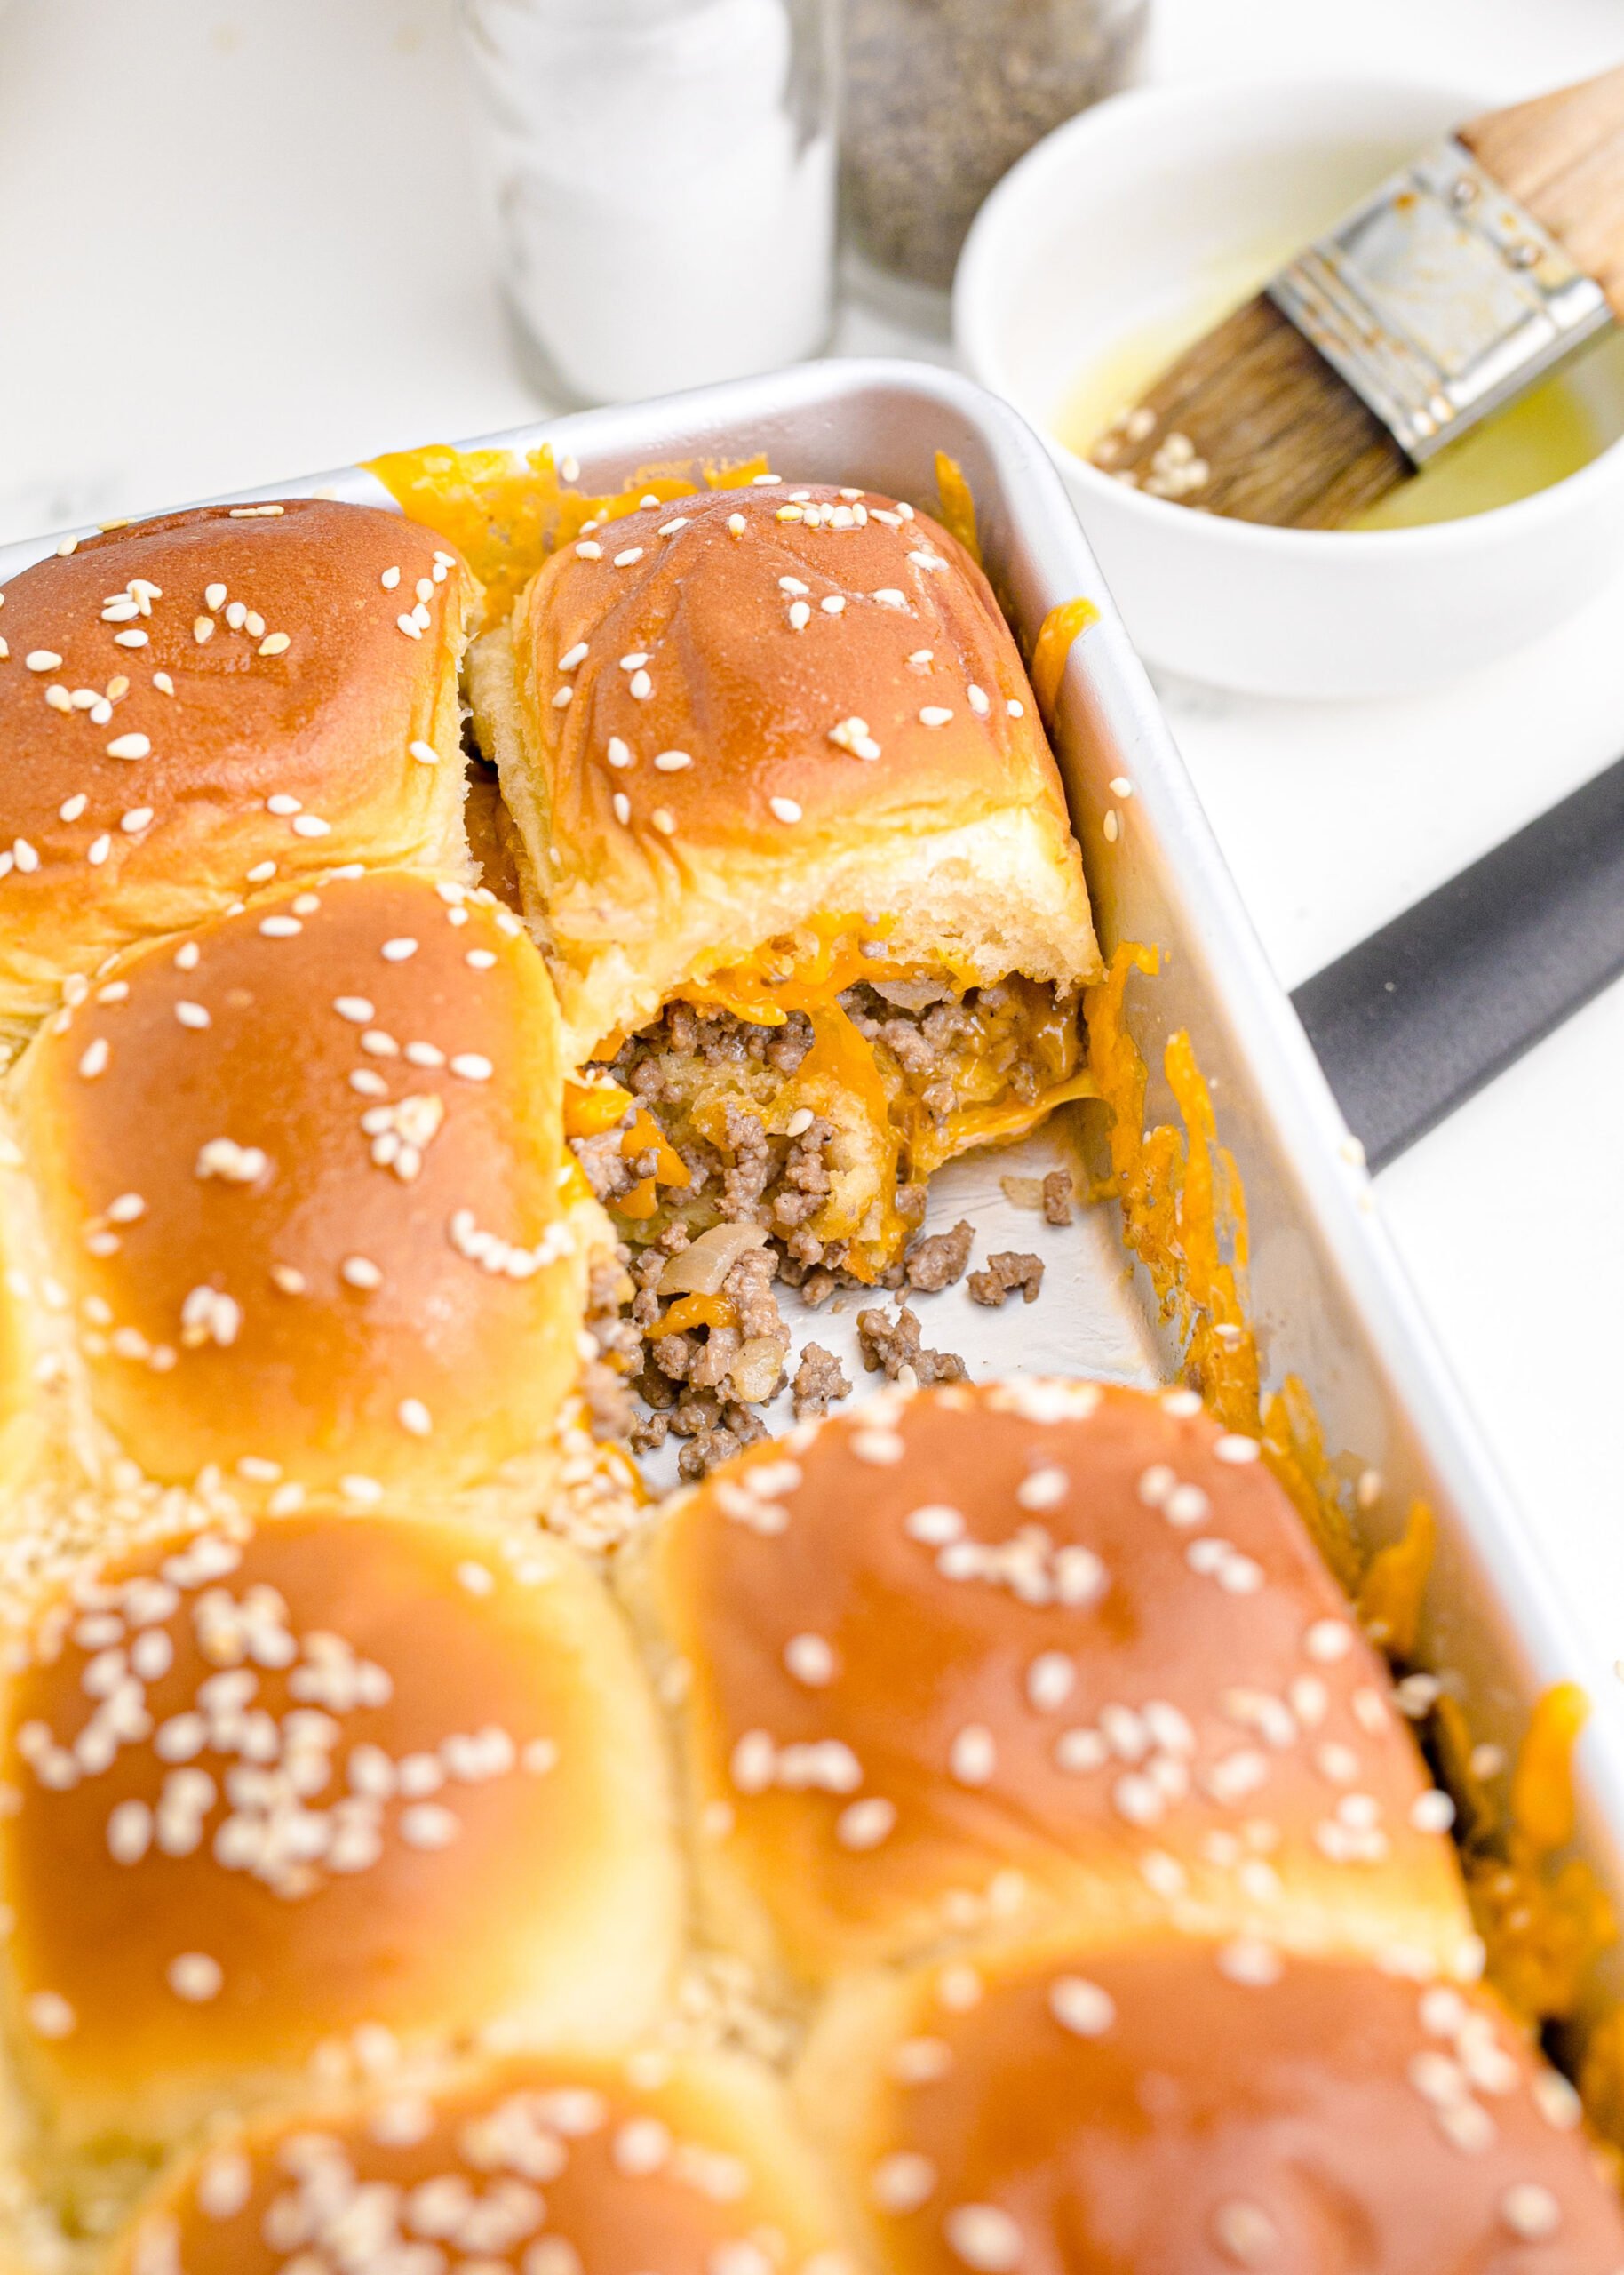
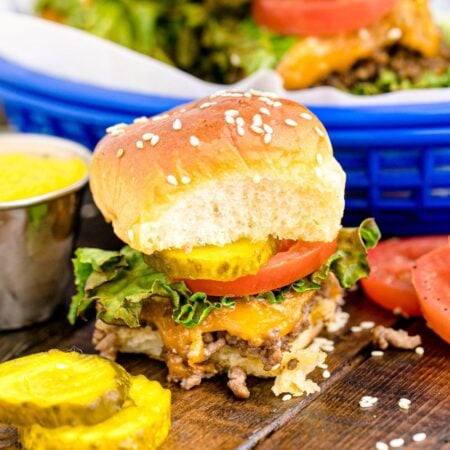
Classic Cheeseburger Sliders are mini sandwiches made from seasoned ground beef and melted cheddar layered onto slider buns, then baked in one pan for convenience. The beef is flavored with onion, Worcestershire sauce, garlic powder, and mayo to keep it moist and flavorful. Once the buns are topped and brushed with butter and sesame seeds, they’re baked until the cheese is melted and the tops are golden brown and slightly crisp.
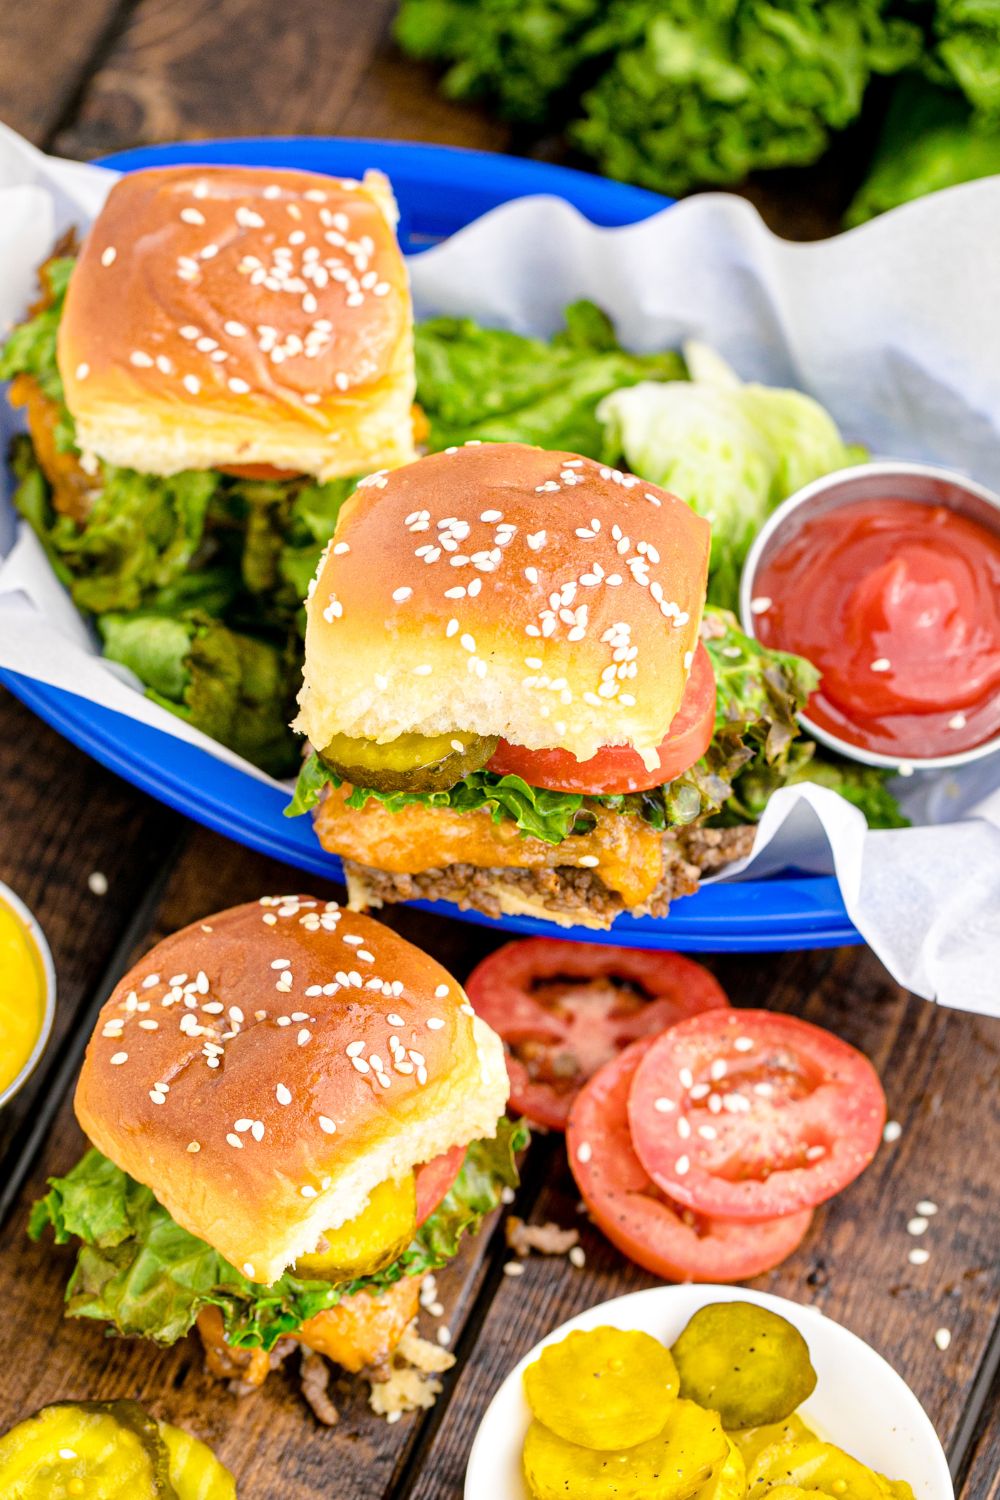
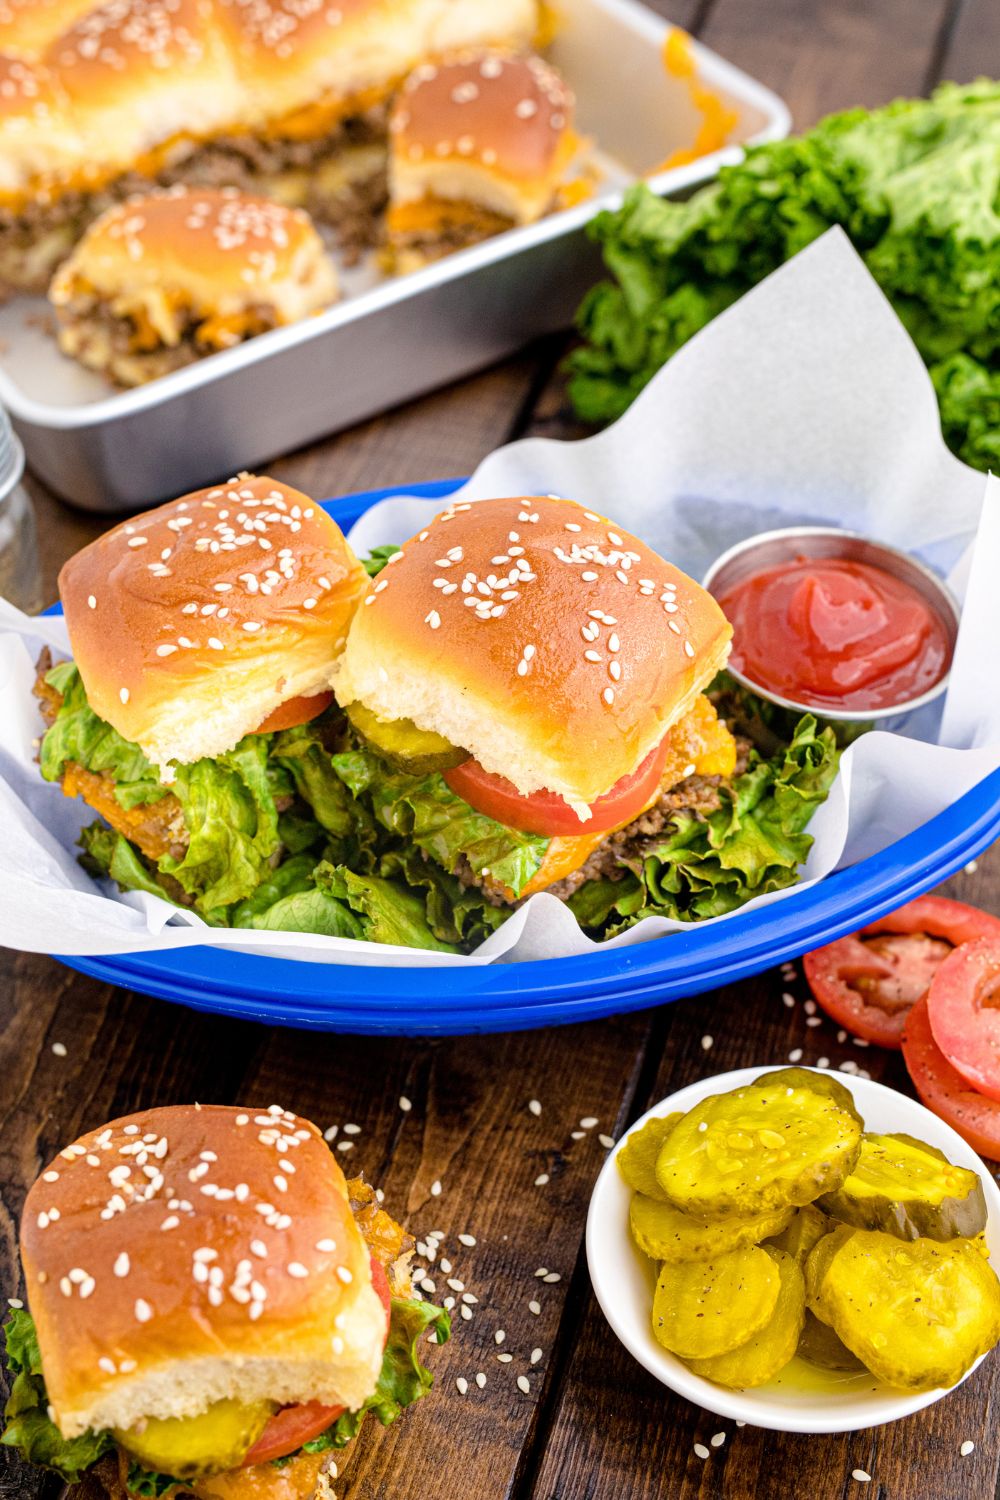
They’re soft, savory, cheesy, and wildly addictive. And they’re completely customizable once baked—add lettuce, pickles, ketchup, or whatever your burger-loving heart desires.
When to Serve These Sliders
- Game Day or Super Bowl parties
- Potlucks or tailgates
- Family movie nights
- Birthday parties (especially for teens or kids!)
- Weeknight dinners
- Fourth of July or summer BBQs
Since they’re baked all at once, they’re ideal for serving a hungry crowd with minimal effort—and they reheat well if you’re making them ahead.
Build-Your-Own Slider Bar: The Crowd-Pleasing Party Trick
One of the easiest ways to take these classic cheeseburger sliders from simple to unforgettable? Set up a build-your-own slider bar and let your guests customize to their heart’s content. Just bake the sliders as usual, then place them on a tray surrounded by toppings in little bowls or ramekins.
Here are some fun topping ideas to include:
- Sliced dill pickles or sweet pickles
- Crispy bacon pieces
- Caramelized onions
- Lettuce, tomato, and red onion
- Jalapeños
- Ketchup, mustard, mayo, sriracha, and BBQ sauce
- Ranch, chipotle aioli, or burger sauce
It’s a hit at parties because everyone gets exactly what they like—and you don’t have to play short-order cook. It’s also a great option for picky eaters or kids, who can keep it simple if they want. A slider bar is easy to prep, totally interactive, and a guaranteed party win.
Why You’ll Love These
- They bake in one pan—no flipping or grilling required.
- They make 24 sliders in under 30 minutes.
- They’re loaded with flavor—savory, cheesy, buttery, and nostalgic.
- They’re easy to adapt for picky eaters or adventurous toppings.
- They freeze and reheat beautifully for meal prep or party planning.
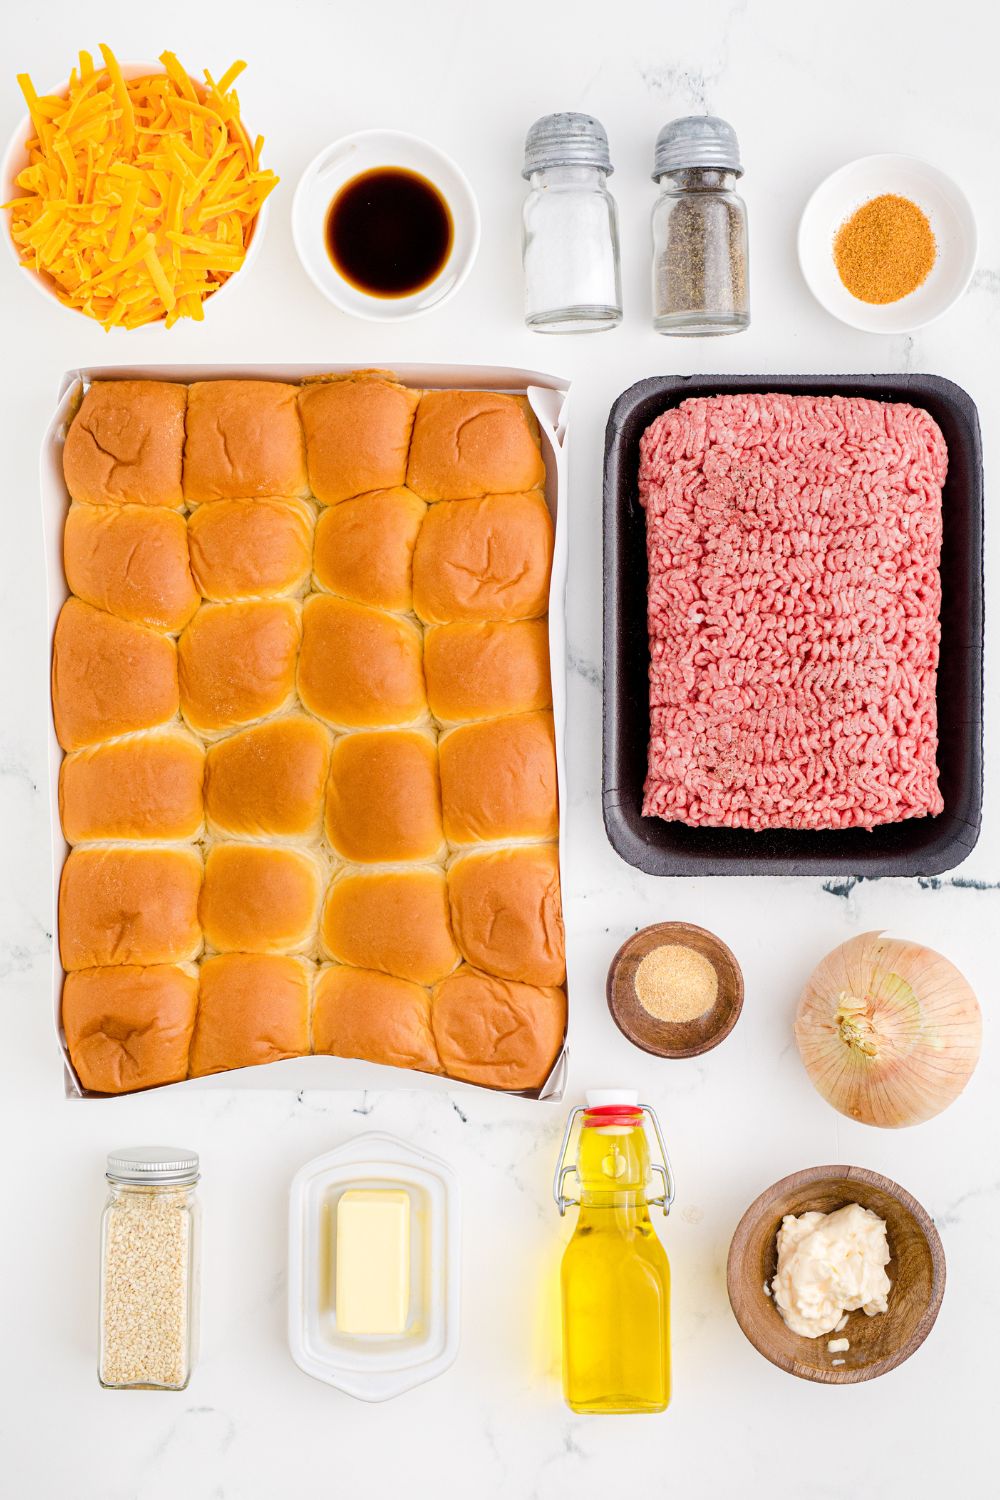
Ingredient Breakdown
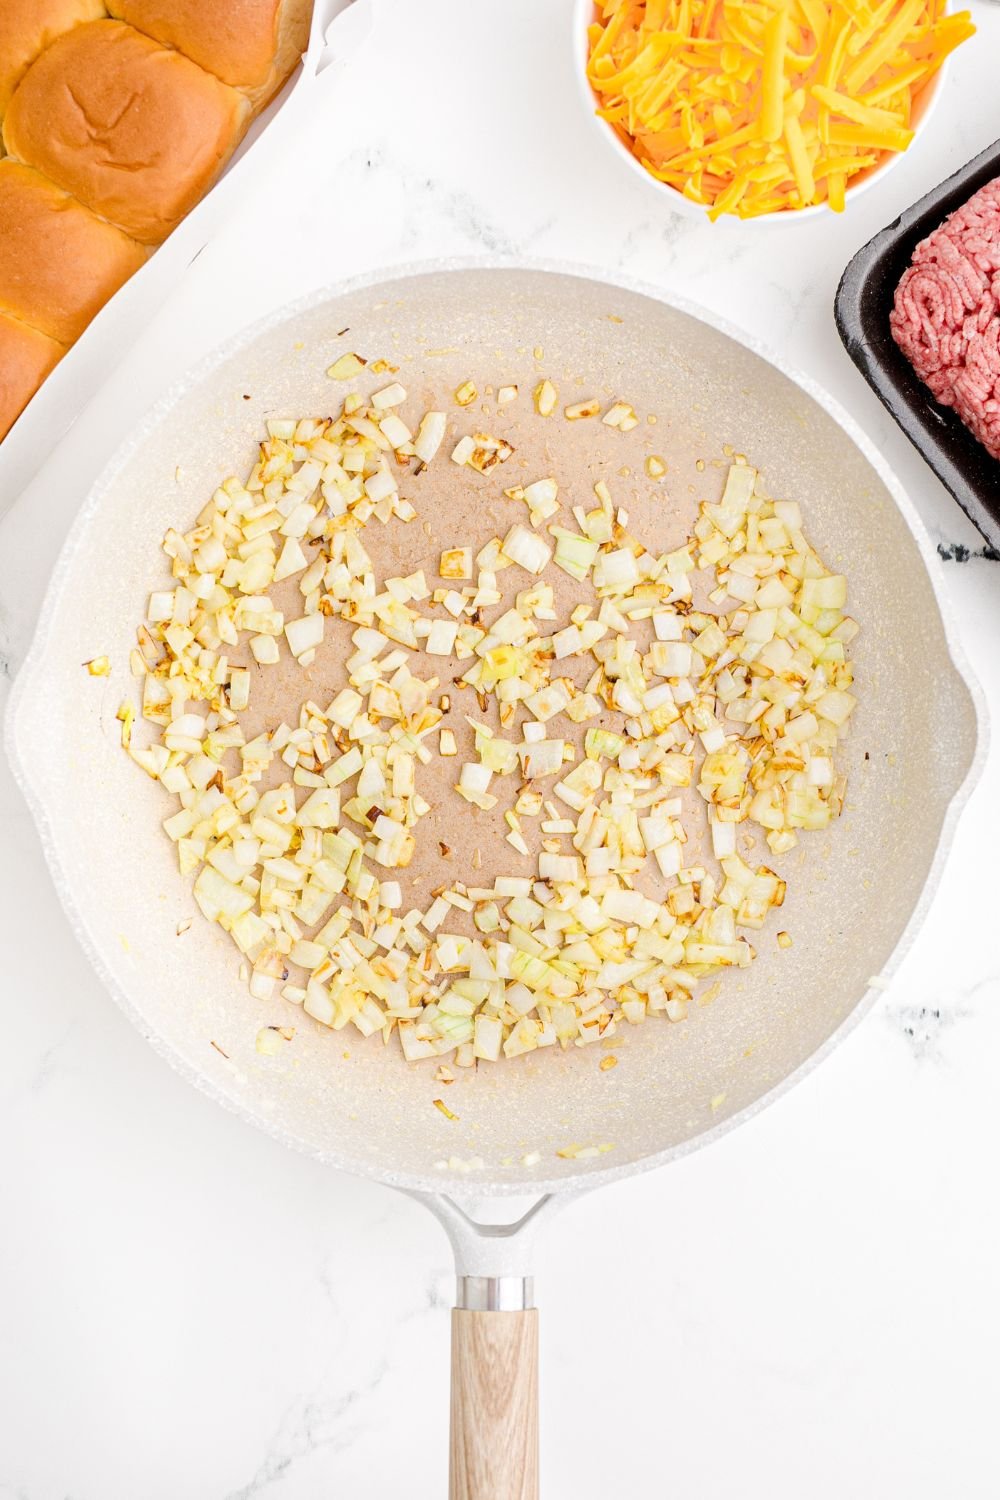
- Olive Oil & Onion: Forms the savory flavor base.
- Ground Beef: I recommend lean beef (80/20 or 85/15) for the right balance of flavor and moisture.
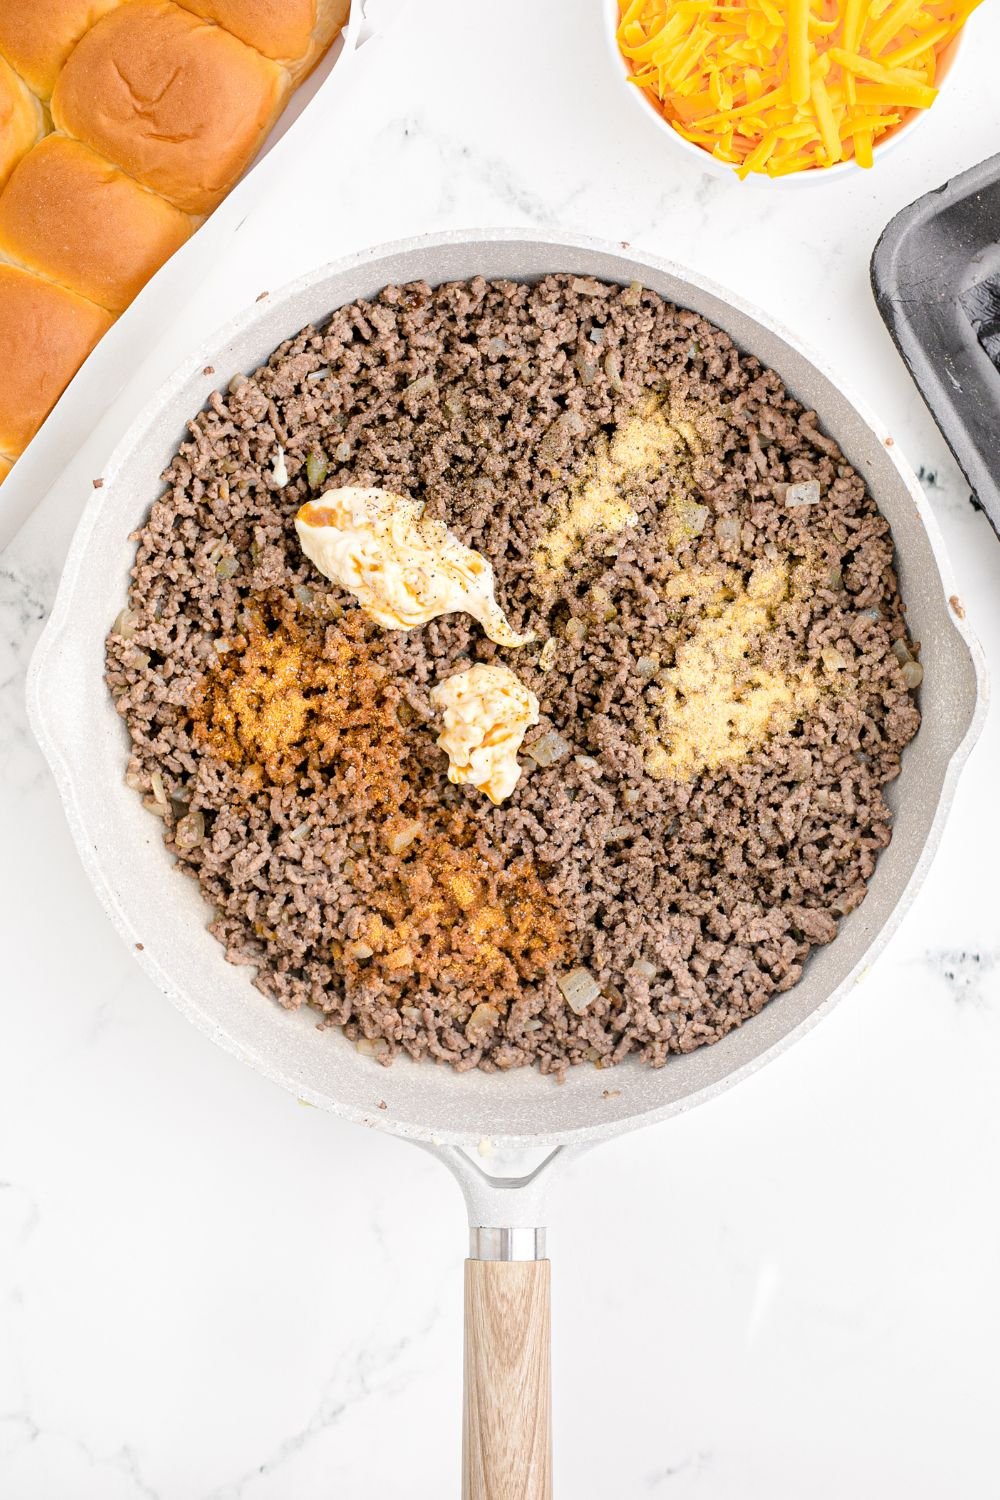
- Worcestershire Sauce & Mayo: Adds richness and depth without being heavy.
- Seasoned Salt, Salt, Pepper, Garlic Powder: Simple but flavorful seasoning mix.
- Cheddar Cheese: Shredded works best for even melt, but slices are fine too.
- Slider Buns: Soft, pull-apart Hawaiian-style buns work beautifully.
- Butter & Sesame Seeds: For that golden, glossy finish and classic burger bun look.


Variations
- Use ground turkey or chicken instead of beef for a leaner version.
- Try different cheeses like Colby Jack, Pepper Jack, or American.
- BBQ twist: Add BBQ sauce instead of mayo for smoky sliders.
- Add toppings inside: Thin pickle slices or sautéed mushrooms bake up nicely too.
- Spice it up: Add chopped jalapeños to the beef or brush the tops with hot honey butter.
Troubleshooting Tips
Beef too greasy?
Drain it thoroughly before layering into your buns. Leaner beef helps here, too.
Buns getting soggy?
Let the cooked beef cool slightly before assembling so it doesn’t steam the bread.
Cheese not melting well?
Try covering the tray with foil for the first 5 minutes, then remove to finish browning.
Bottom layer sticking?
Lightly spray your baking dish and press the bottom buns gently into place.
Storage & Serving Tips
Storing Leftovers:
- Store cooled sliders in an airtight container in the fridge for up to 3 days.
- Reheat in the microwave (30–45 seconds) or air fryer (3 minutes at 350°F) for best texture.
Serving:
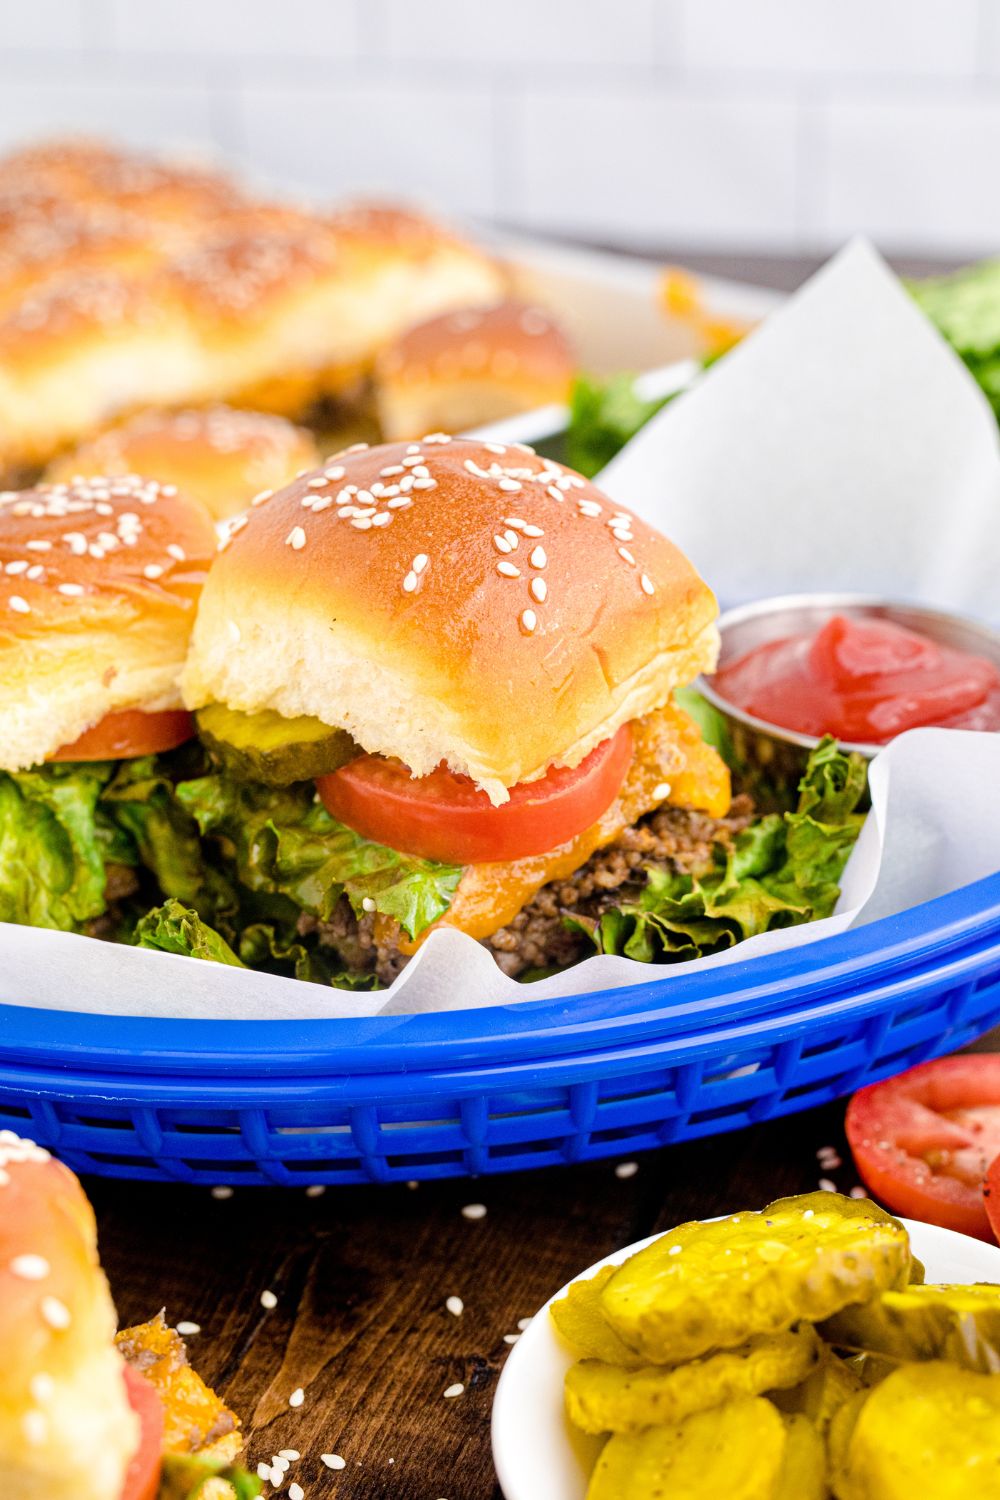
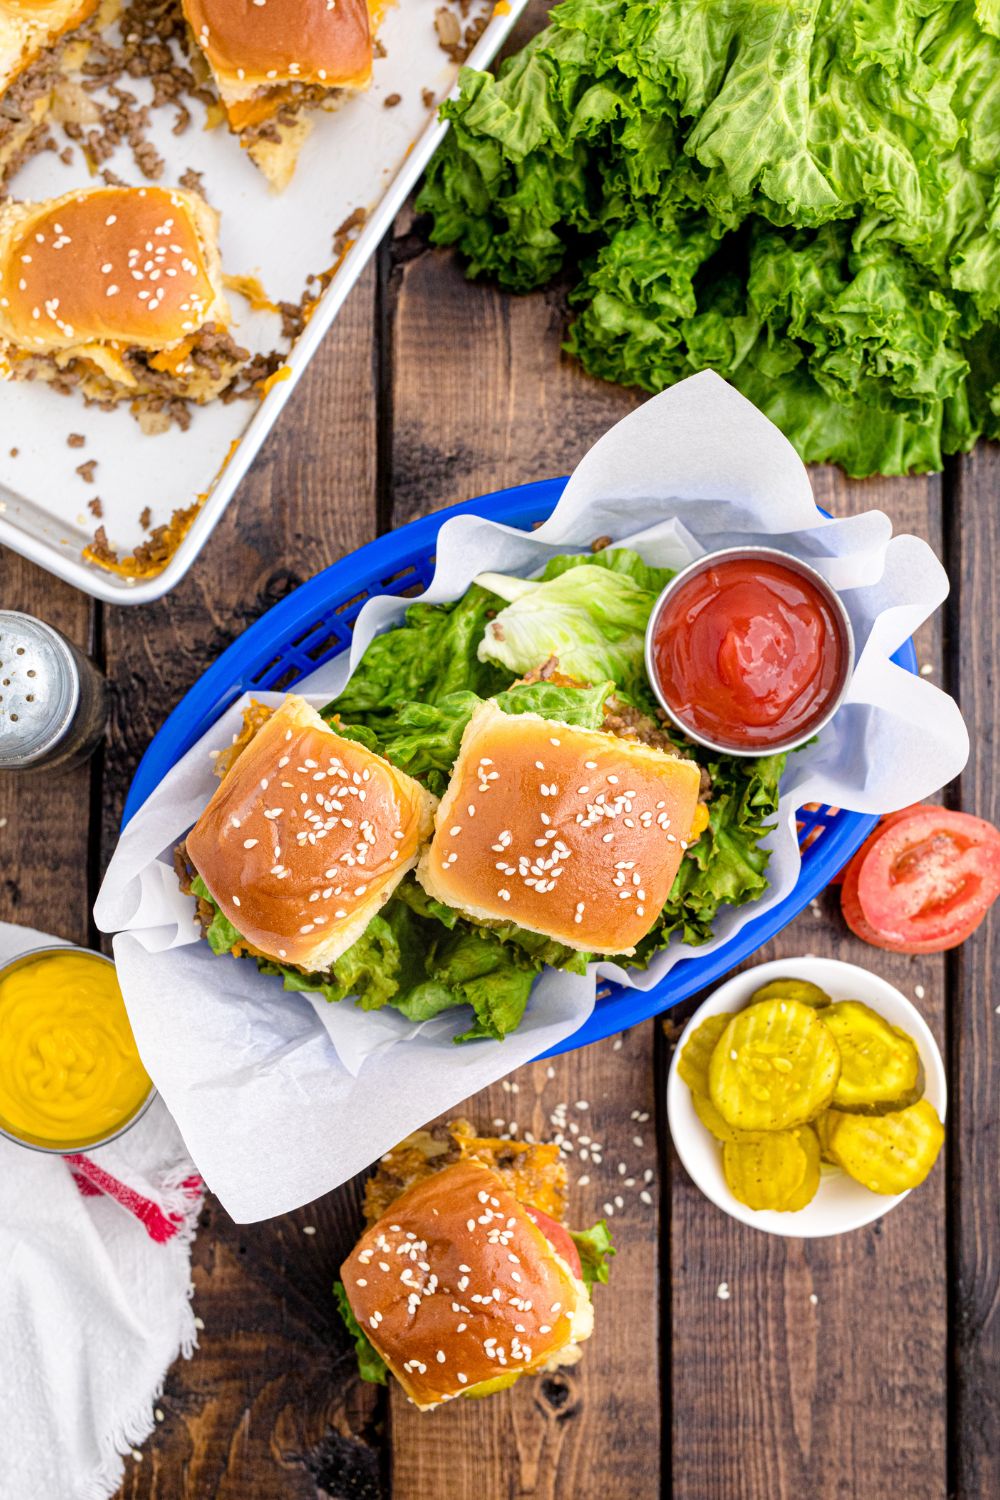
Serve them fresh from the oven, stacked on a platter or lined up in a chafing dish. For toppings, set out:
- Ketchup, mustard, mayo
- Pickles, lettuce, tomato
- Hot sauce, ranch, or burger sauce
For a meal: Pair with fries, chips, mac & cheese, or a simple salad.
The Ultimate Get-Together Food
These baked cheeseburger sliders were made for get-togethers. Whether you’re hosting a casual backyard hangout, a game day bash, or a family birthday party, these little sandwiches are always a hit. They’re easy to make in large batches, quick to reheat, and simple to serve—no forks, no mess, no stress.
Just line a tray with these sliders, add some dipping sauces or chips on the side, and you’ve got an instant party spread. They’re the type of dish that feels comforting and fun at the same time, with enough nostalgia to make people say, “I forgot how much I love a good cheeseburger.”
And since they hold together so well, you can easily serve them on paper plates or pass them around—no fancy setup needed. Perfect for birthday parties, tailgates, potlucks, or whenever you need something warm, cheesy, and shareable.
Make-Ahead & Freezing Tips
Make-Ahead:
- You can fully assemble the sliders (minus the butter topping) and refrigerate up to 24 hours ahead. Brush with butter and bake when ready.
Freezing Instructions:
- Wrap individual sliders in foil and place in a freezer-safe bag. Freeze for up to 3 months. Thaw overnight in the fridge and reheat in the oven or air fryer for best texture.
Frequently Asked Questions
Can I cut the recipe in half?
Yes! Just use half a package of slider rolls and 1 lb of ground beef. Bake in an 8×8 or 9×9 dish.
Can I use cheese slices instead of shredded cheese?
Definitely. Just layer the slices over the beef evenly. It melts beautifully.
How do I keep the bottoms from getting soggy?
Make sure to drain the beef well and let it cool slightly before assembling. A light toast of the bottom buns before filling can help too.
Can I make these ahead and serve them later?
Yes. Bake them, cool, and reheat when ready to serve. They hold up well and reheat beautifully.
Do I have to use sesame seeds?
Nope! Totally optional. You can skip them or swap in poppy seeds or everything bagel seasoning.
Can I add toppings inside the sliders before baking?
Sure—sautéed mushrooms, chopped pickles, or caramelized onions work well. Just keep it light so they stay easy to handle.
Can I make these in a toaster oven or smaller oven?
Yes—just make sure the baking sheet fits and rotate halfway through baking for even browning.
What kind of buns are best?
Hawaiian-style slider rolls or potato buns are soft, slightly sweet, and hold up well. Just make sure you get the pull-apart style in a connected sheet for easy prep.
Are they kid-friendly?
Absolutely. The seasoning is mild, and they’re easy to eat with little hands. They also make great lunchbox leftovers!
Make-Ahead Magic: Cheeseburger Sliders for Meal Prep
These classic cheeseburger sliders aren’t just party-perfect—they’re also a total game-changer for meal prep. Bake a batch on Sunday, and you’ll have flavorful, ready-to-heat lunches or easy weeknight dinners on standby all week long.
Since they reheat beautifully in the microwave or air fryer, you can pack them in meal prep containers with a handful of baby carrots, some chips, or a small salad for a balanced, grab-and-go lunch. They’re great for adults, teens, and kids alike—plus, they freeze like a dream if you want to stock the freezer for future busy nights.
Make a full batch, keep half in the fridge and freeze the rest individually. Your future self will thank you.
Backyard BBQ Vibes, Anytime
These sliders instantly bring that backyard BBQ feeling to the table—no grill required! Whether you’re hosting a summer cookout or just craving those nostalgic char-grilled flavors, baking these cheeseburger sliders fills your kitchen with mouthwatering aromas and delivers all the juicy satisfaction of a burger hot off the grill. They’re perfect for when the weather’s not cooperating or you just want that backyard flavor without the hassle.
Final Thoughts
These Classic Cheeseburger Sliders are one of those easy wins that never fail—whether you’re making them for a casual weeknight dinner or loading them onto a party platter. They’re buttery, beefy, cheesy, and baked to golden perfection in just one pan. You can dress them up with your favorite toppings, freeze the extras, or bring them to a potluck and instantly become everyone’s favorite person.
Trust me, once you try these, they’ll earn a permanent spot in your rotation.
More Slider Recipes
Classic Cheeseburger Sliders
Ingredients
- 1 Tablespoon olive oil
- 1 medium onion diced
- 2 pounds lean ground beef
- 1 Tablespoon Worcestershire sauce
- 3 Tablespoons mayonnaise
- 1 teaspoon seasoned salt
- 1 teaspoon salt
- 1 teaspoon pepper
- 1 teaspoon garlic powder
- 2 cups cheddar cheese shredded
- 24 slider buns
- 2 Tablespoons salted butter melted
- 1 Tablespoon sesame seeds
Instructions
- Preheat the oven to 350 degrees. Spray a rimmed baking sheet with non-stick spray.
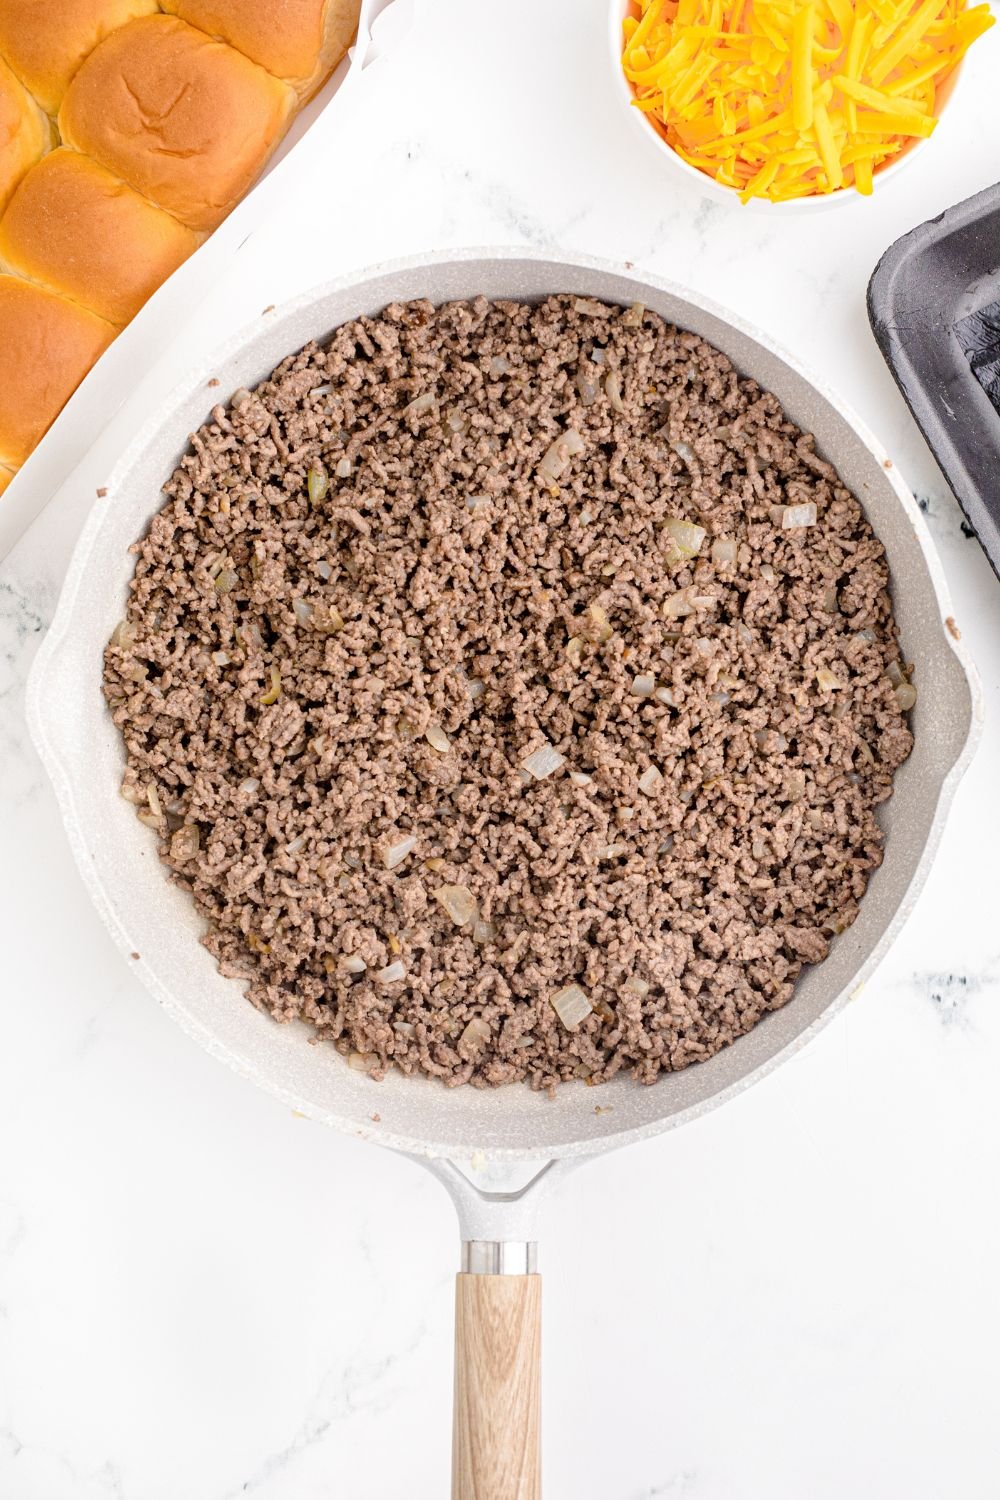
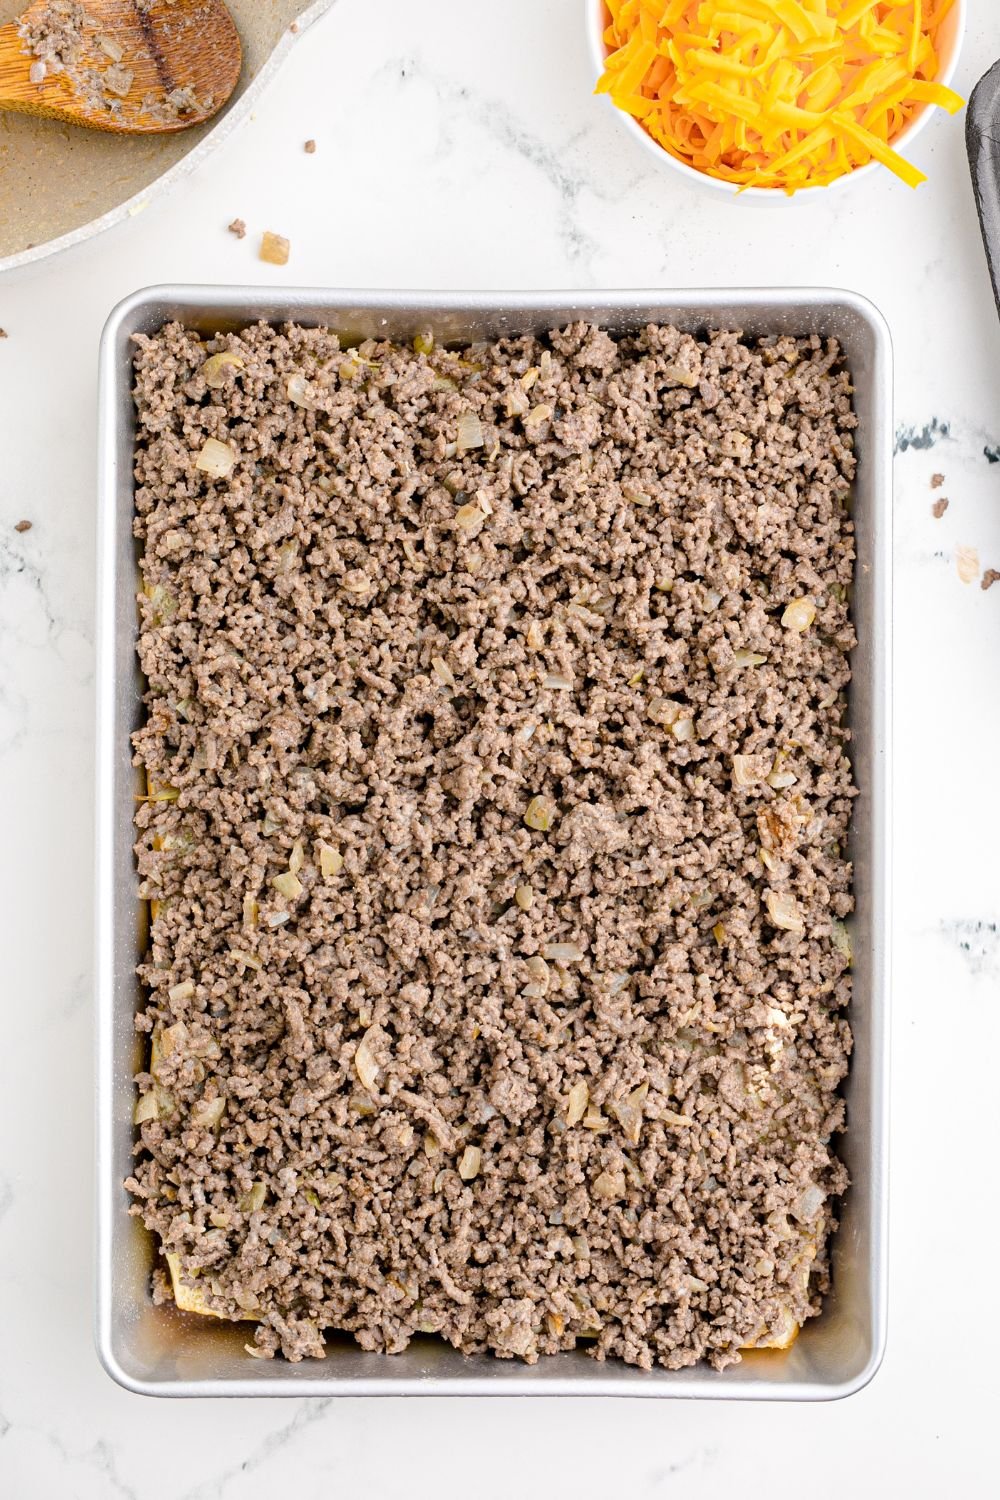
- Place the olive oil in a large skillet. Add the onion, and stir while frying this, until the onion is softened. Add the ground beef and scramble fry this until there is no pink left. Drain off as much fat as you can. Stir in the worcestershire sauce, mayonnaise, seasoned salt, salt, pepper, and garlic powder. Remove this from the heat.
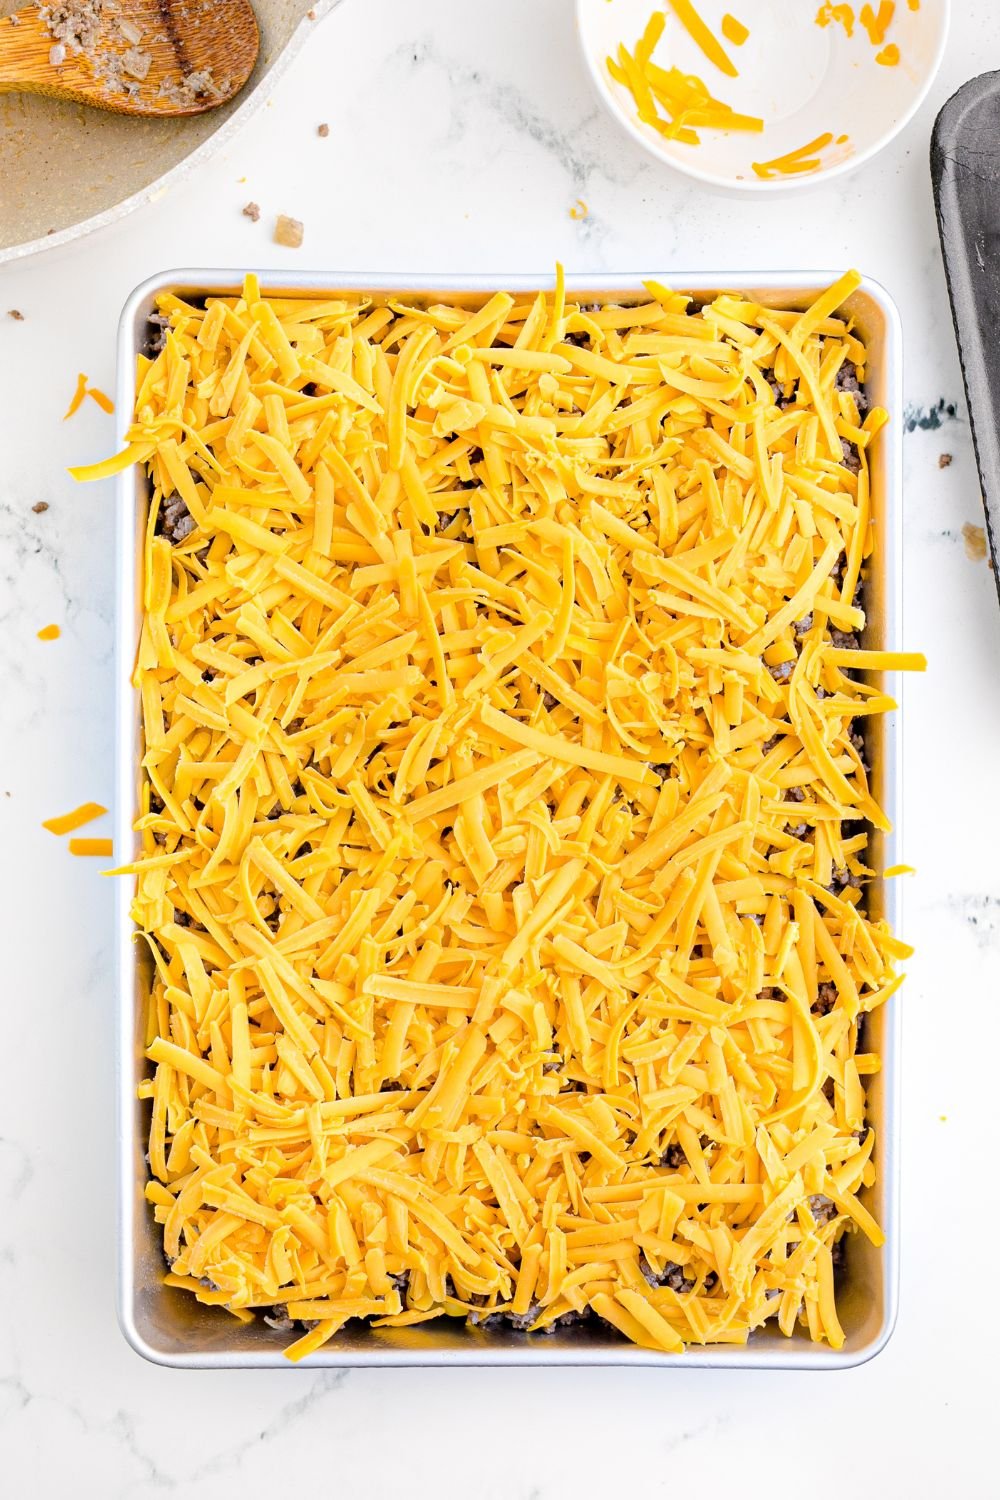
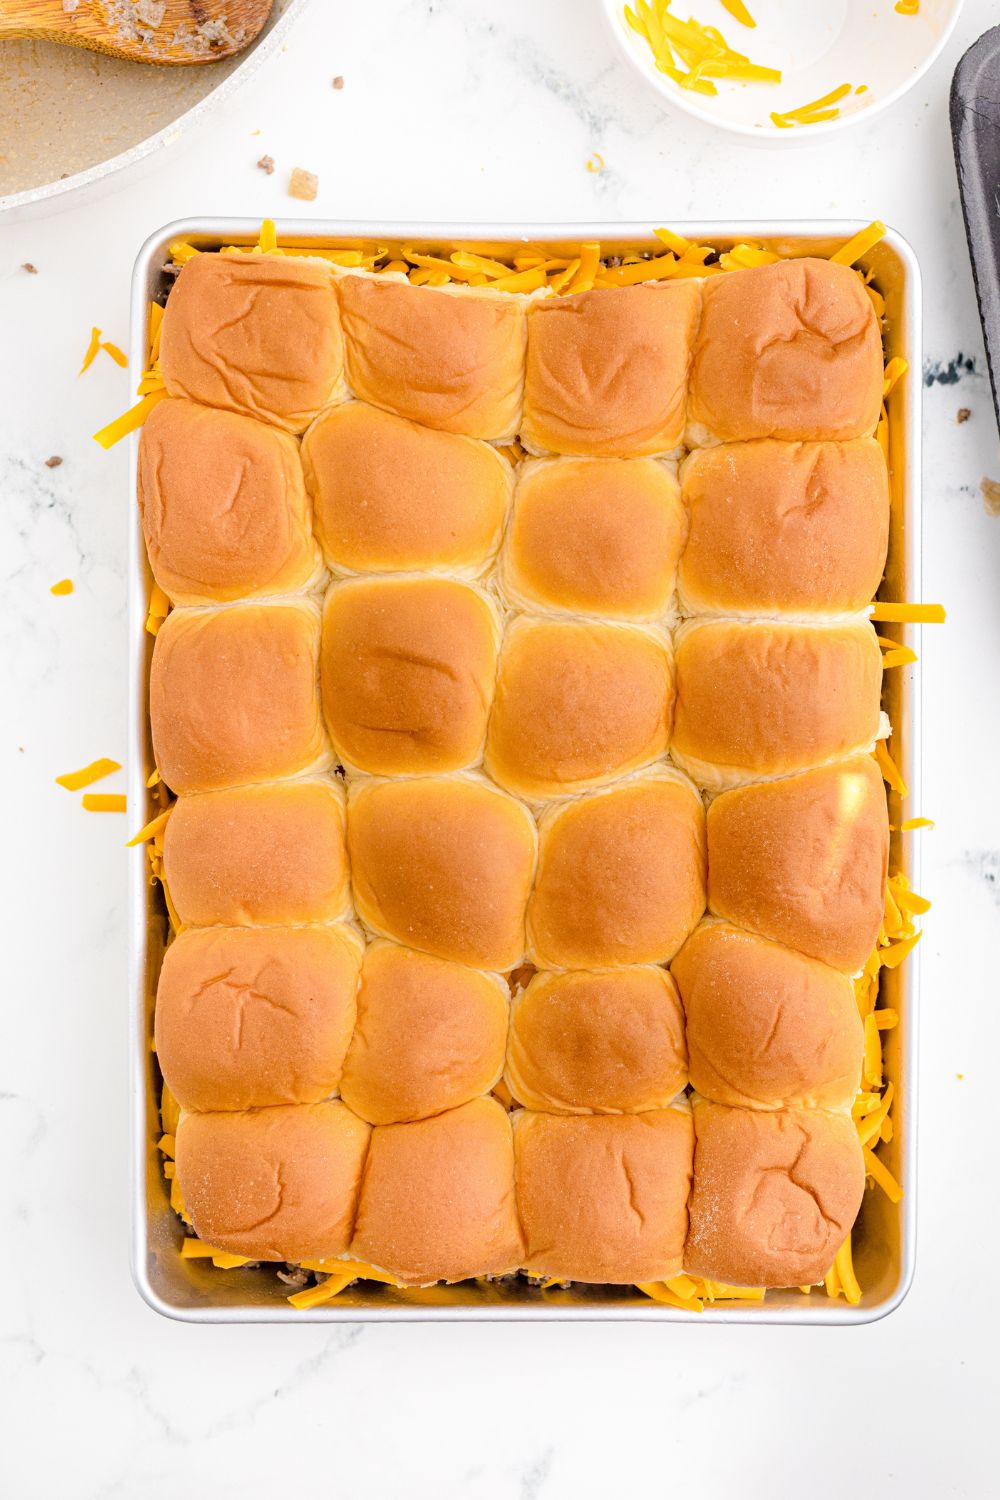
- Cut the whole block of slider rolls in half and place the bottom halves into the baking dish. Evenly cover the bottom layer of slider buns with all of the ground beef. Sprinkle the 2 cups of grated cheese over the beef. Add the top halves of the buns.
- Brush the tops of the buns with the melted butter. Sprinkle on the sesame seeds.
- Bake for 10-12 minutes or until the cheese is melted and the tops are golden brown.
Did you make this recipe?
Make sure to follow on Pinterest for more recipes!

Leave A Reply!